Remote Support Connection Guide
Sometimes, some technical issues may require direct assistance and a Neat Customer Care agent may request to schedule a remote session with you. In order to conduct direct remote support, you will need to have access to the computer with Neat installed, at the time of the scheduled session for security permissions to be granted. Once an appointment is scheduled and confirmed, the agent will send a remote session ID, at the time of the scheduled session, that must be entered into the remote support application to initialize the session.The session ID that is sent is only valid for a two-hour window and only for that specific session. Once a session is disconnected, the agent will not be able to connect to your computer again without following the connection process below and without expressed authorization from the customer.
Starting a Connection
- To establish a connection to a scheduled remote session, please browse to
https://support.neat.com/customerservice/remote-assistance.
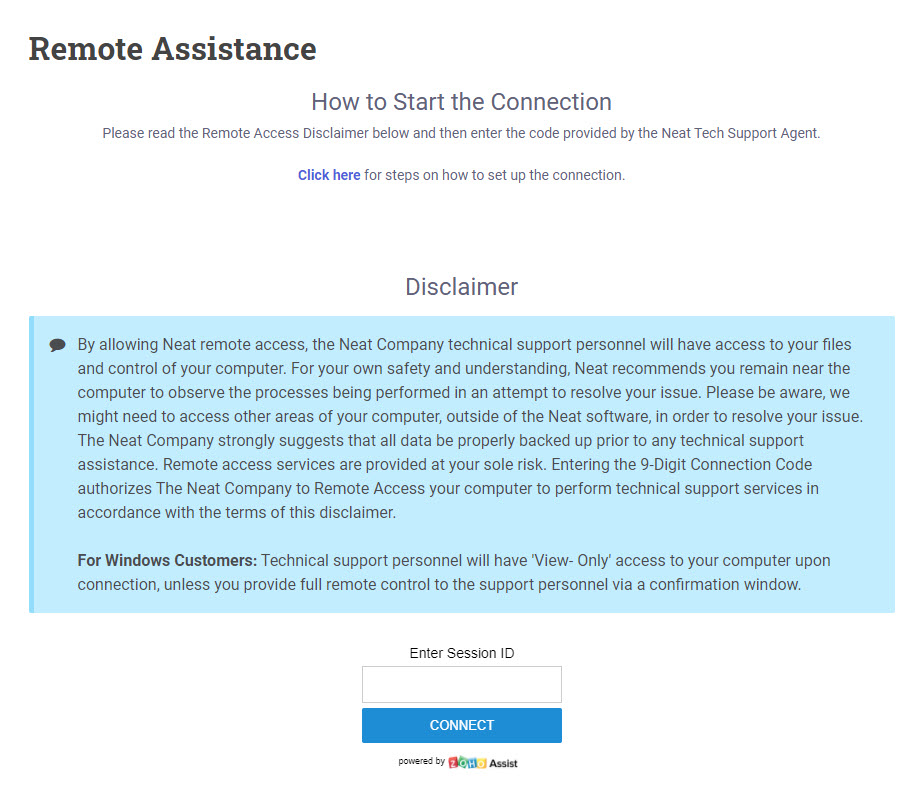
- Read the remote disclaimer . By entering the session ID, you agree to Neat's remote disclaimer.
- Enter the session ID and click Connect.
Windows Steps
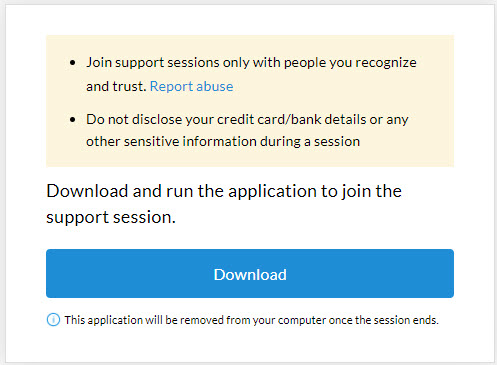
- After you click connect, the ZoHo application will download.If the application doesn't download automatically, please choose Download.
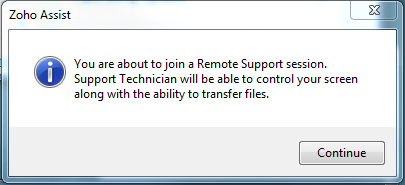
- After your session ID is verified and ZoHo is downloaded and configured, a window will open at the bottom right hand corner of your screen. Choose Continue.
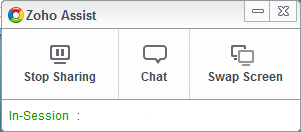
- You will then be connected to a Customer Care agent. You will see a window at the bottom right hand corner of your screen that will allow you to open a chat with the agent or stop sharing if you choose to.
Mac Steps
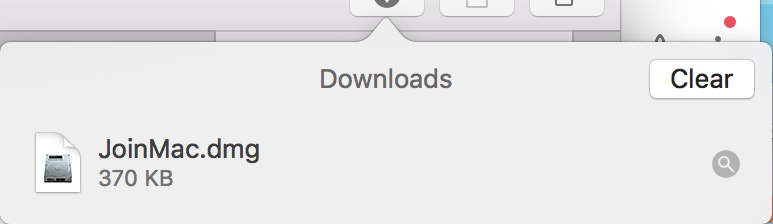
- After you click connect, the JoinMac application will download. If the application doesn't download automatically, please choose Download.
- Locate your downloads folder and double-click on the JoinMac application.
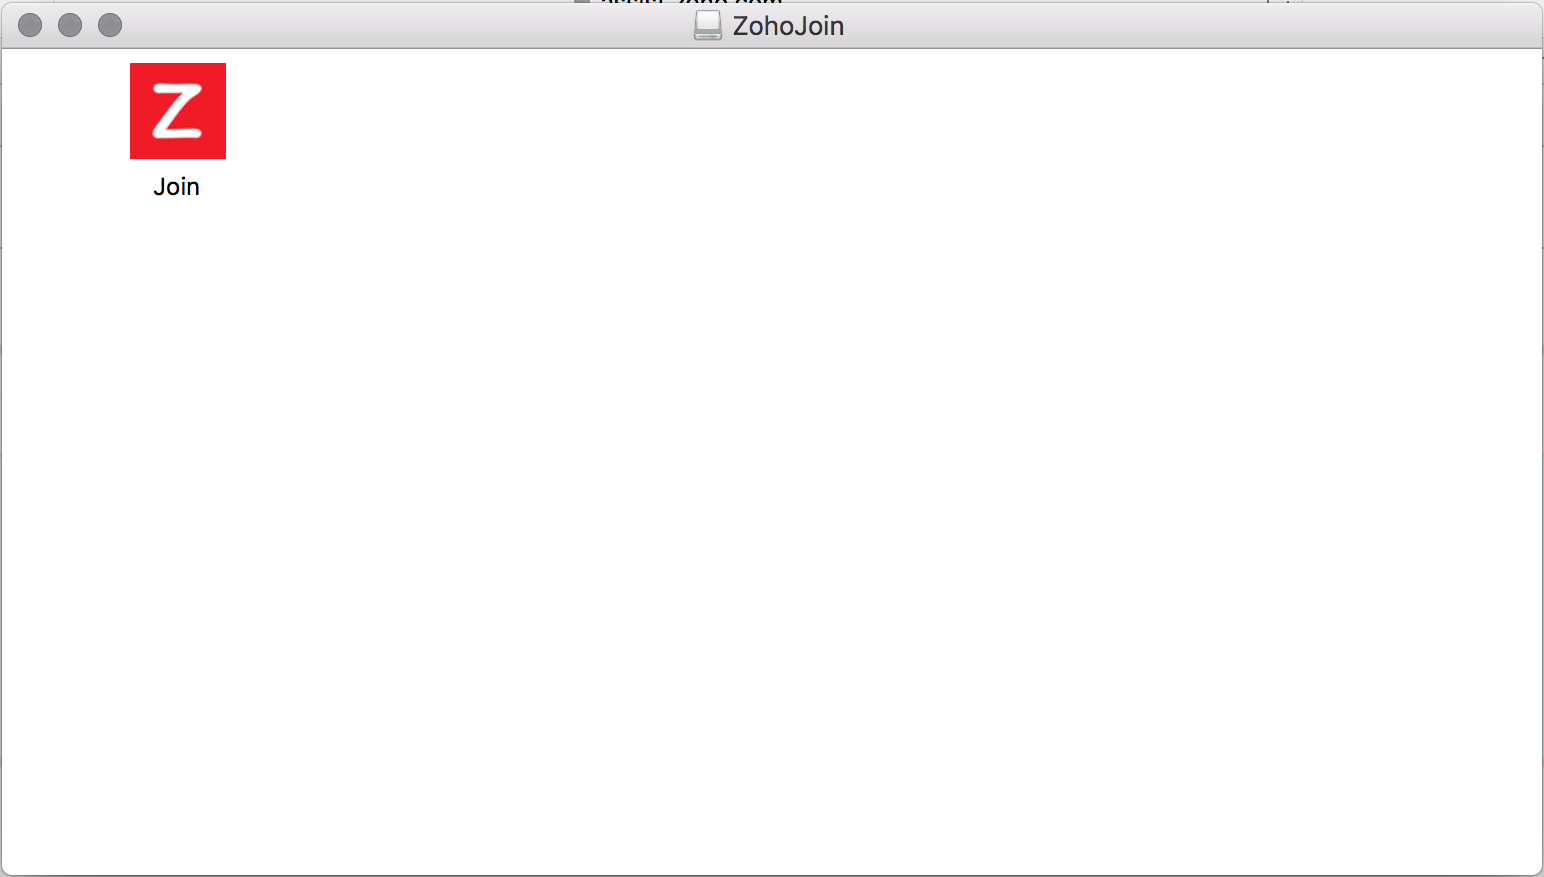
- A new window will open and and you will see a Join icon. Double-click on the Join icon.
- After your session ID is verified and ZoHo is downloaded and configured, a window will open at the bottom right hand corner of your screen. Choose Join.
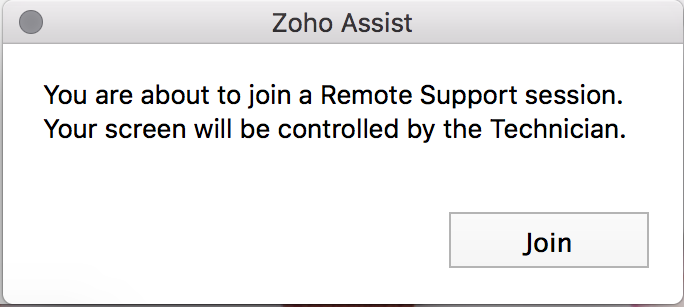
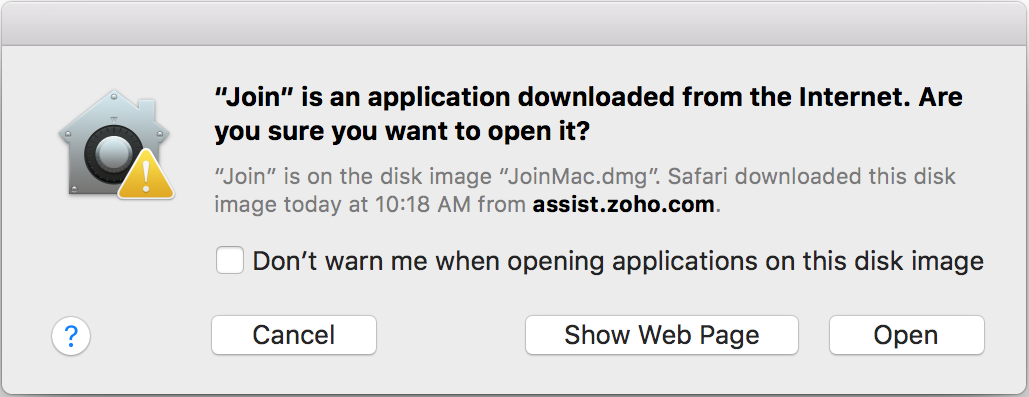
- You may be prompted to confirm you want to open the application, by clicking Open.
- You will then be connected to a Customer Care agent. You will see a window at the bottom right hand corner of your screen that will allow you to open a chat with the agent or stop sharing if you choose to.
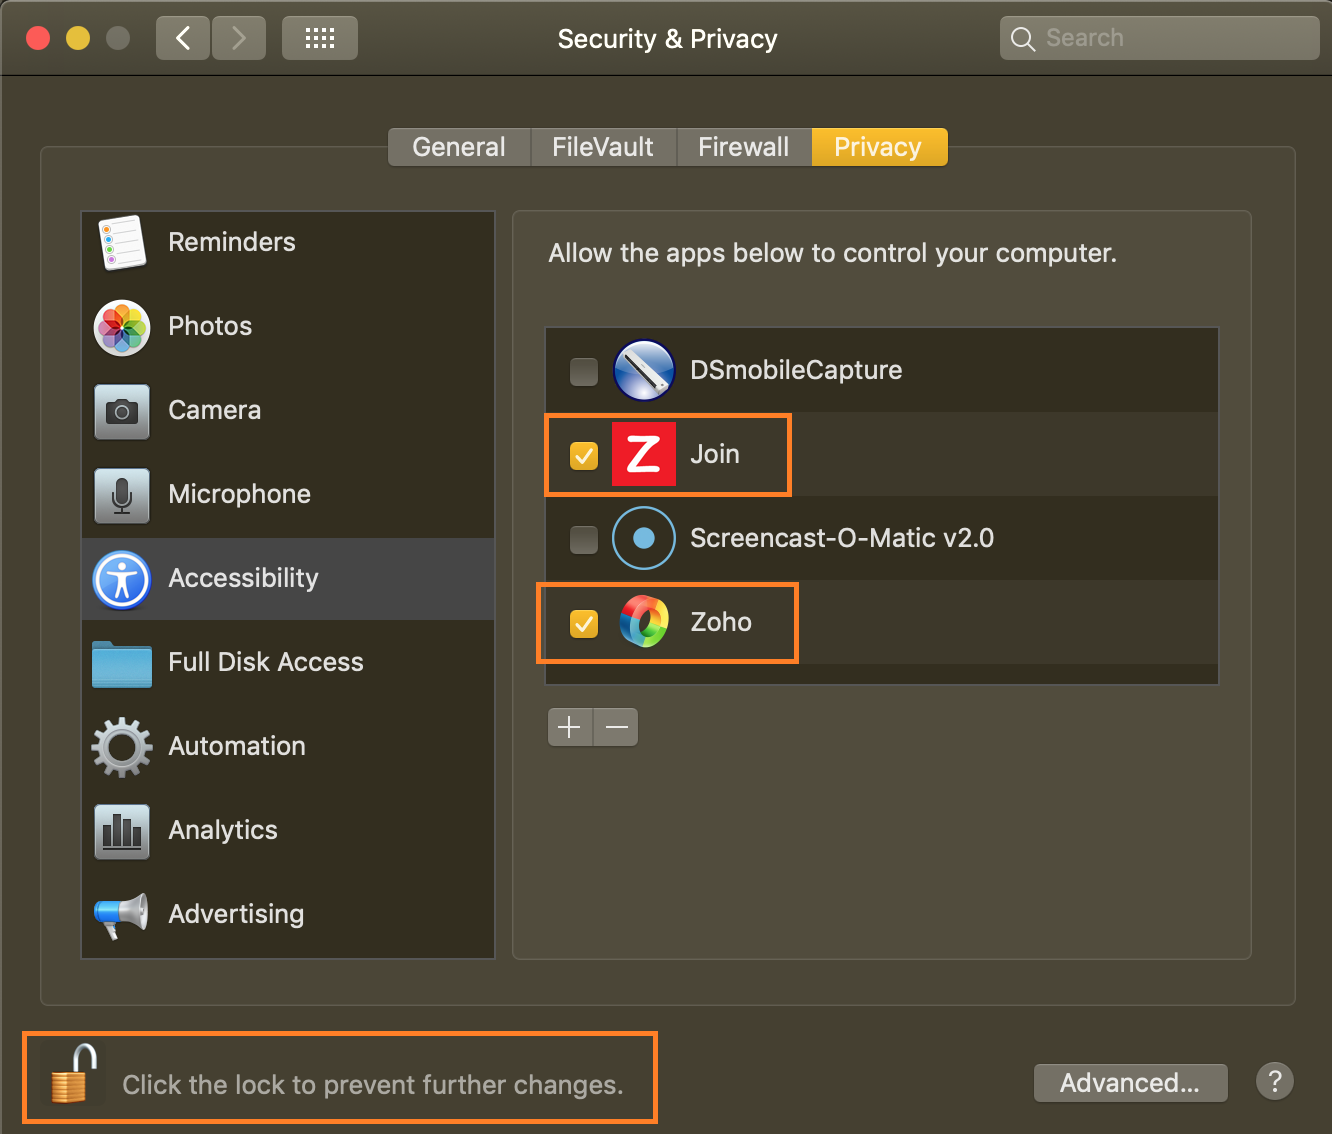
Mac Mojave
In Mac Mojave OS, you may have to complete an extra step in order to set up the remote connection.
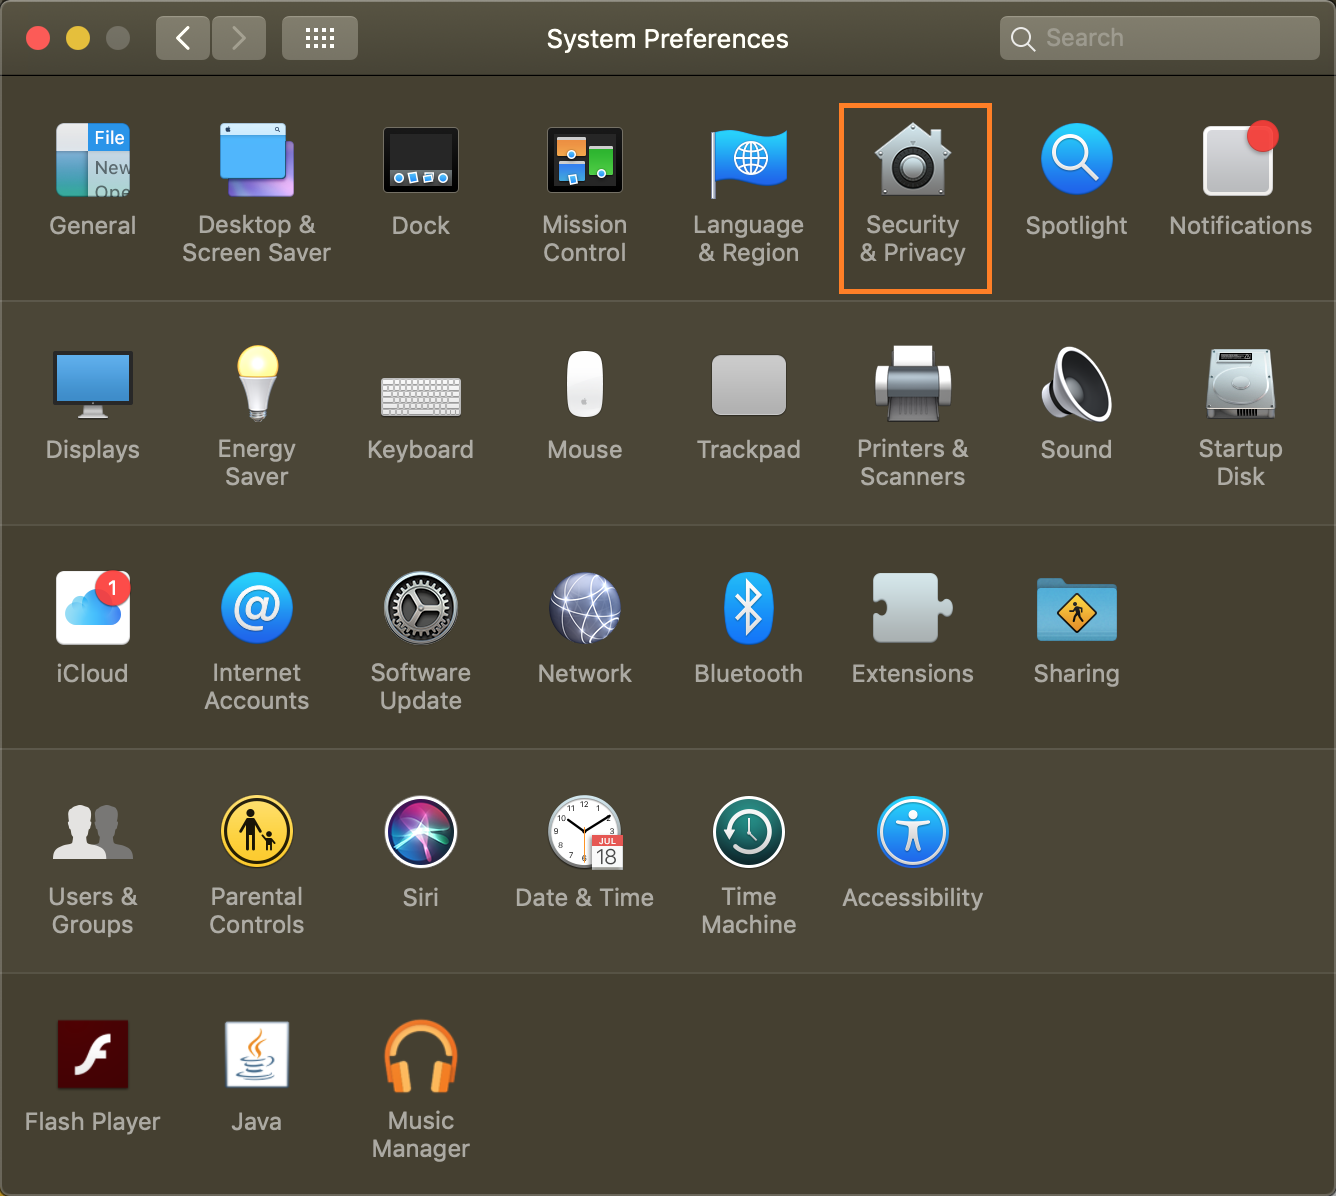
- Open up your system preferences.
- Select Security & Privacy.
- Then select the Privacy tab, and Accessibility from the options to the left.
- Once selected, click the lock at the bottom left corner of the window and enter your Mac administrators password to make changes to the settings.
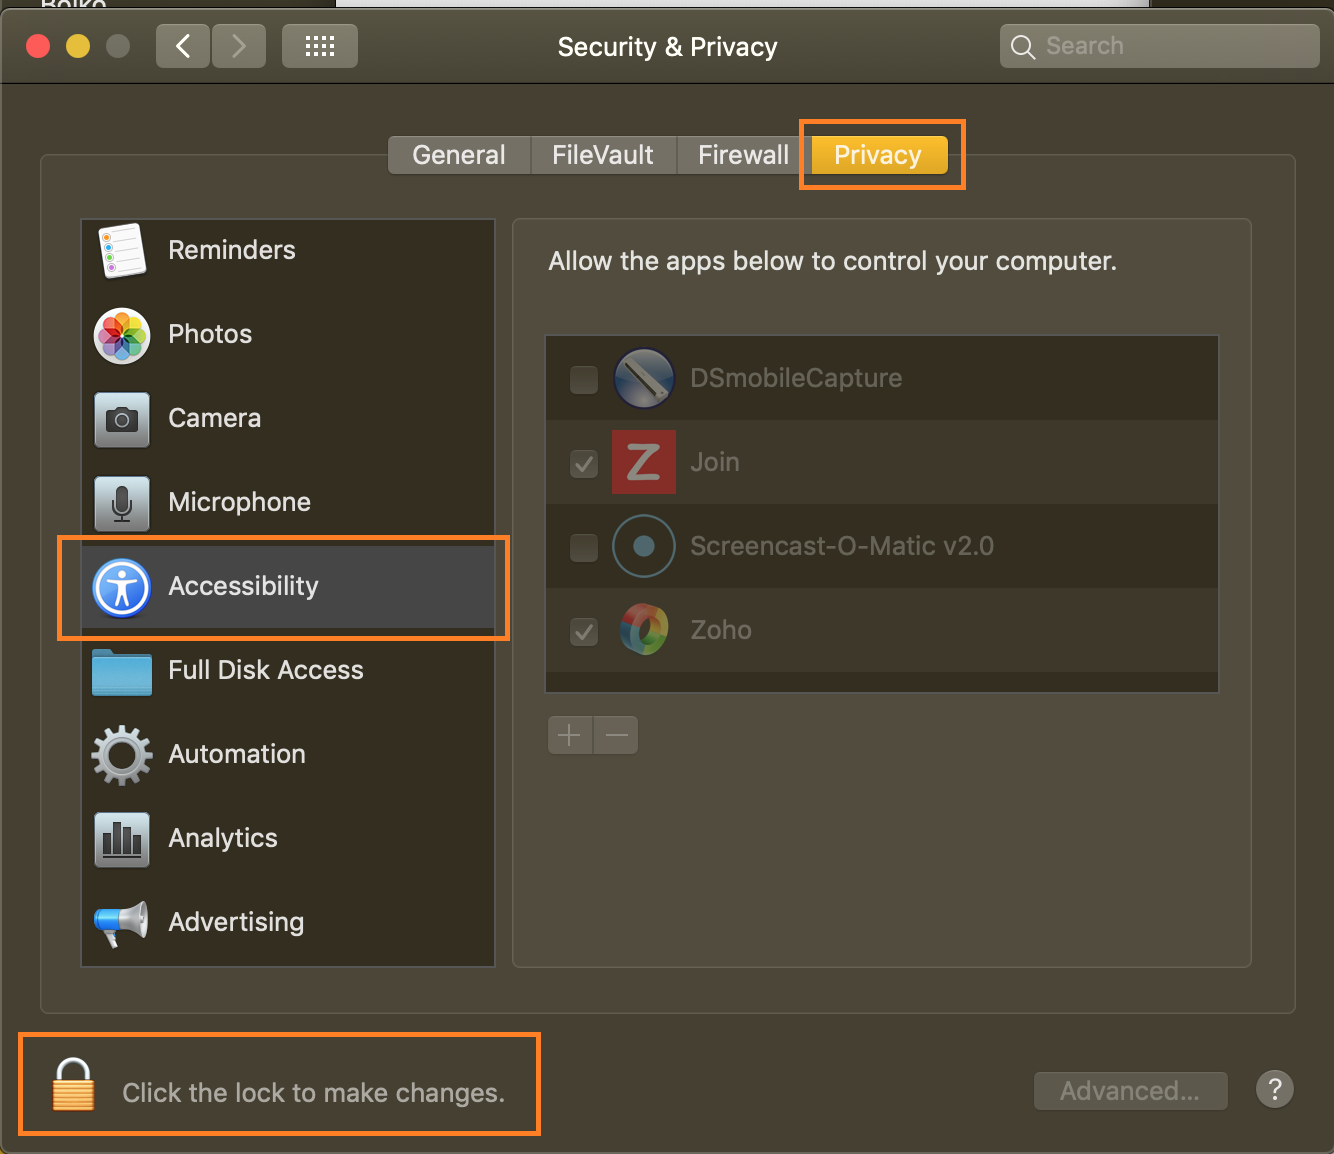
- Put a check mark next to the Join application and Zoho application.
- Click the lock at the bottom left corner of the window to save your changes.