Neat Smart Organization System - Export to Quicken
Please Note: Neat Web App now has ALL of the desktop features, and so much more! You can continue to use this desktop application, however, all new features, improvements, and updates will occur in our Neat web application. Click here to learn more!
Learn how to export items to Quicken using the Neat Smart Organization System.
Quicken has deprecated QIF import for versions 2005 and later. You can learn more about Quicken and QIF files here: http://www.quicken.com/support/qif-import-frequently-asked-questions
Before exporting to a Quicken account for the very first time, you will need to create and import a QIF file of your Quicken accounts. Once that is completed you can start exporting data from Neat to Quicken with the steps below.
How to Export to Quicken
- Open your Neat Smart Organization System (orange logo)
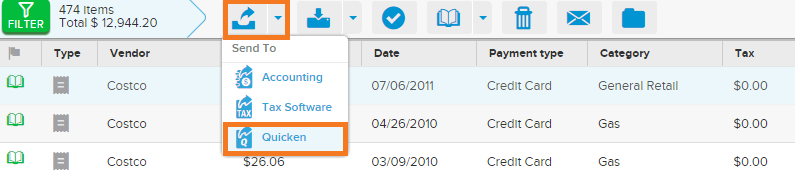
- Select one or more receipts in a folder, click the Send To button and then choose Quicken.
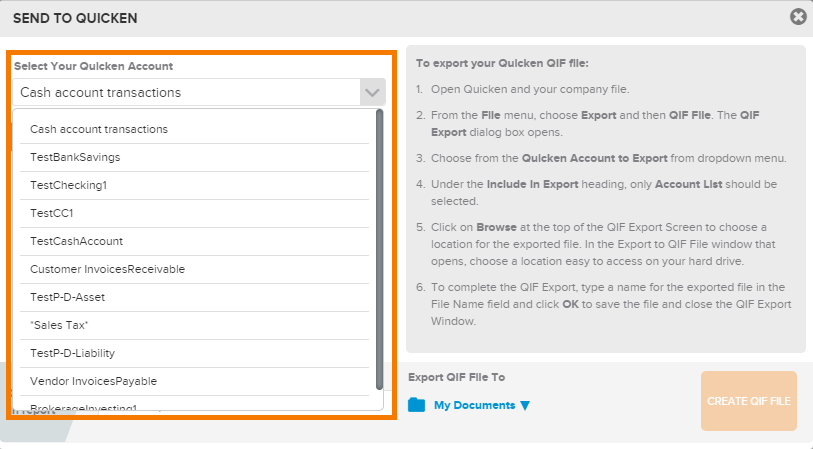
- Click the Accounts drop down and select which Quicken account you want to export your data into.
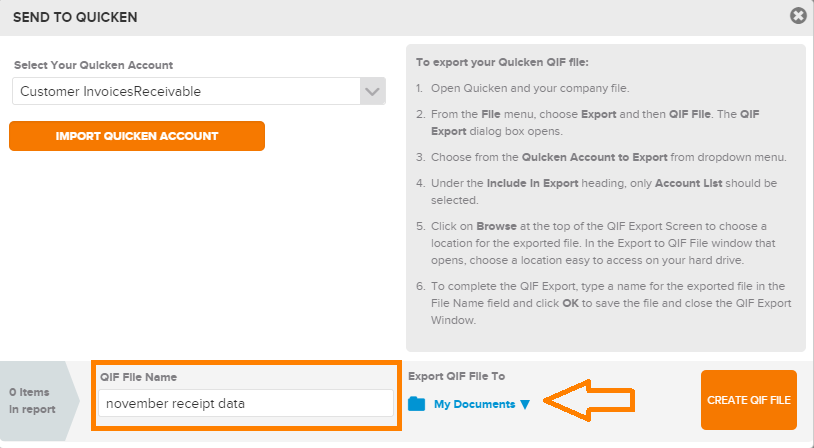
- Type in a name for the item(s) you are exporting, select a location on your computer's hard drive to save the item(s) and then click Create QIF File.
- Open your Quicken application
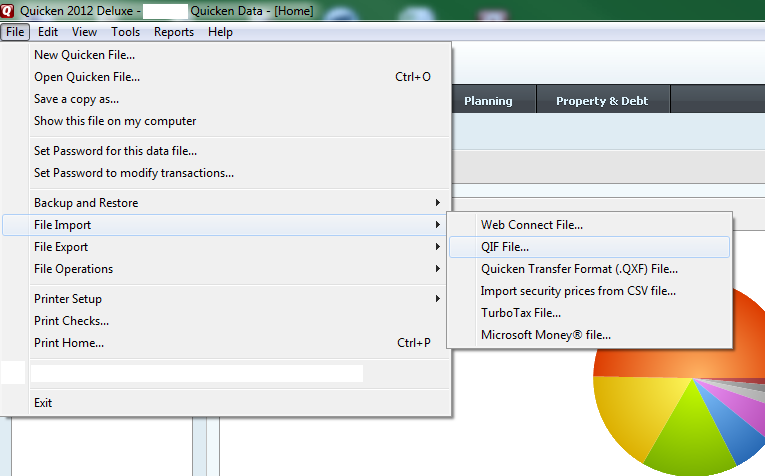
- In the menu bar at the top, go to File choose Import and then Import QIF to import the exported file from Neat.
- At the top of the QIF Import window, click Browse, then select the file exported from Neat and click Open.
Please Note: Make sure <All Accounts> is selected in the Quicken account to import into drop down menu. Under the Include in import section, make sure that only Transactions is checked. All of the other check boxes should be empty. Then click Import.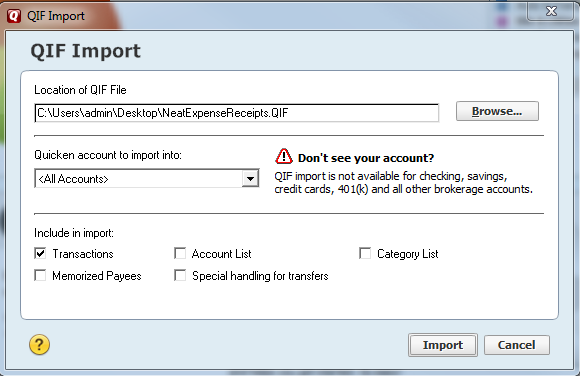
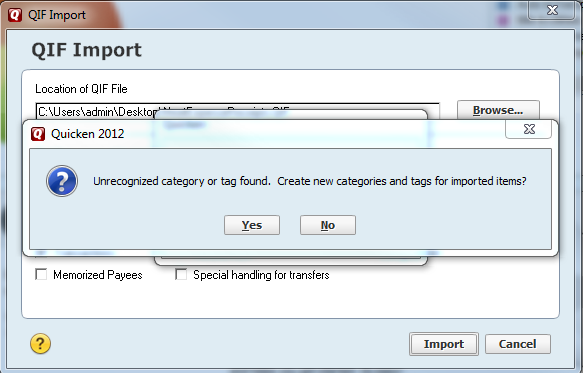
- A confirmation dialogue box will appear. If categories are found that are not currently in Quicken, you may see the following window. If you wish to add the new categories, select Yes. If you select No, the items
will still be imported.
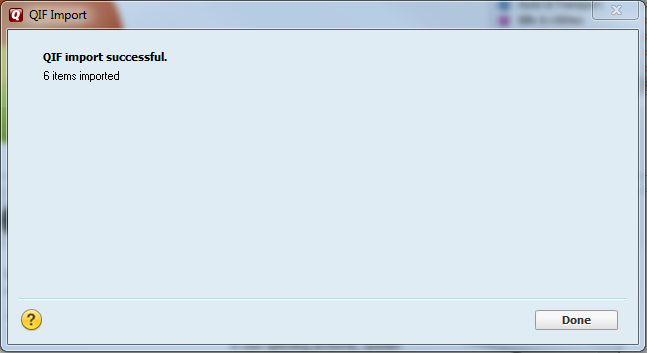
- You should then get a message that your item(s) were imported successfully.