Raven Original and Pro Scanners
The Raven Pro scanner is a TWAIN compliant scanner that integrates with the Neat Desktop Application (NDA).
Attention Raven Users:
In 2023, Raven announced that Raven Cloud will no longer be supported after December 31, 2023.
This would have meant the option to scan directly to Neat from your Raven scanner would also cease functioning on or soon after December 31, 2023. However, when last tested in May, 2026, Raven's cloud is still accessible. Therefore, over two years later, it may still be possible to scan directly to Neat. There is no telling how long it will continue to function. Should it cease, you can continue to scan to your @neatcloud.com email and/or scan and upload to Neat from the Neat Desktop Application as that functionality is not dependent on the Raven Cloud.
Please Note:
There are several options for getting scanned items from the Raven scanner into Neat:- This scanner is supported in both Windows and Mac environments.
- You can rotate images in the Neat Desktop Application, but you can save time when scanning from the Raven Pro scanner by loading pages upside down.
- Scan directly from your Raven Original and Raven Pro Scanner Touchscreen to Neat
- Scan to your @neatcloud.com email
- Scan via NDA and then upload to Neat
Scan directly from your Raven Original and Raven Pro Scanner Touchscreen to Neat
Note: If you previously set up a connection to Neat and it has stopped working, try disconnecting and then reconnecting the connection again.
- Visit raven.com/account/connections to set up your Neat connection.
- Log in to your Raven Cloud™ account.
- If the link above does not take you to Connections:
Click on your name in the upper right and select My Account. Then select Connections from the options across the top. - Locate Neat within Connections and press Set Up.
- Log in using your Neat email and password.
- Select Authorize to give Raven Scanner access to scan to Neat.
- You will now be directed to choose a destination folder.
- Once you have chosen your folder, press Select.
- To complete set up, click Continue to confirm the folder of your choice.
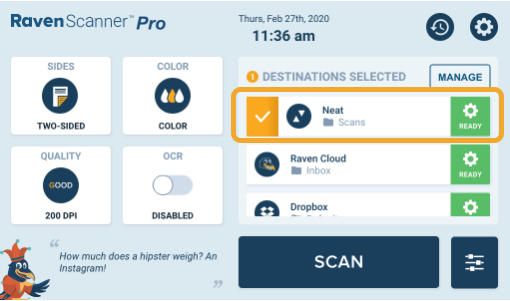
- You will now see Neat as an available destination on your Raven Original or Pro Scanner display, as shown below.
- Tap Neat to choose Neat as a destination, then you are ready to scan!
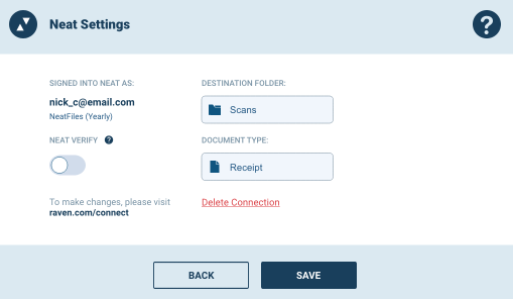
- Neat settings can be changed by tapping the settings gear to the right of the Neat destination (in green). Within settings you can change the Neat folder, document type and enable NeatVerify for eligible accounts.
Scanning to your @neatcloud.com email
- Because the Raven scanner has a scan to email option, it can be set to send scanned items directly to Neat cloud using the your @neatcloud.com email address.
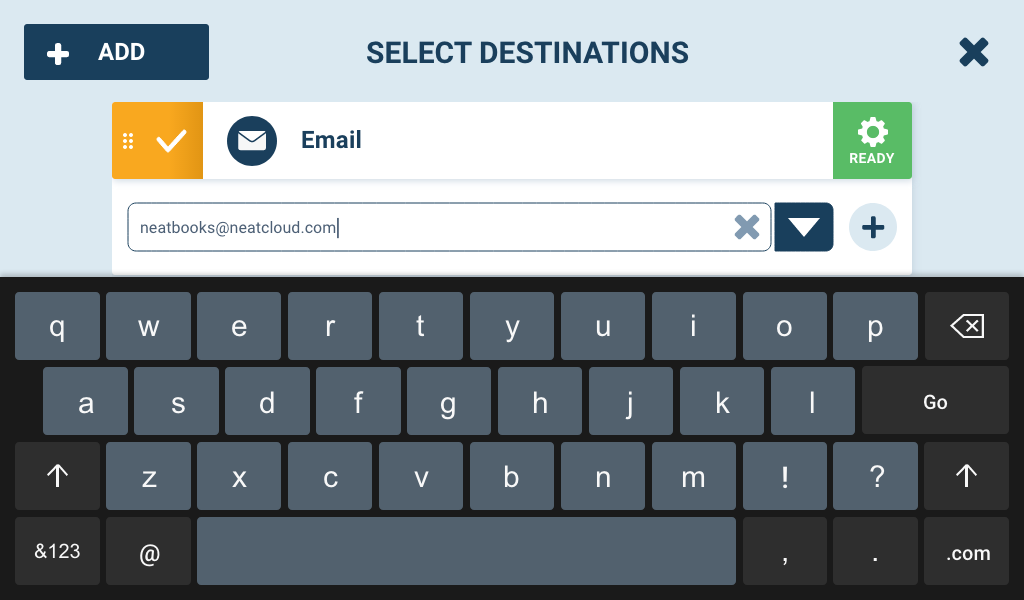
- Press Destination on the Raven touchscreen (on the right side).
- Press Email.
- Enter the recipient email address and press Go.
- Place the items to be scanned in the feeder and press Scan.
- Images can be edited before emailing by tapping them.
- Press Send to Destination.
Connecting the Raven Pro scanner to the Neat Desktop Application
- Do not connect the Raven Pro scanner until the scan drivers are installed.
- If you haven't already, install the TWAIN driver for the Raven Pro scanner from the Raven Downloads page (near the bottom of the page). Alternatively, you can use these Raven links for immediate download:
- Power on the Raven scanner.
- Open the Neat Desktop Application.
- Use the settings options and Scan button within the Neat Desktop Application to scan your items.
For more information please see the Neat Desktop Application FAQ