Delete an Item using the Neat Smart Organization System
Please Note: Neat Web App now has ALL of the desktop features, and so much more! You can continue to use this desktop application, however, all new features, improvements, and updates will occur in our Neat web application. Click here to learn more!
Learn how to delete an item in the Neat Cloud using the Neat Smart Organization System. There are several quick and easy ways to remove an item from your Neat Cloud. Follow the steps below to delete an item or permanently remove an item from your Neat
database.
Delete an Item
Open your Neat Smart Organization System software (orange logo)
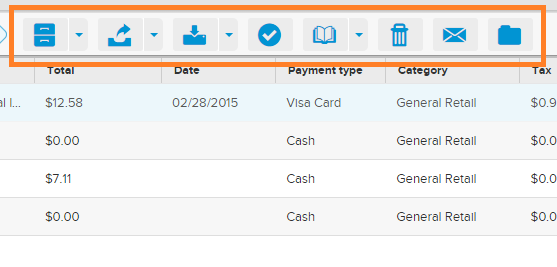
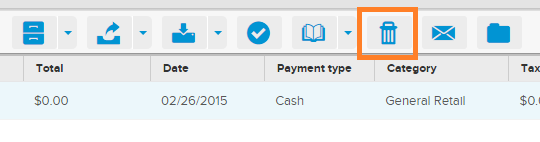
Select the item that you wish to delete. A menu will appear above the item.
On the menu, click the Trash icon.
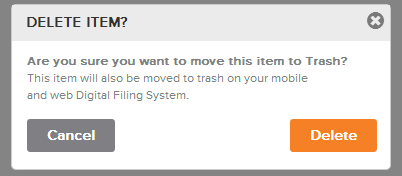
A message box will appear to confirm that you want to delete the item. Click Delete.
Please Note: The item will not be fully removed from your Neat database, rather it will be moved to your Trash Folder in the folder navigation pane. To permanently remove the item from your database, please see steps below.
Delete Multiple Items
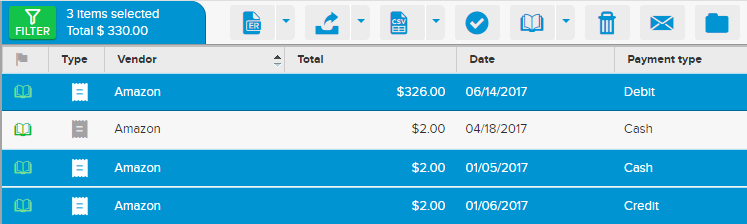
Hold the Ctrl key on your keyboard (Command key on Mac) and select all the items you want to delete. If you want to delete all the files in a folder, then click Crtl + 'A' on your keyboard (Command + 'A' on a Mac), and all the files in that folder will be selected.
In the menu, click the Trash icon.
A message box will appear to confirm that you want to delete the item. Click Delete.
Please Note: The item will not be fully removed from your Neat database, rather it will be moved to your Trash Folder in the folder navigation pane. To permanently remove the item from your database, please see steps below.
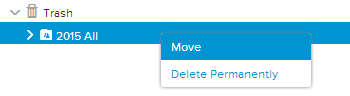
Restore a Deleted Item
If you would like to restore a deleted item, go to the Trash folder, right-click on the item, and select Move.
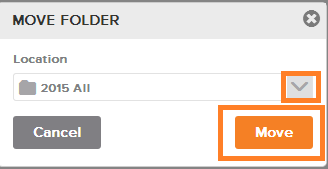
Click the small down arrow to select the folder you would like to move the deleted item to, then click Move.
Please Note: Alternatively, you can drag-and-drop the item(s) from the Trash folder to the desired folder.
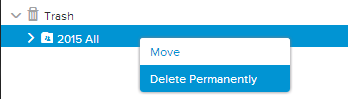
Permanently Delete an Item
If you want to permanently delete an item, go to the Trash folder and right-click on the item. Select Delete Permanently from the drop-down menu.
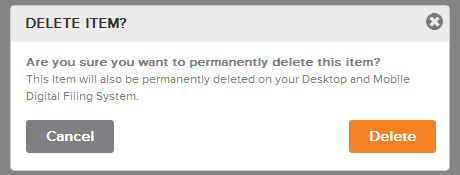
A message box will appear to confirm that you want to permanently delete the item. Click Delete. The item will be permanently removed from your Neat database.