Windows - How to Create a Screenshot
Sometimes, a Neat Support Agent may need a screenshot of the issue you are experiencing in order to clearly understand your issue and identify a solution. Follow one of the methods below to learn how to take a screenshot on a Windows computer.
Method 1 - Printscreen
- Press Ctrl + PrintScrn (button next to F12 on a Windows keyboard)
- Open up MS Paint. (Search for "paint" in the Windows search bar)
- In the Edit menu, select Paste.

- Once pasted, click File in the upper left and Save your screenshot as a JPG or PNG file on your computer. Then attach the image in a reply to your case.
Method 2 - Windows Snipping Tool
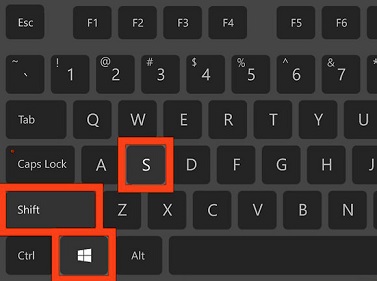
- On your keyboard, hold the Windows key + Shift + S key simultaneously.
- Your screen will turn gray, and the Snipping Tool menu will appear in the top center of your screen. From left to right, your options are: Rectangular, Freeform, Window, and Fullscreen. Fullscreen is recommended to ensure you are capturing everything needed for troubleshooting.
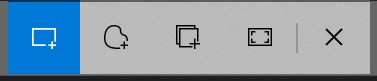
- Simply click the Fullscreen option (directly next to the X), and your snip will be saved.
- A thumbnail preview will appear with the message: Snip saved to the clipboard. Select here to markup and share the image. Click the black area at the bottom to open Snip & Sketch.
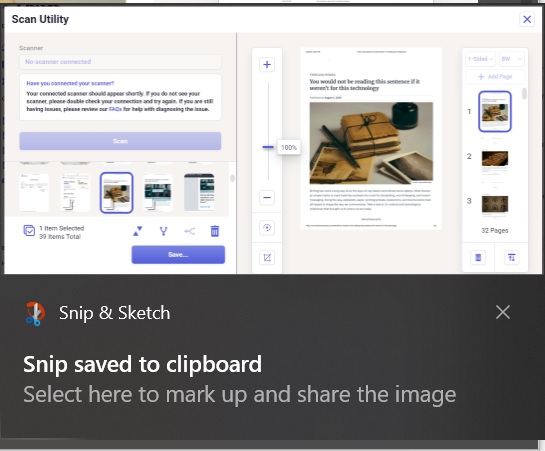
- Click the Save button, resembling a floppy disk, (or press Ctrl+S) to save the screenshot as a JPG or PNG file on your computer. Then attach the image in a reply to your case.
