How to Scan to Neat via ScanSnap Home
All ScanSnap devices must use the ScanSnap Home software to push data into Neat.To scan to Neat with a ScanSnap scanner, you need to install and configure the ScanSnap Home software. You will need to use both the ScanSnap Home software and the Neat application for scanning. Follow the steps below to set up ScanSnap Home and your ScanSnap scanner to scan to Neat.
If you are using the ScanSnap IX1500 or iX1600, you can also scan to Neat wirelessly via Wi-Fi by following the steps at the bottom of this article.
Requirements
- You will need to install the Neat Scan Utility which has a built-in option to configure your Neat connection with ScanSnap Home.
- For the connection with the Neat Scan Utility to work, you must have the latest version of ScanSnap Home installed. You can check and update your ScanSnap Home software by clicking Help > Online update (check for updates).
How to Configure Connection Between ScanSnap Home and Neat Scan Utility
Please Note: These steps use the ScanSnap iX500. They assume that the scanner is already set up, connected to your computer via USB, powered on and that the Neat Scan Utility and ScanSnap Home are both already installed and on the latest version.
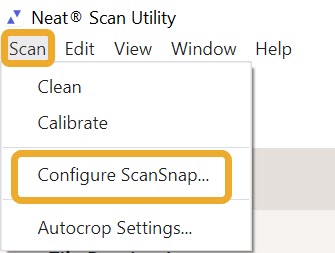
- In the Neat Scan Utility, click Scan and then select Configure ScanSnap...
- In the popup window, click CONFIGURE SCANSNAP to create a scan option in ScanSnap Home for Neat.
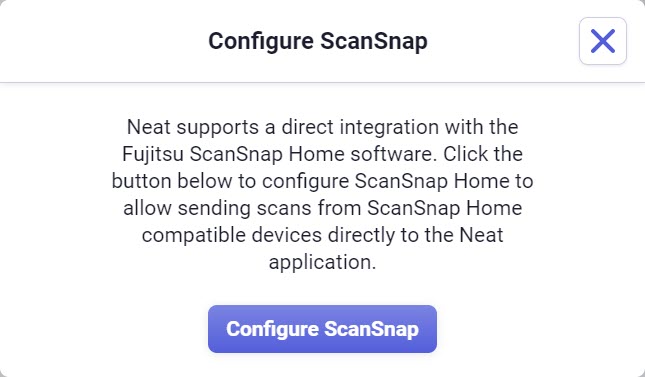
- Click Yes to continue. You will get the following confirmation that the profile was set up.

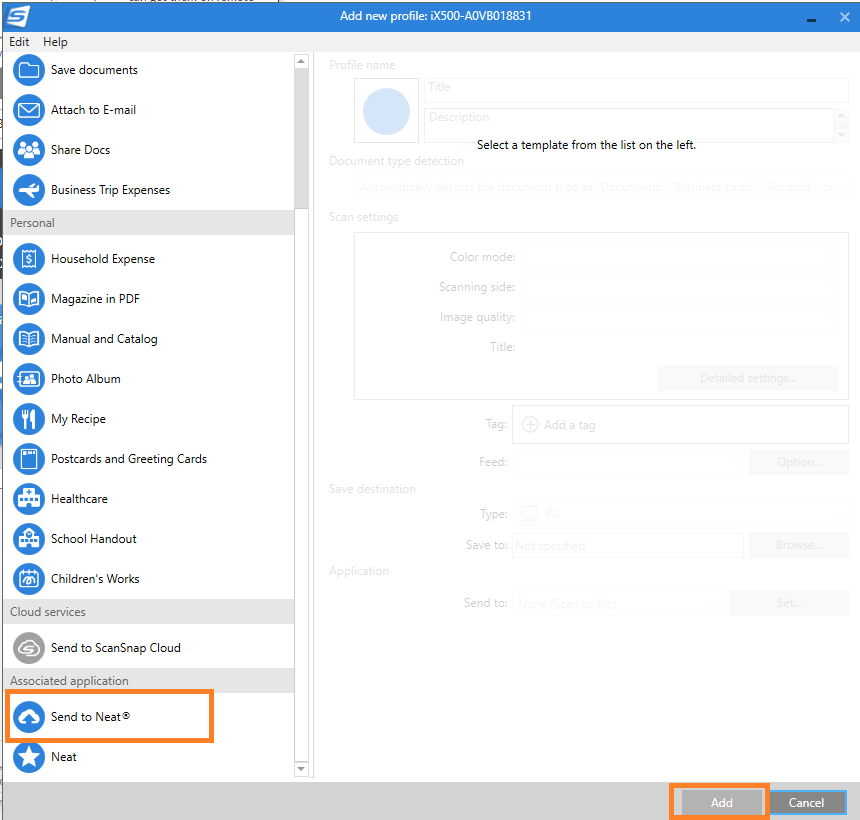
- Go to ScanSnap Home, and click the Add Profiles button in the upper right to complete setting up the Neat profile.
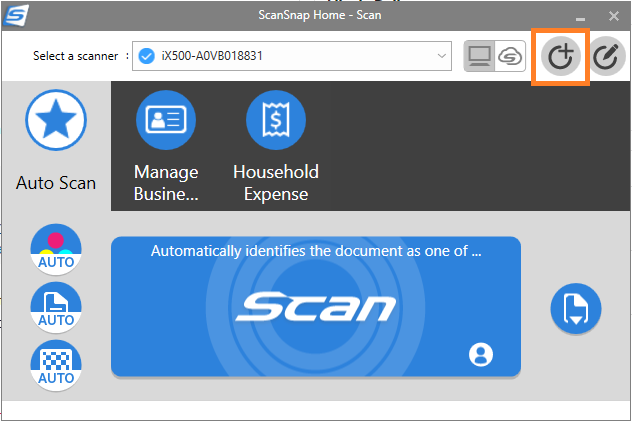
- Scroll to the bottom of the list to select Send to Neat and then click Add to finish setting up the Neat scan profile.
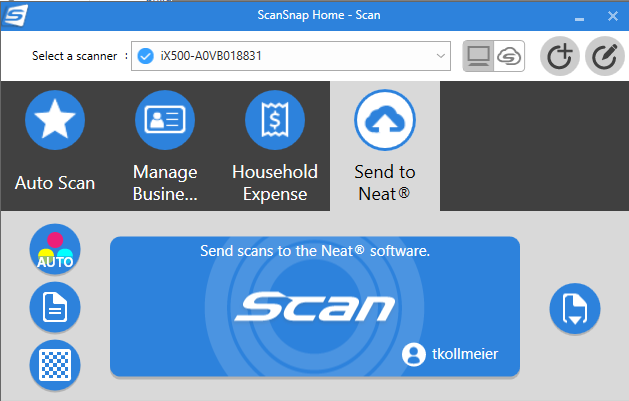
- Now you're ready to scan. Be sure to select the Send to Neat profile. Load your documents in the scanner and click Scan in ScanSnap Home.
- Once scanned, your items will appear in the Neat Scan Utility and you will have the option to edit (rotate, crop, delete) your item and send it to Neat or save it on your computer.
For more details about the Neat Scan Utility please click here.
Scanning Wirelessly with the ScanSnap IX1500
Follow these steps to configure your ScanSnap IX1500 to scan via Wi-Fi to the Neat Scan Utility. The requirements listed above for the Neat Scan Utility and ScanSnap Home also apply. In addition, you will also need to configure Wi-Fi access for your Scansnap IX1500.
- Complete the steps above to connect ScanSnap Home and Neat Scan Utility with your scanner connected via USB.
- Then disconnect the USB cable from your scanner.
- Load your documents into the scanner.
- Select Send to Neat on the touchscreen.
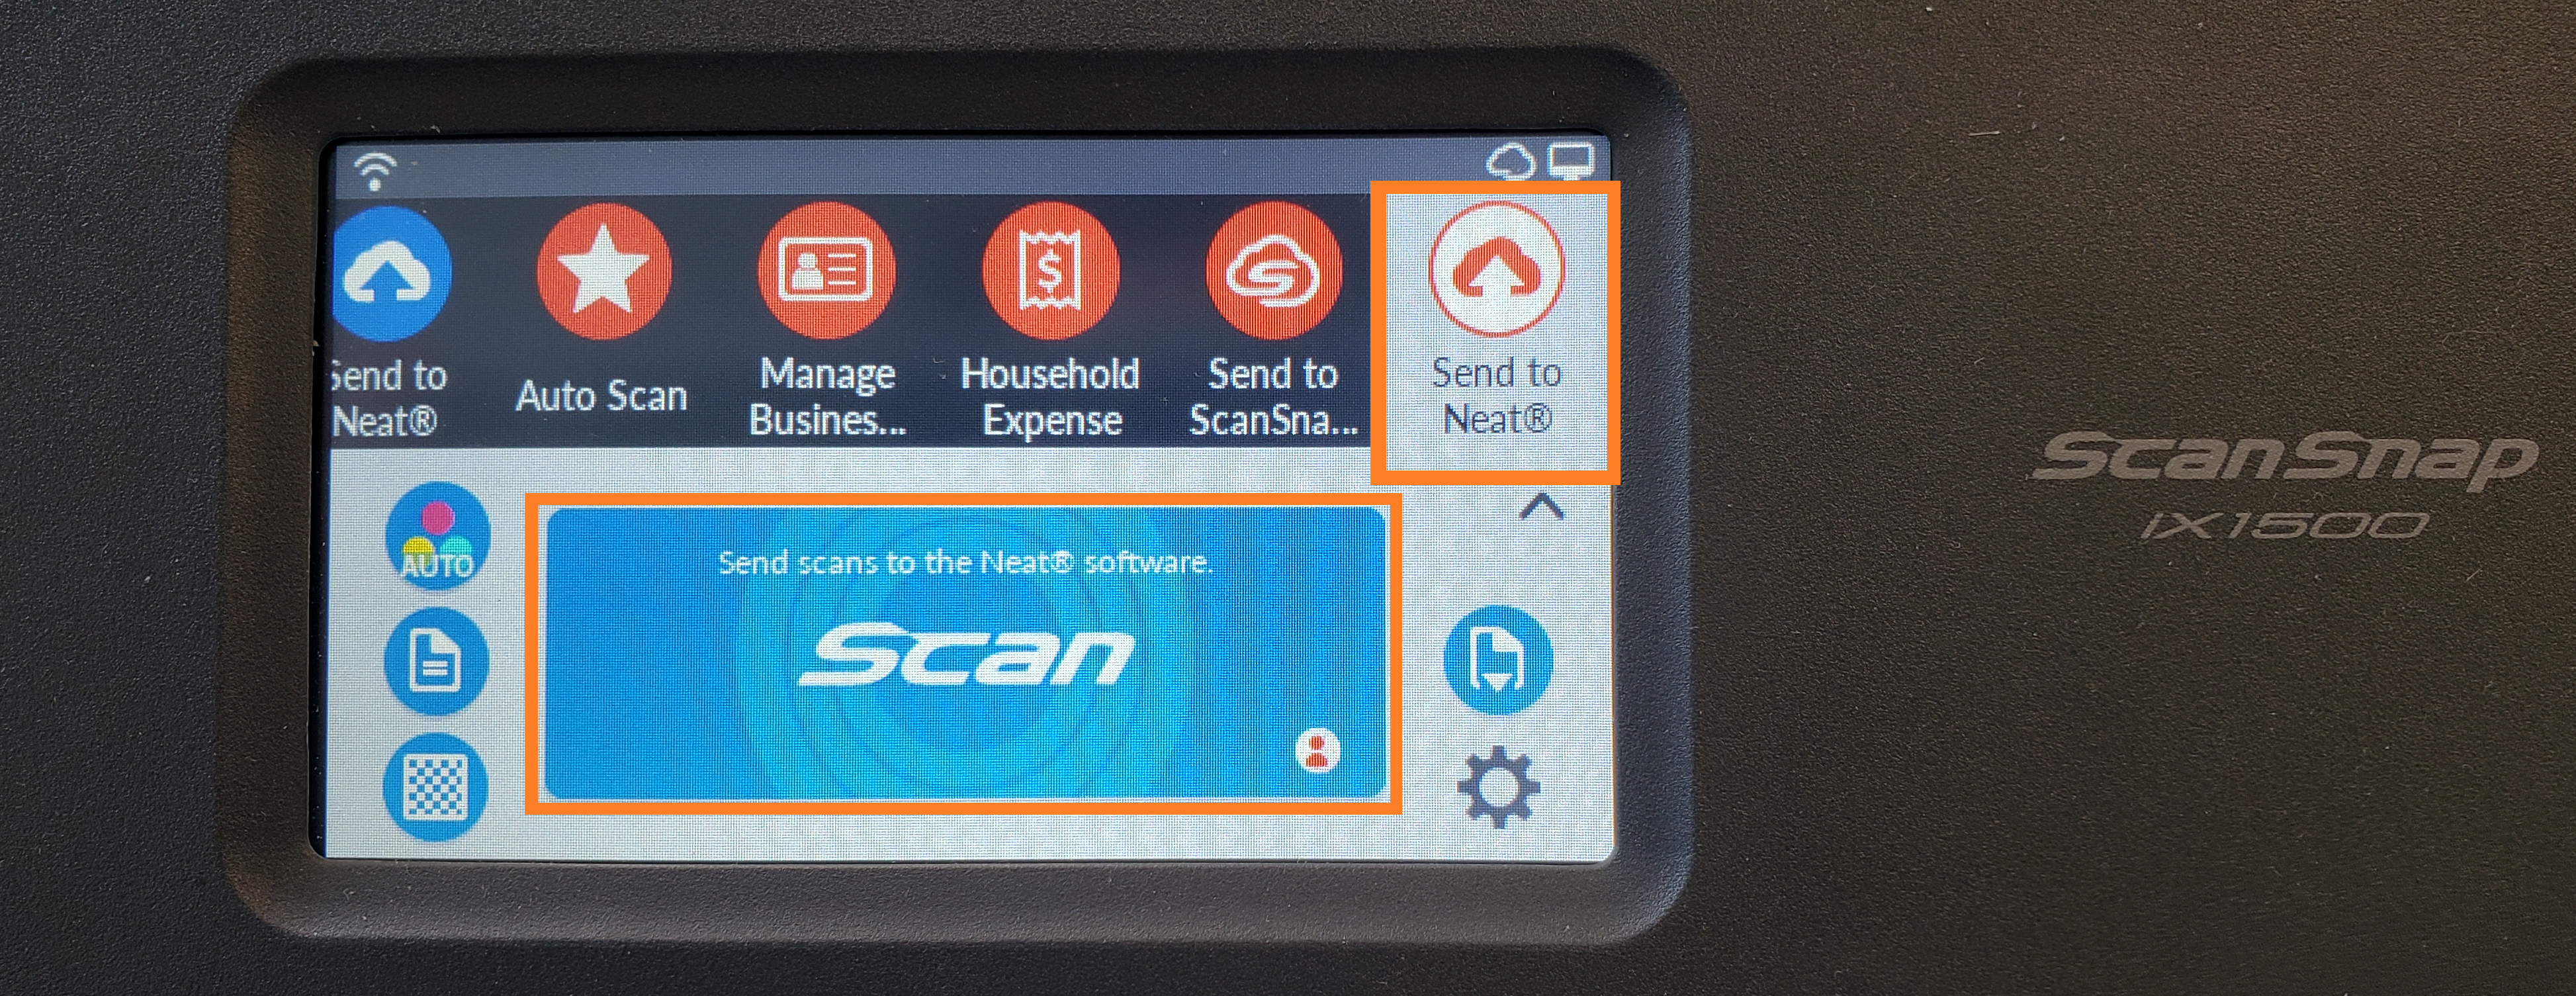
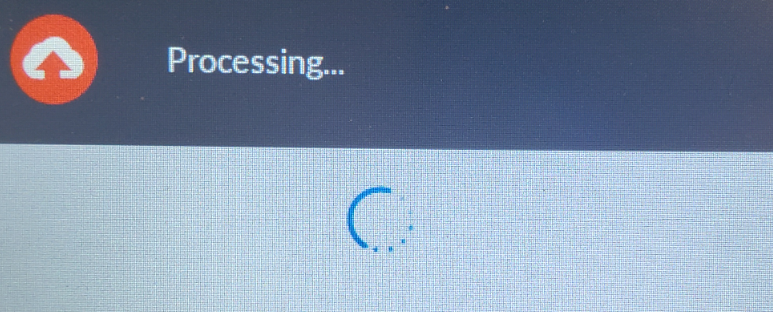
- The touchscreen will display Scanning and Processing before the item appears in the Neat Scan Utility.