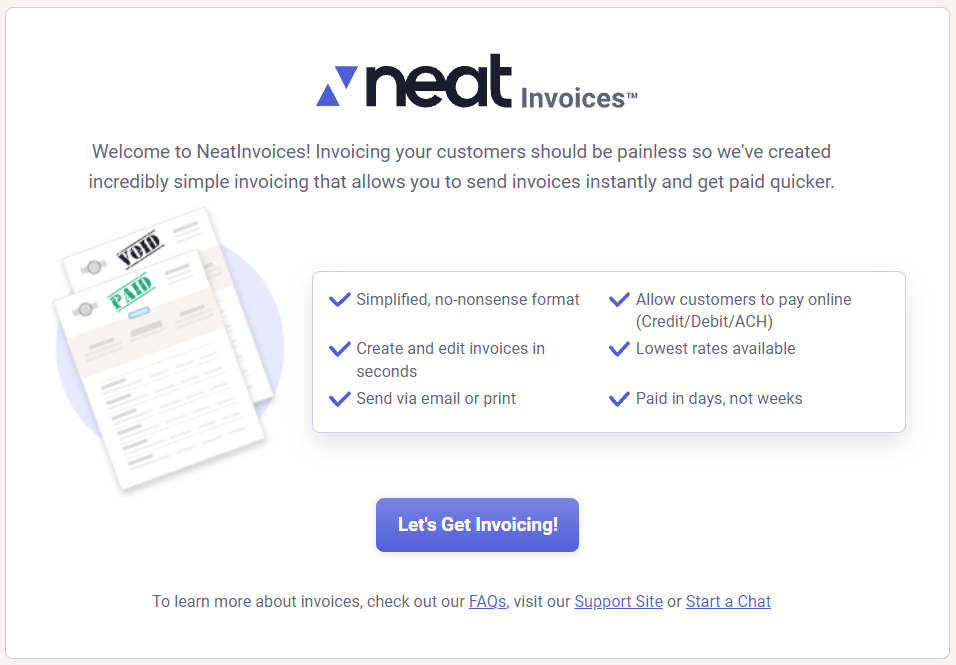
Simplify how you bill your customers by creating and sending invoices using Neat.
Check out our frequently asked questions below to learn more about how to use the invoicing feature in Neat.
Click on Bill My Customers in the left-hand navigation, then click Complete Setup. During this setup process you will be defining your invoice settings, such as your company information, invoice numbers, invoice reminders, and terms and conditions.
Please Note: You can edit this information at any time from the invoice settings menu.
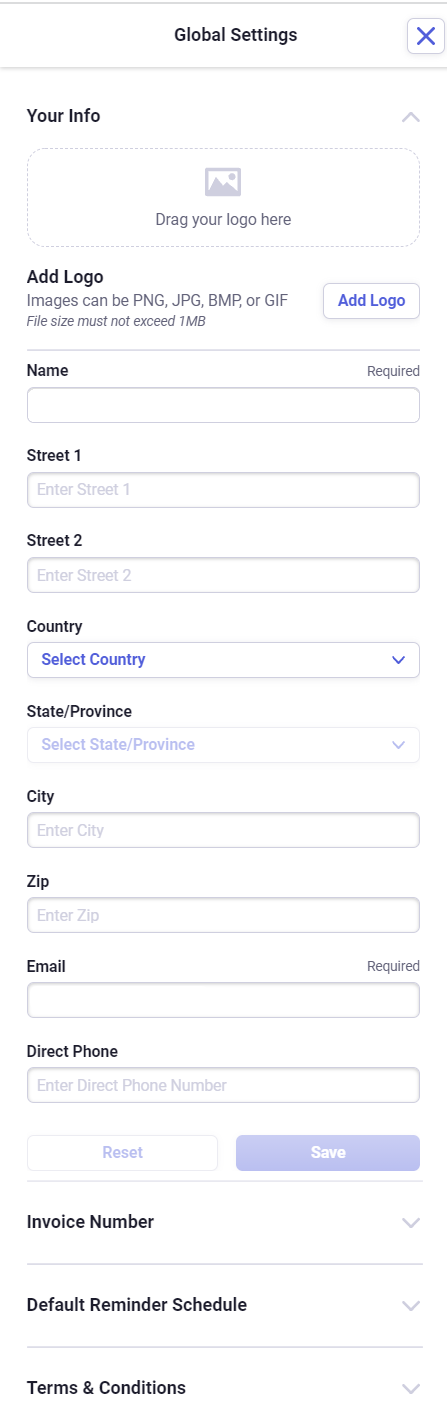
Enter your company information. You can import your company's logo and enter your company's address and contact information. This will be the company information that will appear on your invoices. When you're done click Next.
Next, you will set up your invoice numbering. By default, invoice numbers begin with “1” but you can choose a different starting invoice number that more closely matches your current invoice numbers. When you're done, click Next.
Please Note: Letters are not supported for invoice numbering, only numeric values are supported.
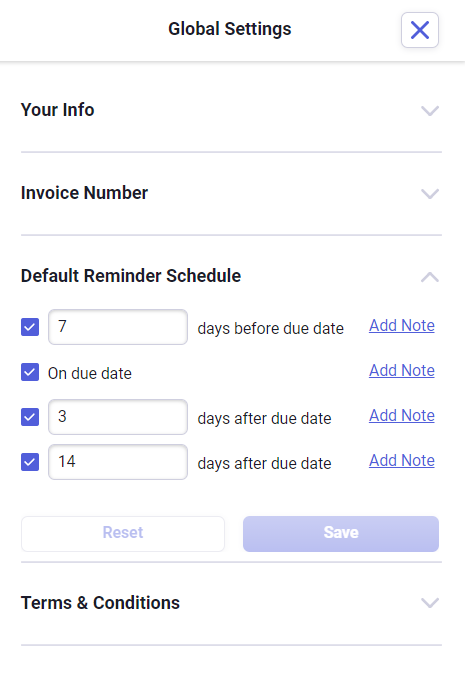
Invoice reminders are a simple, yet powerful tool that helps you to reduce time and confusion around email communications with your customers! With invoice reminders, once an invoice is sent, Neat will automatically send email reminders to your customers based on your settings.
Set up invoice reminders as desired by checking or unchecking the reminder options. You can change the number of days before or after the due date for the reminder to be sent. You can also add a note to the reminder. When you're done, click Next.
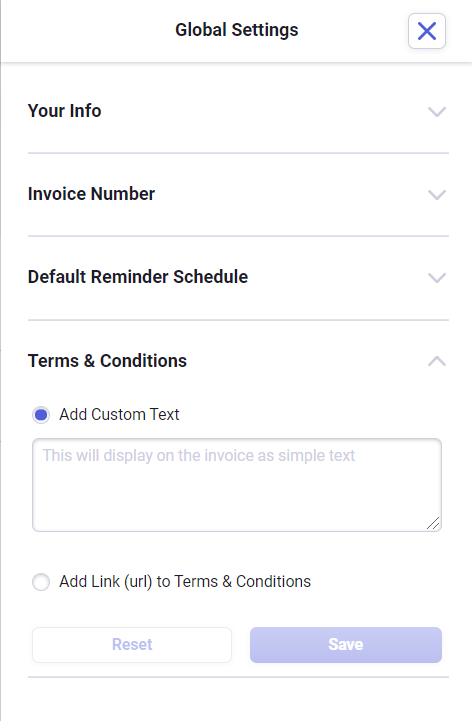
Lastly, you will have the option to set up your terms and conditions. You can add a URL to terms and conditions you already have set on your company's website, or you can enter custom terms and conditions via the custom text box. When you're done, click Next.
Note: You may skip adding terms and conditions during the setup process but will need to complete it before you send your first invoice.
Terms & Conditions should outline how quickly you expect payment from your customers, the fees associated when invoices aren't paid promptly, and the different payment methods your business accepts. You can add this at anytime by clicking the gear icon for Bill My Customers Settings.
Please Note: Currently, only one business can be added in Neat for invoicing. The ability to add multiple businesses to Neat for invoicing is an enhancement that is coming by the end of 2022.
How do I create an invoice?
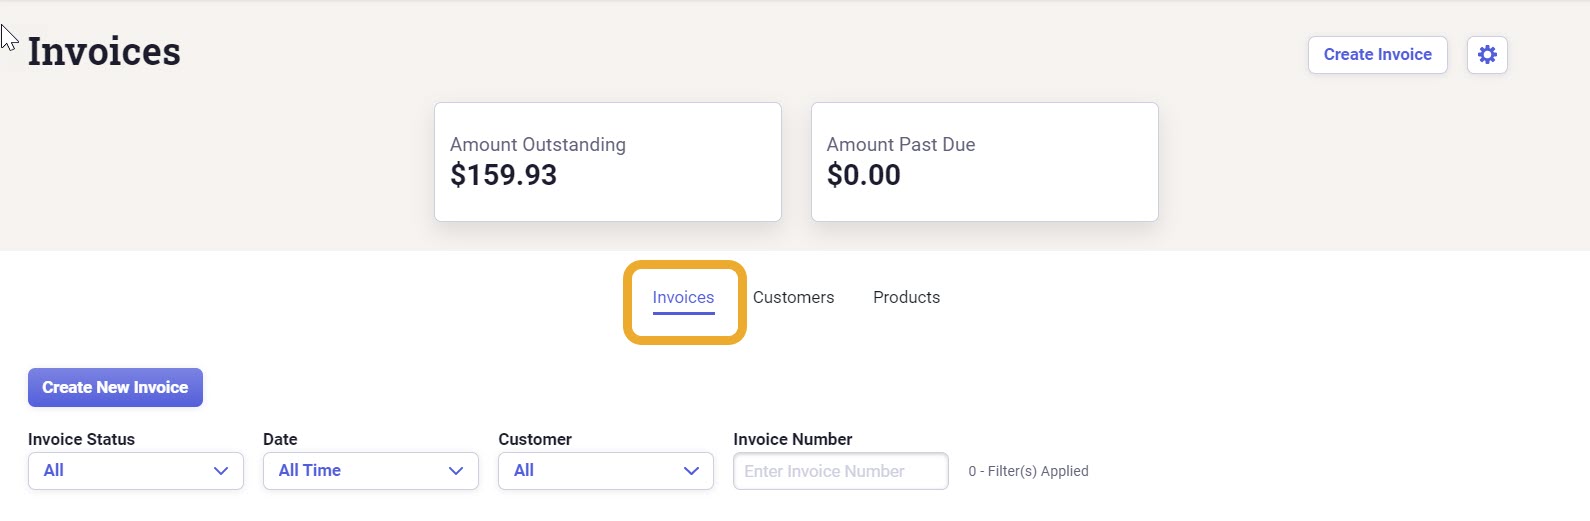
From the Bill My Customers section on the left, make sure Invoices is selected from the section above the Invoice grid which also shows Customers and Products.
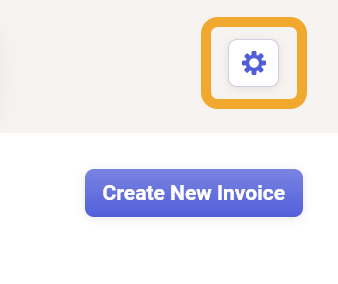
Then click Create New Invoice in the upper left above the invoice grid.
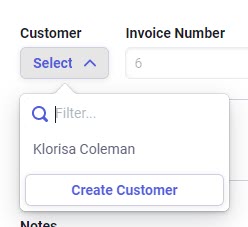
Use the Select Customer dropdown to choose your customer if one is already created. You can also create a brand new customer from the dropdown as well and input all of their customer information including their email address, phone number, billing address, etc.
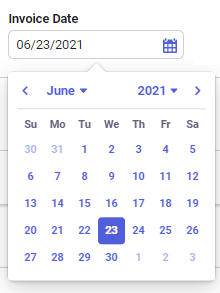
Under Invoice Date you can change the date. By default it will be set to the current date.
The Terms dropdown allows you to select how soon after the invoice date, the payment is due. It defaults to Due upon receipt. The dropdown allows you to select 15, 30, or 60 days from the invoice date and will automatically update in the Payment Date field. Alternately, you can choose Custom and manually select a Payment Date.
The +Product/Service allows you to select your existing products or services and you can also create a new Product/Service. See
How do I add new products? to learn how make your products or services available for invoicing.
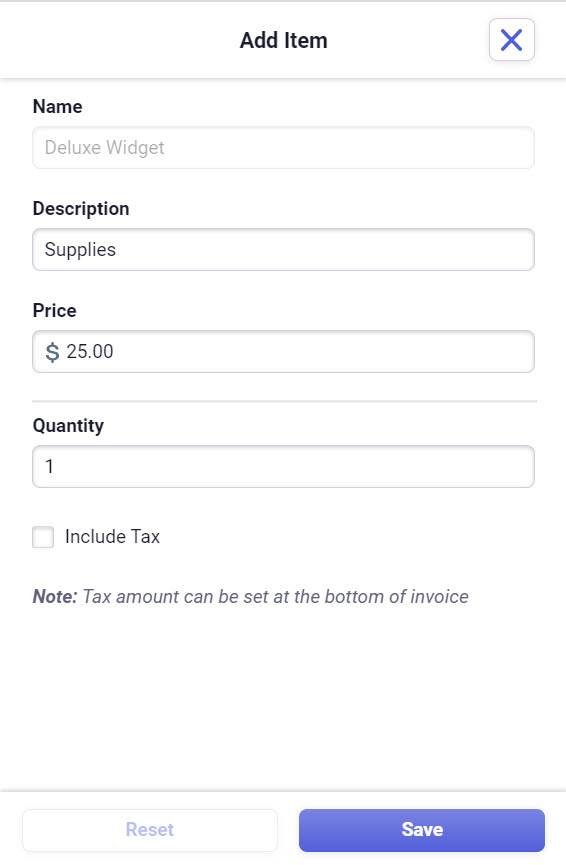
Upon selecting a product, you can edit the Description, Price, Item Category, and Quantity.
Don't forget to check the Include Tax box if your product or service is taxable. Checking this will add a T after the price in the Amount column, indicating this item will be charged tax.
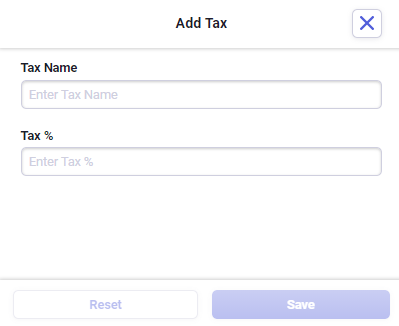
If your items are taxable, you can set the tax percentage in the tax dropdown. Click Tax to open the Tax dropdown list. Select an existing tax option or click Add Tax.
Enter the Tax Name and Tax %.
Click Save to add your tax. Tax for all items marked as taxable will be totaled in Tax the line below Subtotal.
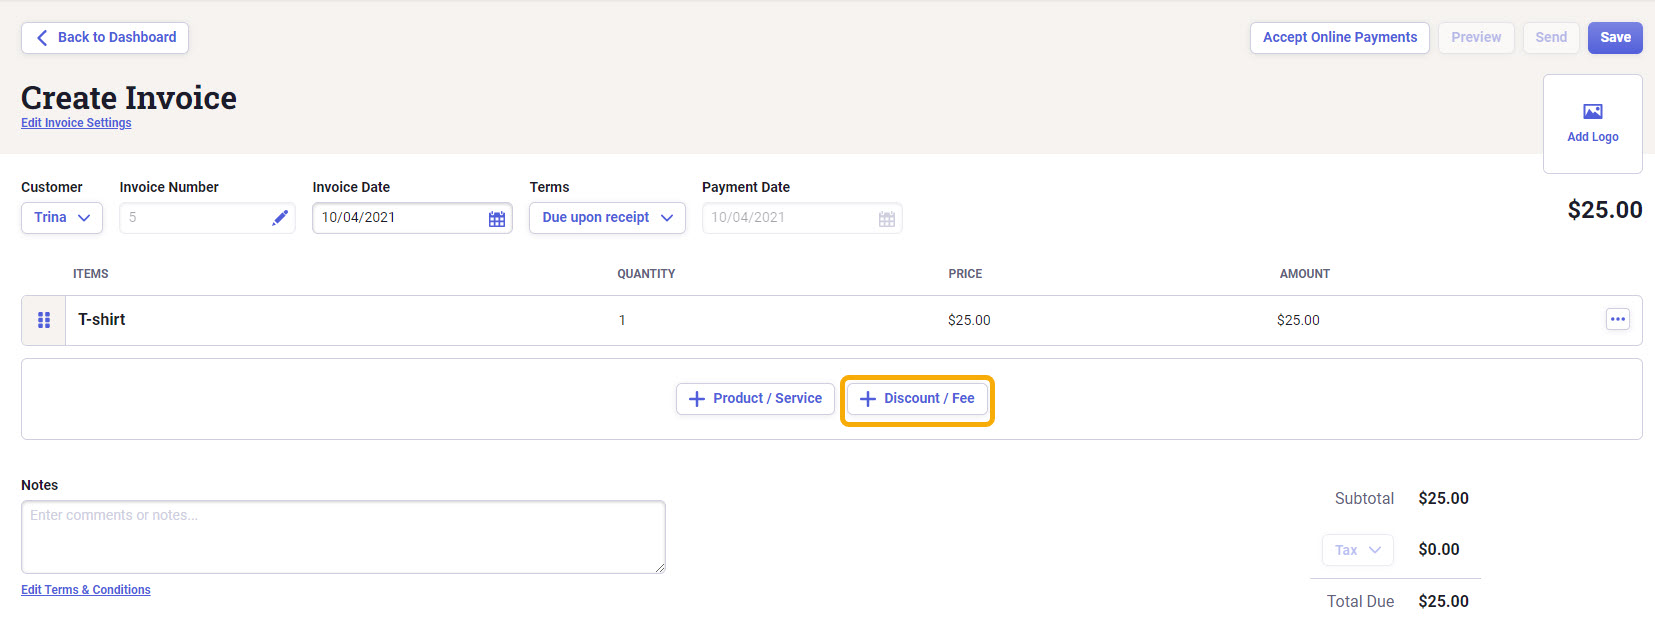
To add discounts or fees to your invoice, select the +Discount/Fee button.
This will open a popup where you can select whether you wish to Add a discount or Add a fee. Adding an Amount is required to continue but the Description is optional.
Click Save to add your discount or fee.
The Notes field allows you to add an optional comment.
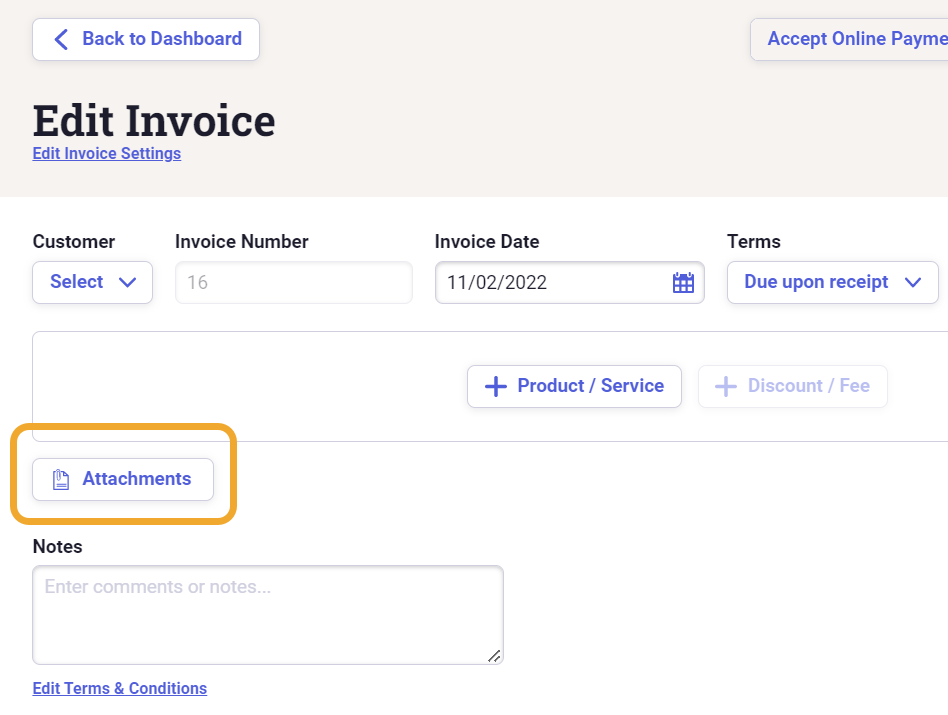
Optionally, you can add an attachment to your invoice to provide additional details and supporting documentation. You can attach existing documents in Neat or upload one of these file types: PDF, JPG, TIF, PNG, or BMP. For steps, please see How can I attach a file to my invoice.
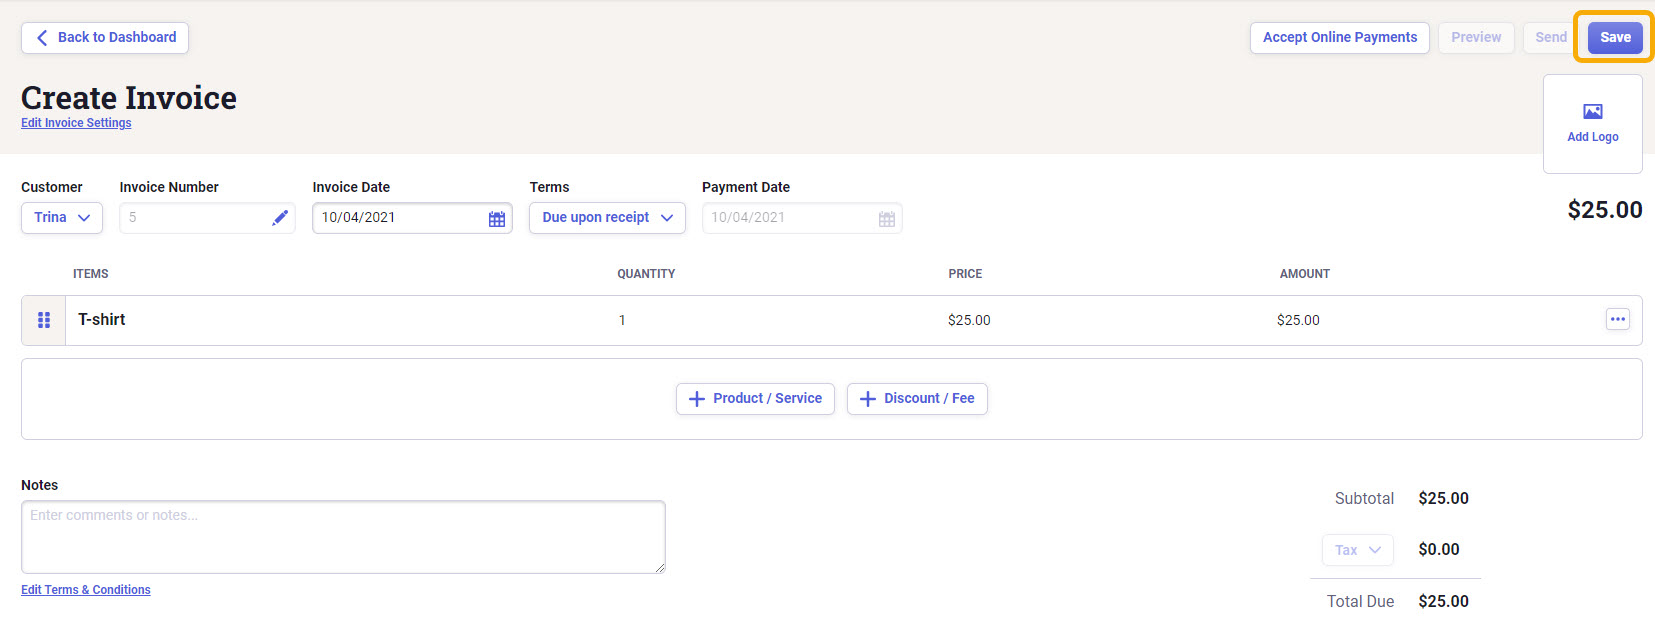
When finished, click Save in the upper right. This will save your invoice as a Draft.
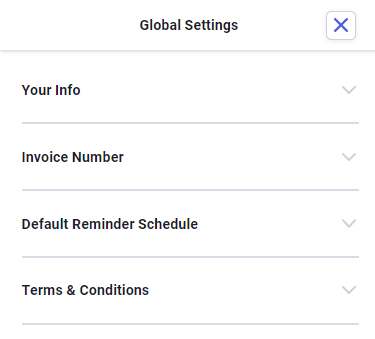
To edit your invoice settings, locate the Gear icon in the upper right corner of the invoice screen, next to 'Create Invoice'.
Here, you can edit all the fields that you originally set during the initial invoice setup process.
Under Your Info, you can update your company name, address, contact information, and remove or update your company logo.
Select Invoice Number to set a new invoice number. This will start with your next invoice. You cannot choose a number lower than your most recent invoice.
Select Default Reminder Schedule to add, change, or remove any of your invoice reminders.
Select Terms & Conditions to update your custom text or URL link. You must choose one or the other, not both.
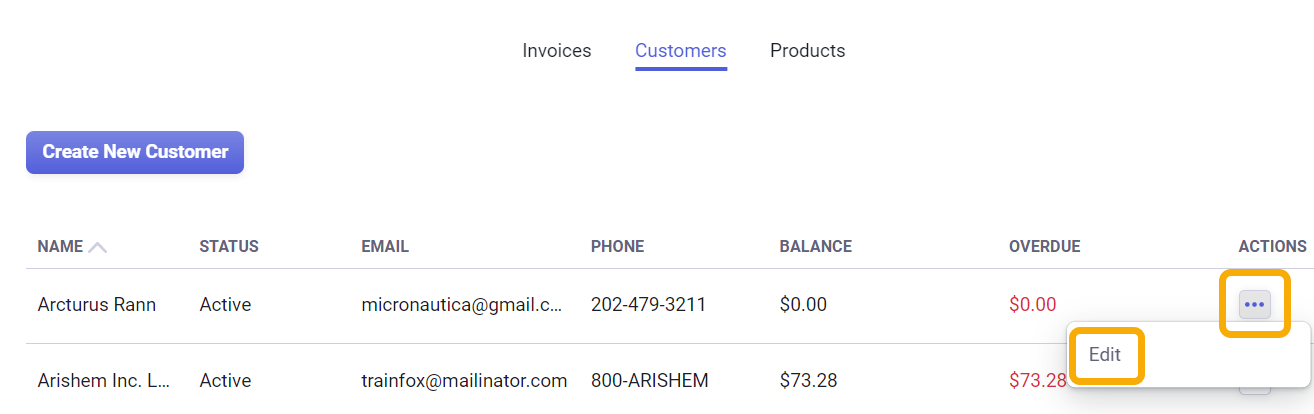
Click on Customers at the top of the invoice grid.
Click on Create New Customer to open the new customer fields.
Enter your customer’s information. Only Name and Email are required to create a customer. Use + Email Address to add more than one email address. Click Save to add your customer.
Repeat to add more customers
Click on the [...] Actions button, then Edit to edit your customers.
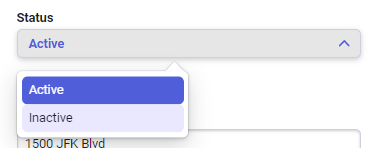
Please Note: At this time, you cannot delete customers you have created. However, you can mark a customer as Inactive in the Edit menu. Inactive customers will still show up in your customer list, but will not show up in your lists while creating invoices.
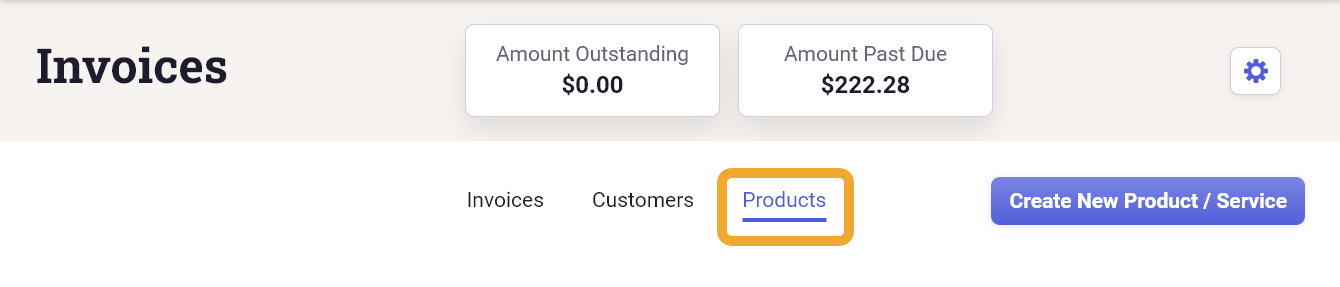
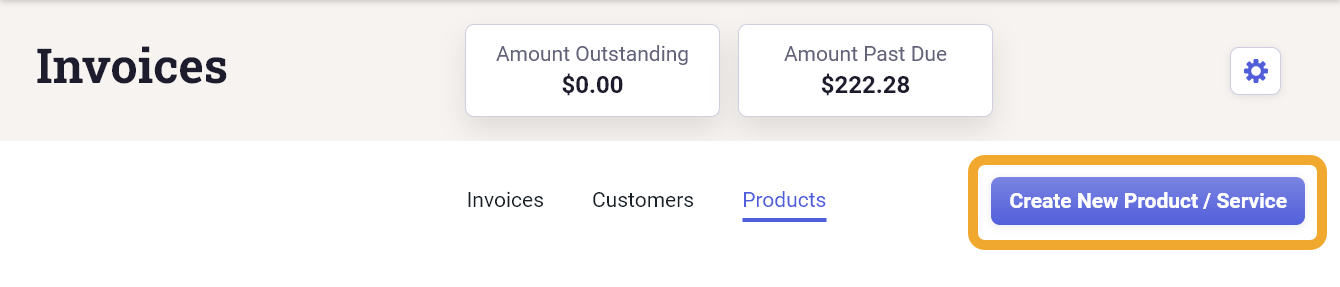
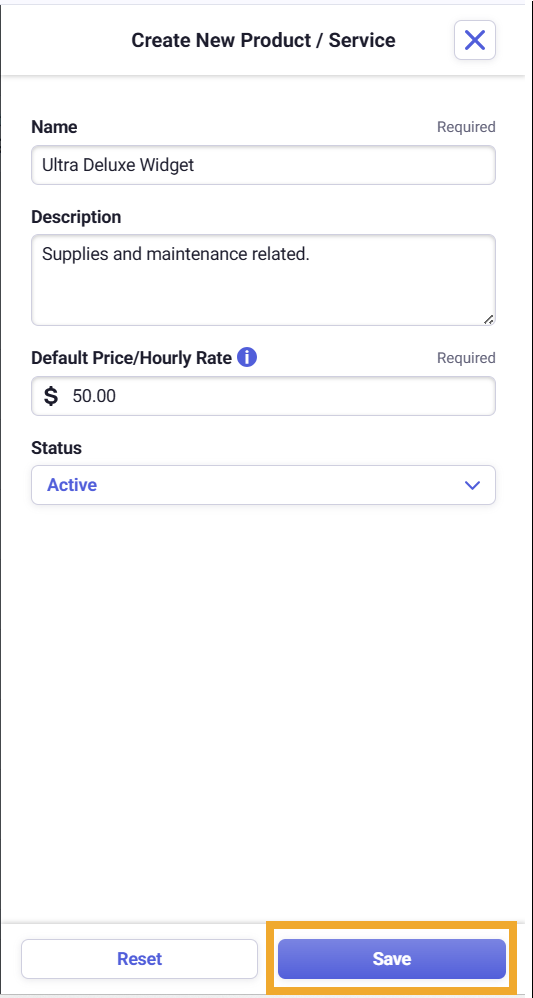
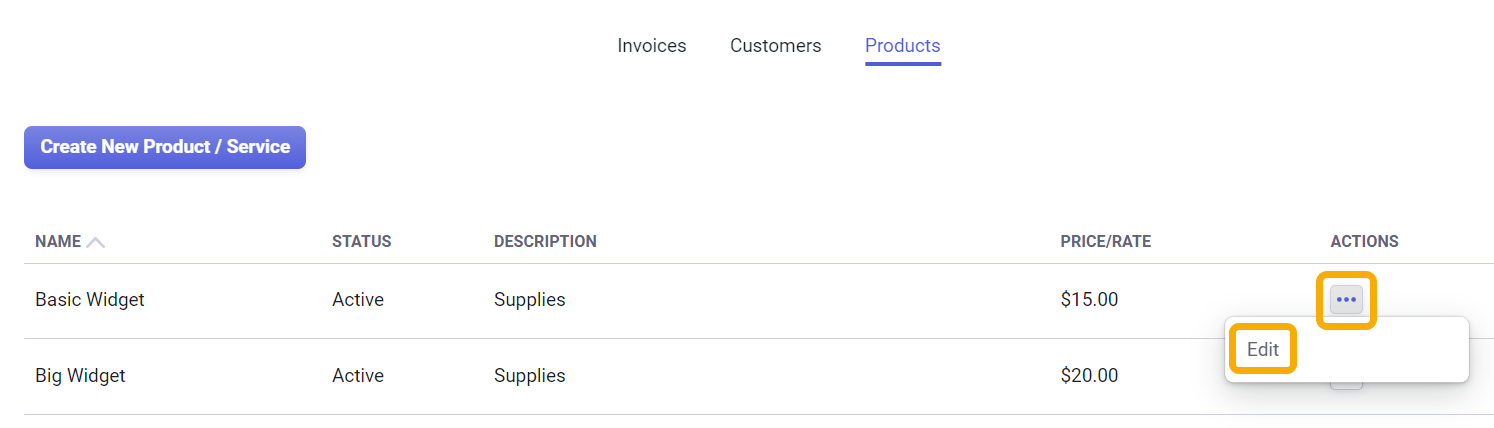
Click on Products above the invoice grid to open the Product view.
Click on Create New Product / Service to open the new product form.
After entering all Product information, click Save to store your product.
Repeat to add more products.
Click on the [...] Actions button, then Edit to edit your products or services.
When finished click Save. Click Reset if you do not wish to save the changes.
Please Note: At this time, you cannot delete products or services you have created. However, you can mark a product or service as Inactive in the Edit menu. Inactive products and services will still show up in your products list, but will not show up in your lists while creating invoices.
How can I attach a file to my invoice?
Please Note:
To add an attachment when creating an invoice, you must first Save your invoice as a Draft and then Edit the invoice. You can only Edit invoices that are in Draft, Sent, or Past Due status.
You can attach existing documents in Neat or upload one of these file types: PDF, JPG, TIF, PNG, or BMP.
Select your invoice.
Click the Actions [...] button and select Edit.
Click Attachments.
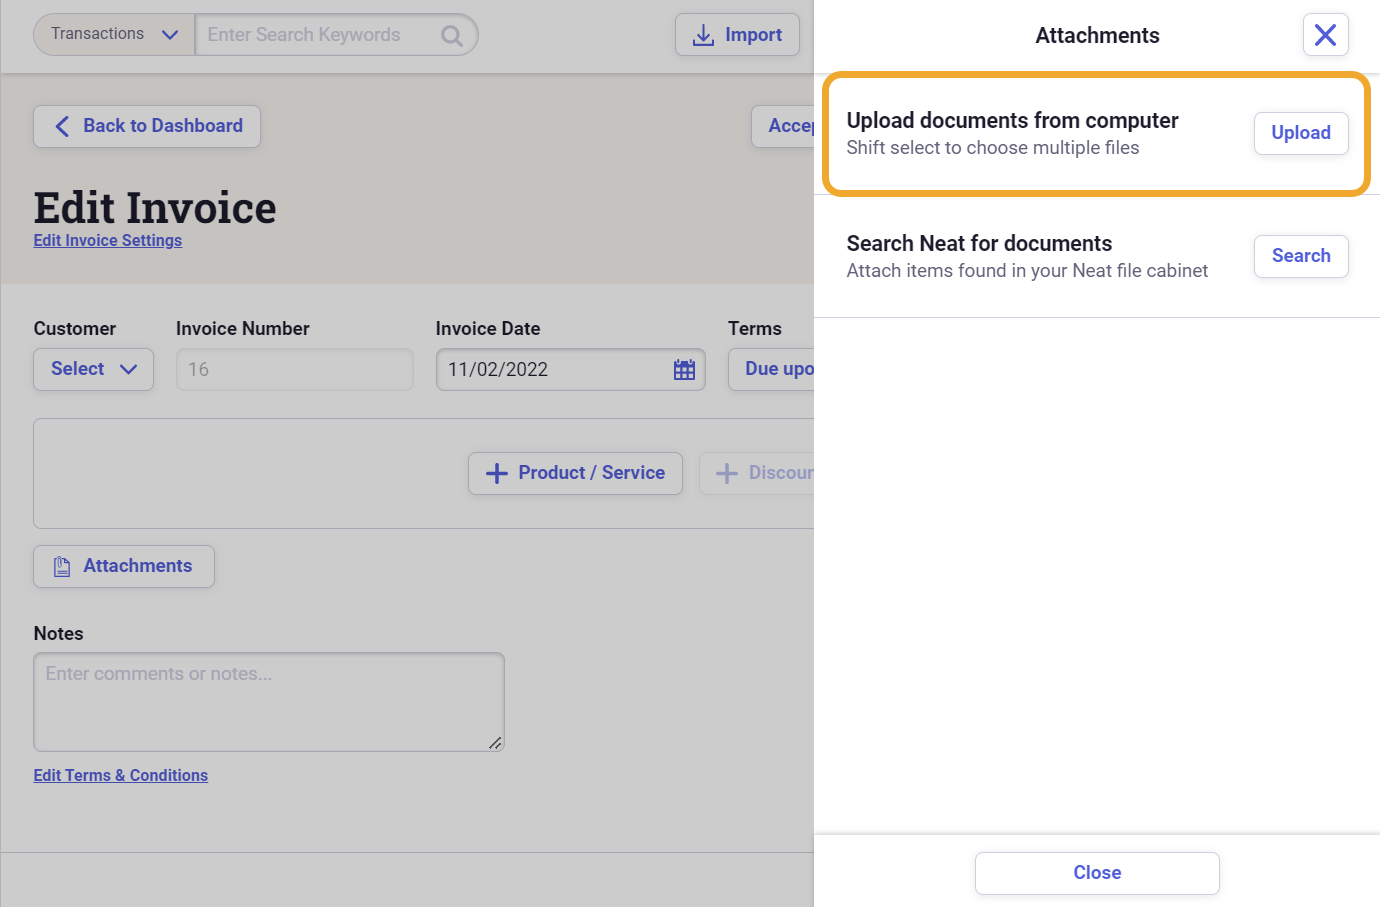
To Upload documents from computer click Upload.
Click Choose Files.
Browse to the files on your computer that you wish to upload and attach one of these file types: PDF, JPG, TIF, PNG, or BMP.
Select the file(s) and click Open.
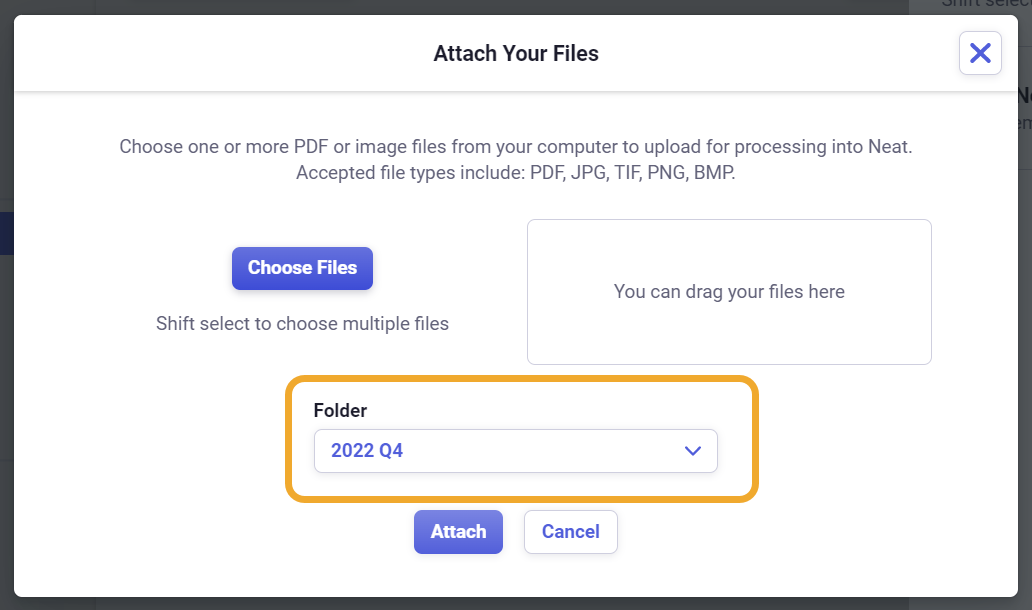
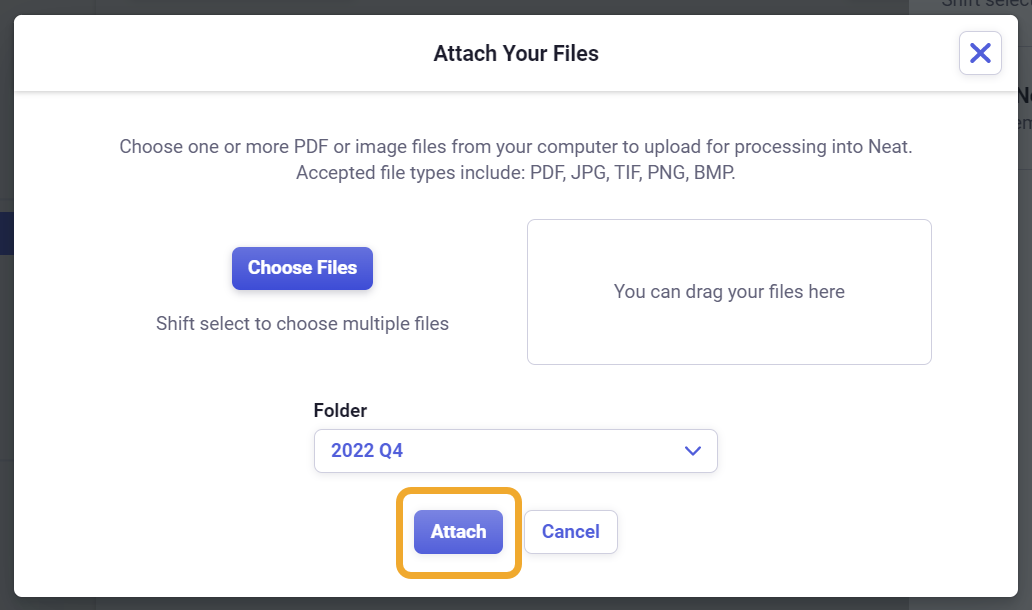
Select a folder within Neat for the uploaded file to be stored.
Click Attach. Your file will be uploaded and processed.
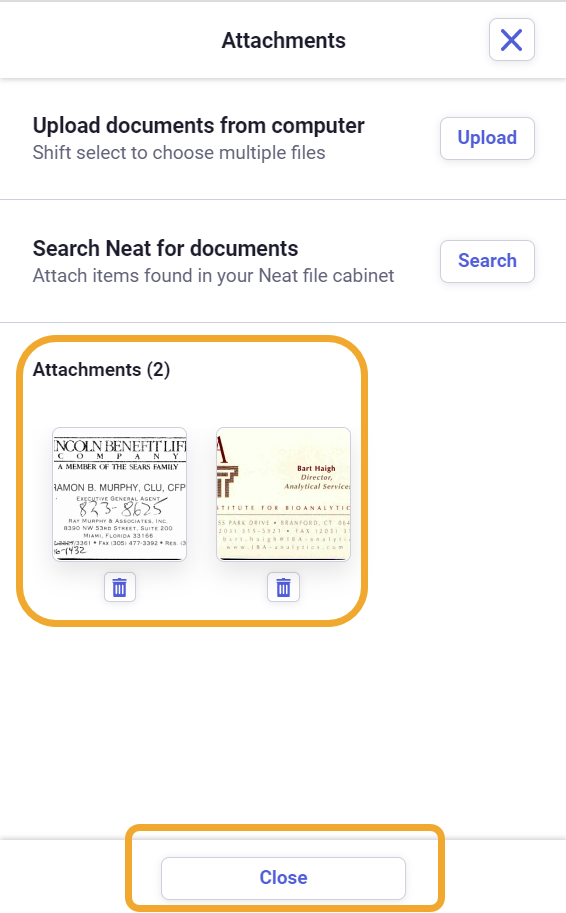
You can click the thumbnail to get a better view of the file after processing or click the trash icon to remove it.
When you're done click Close.
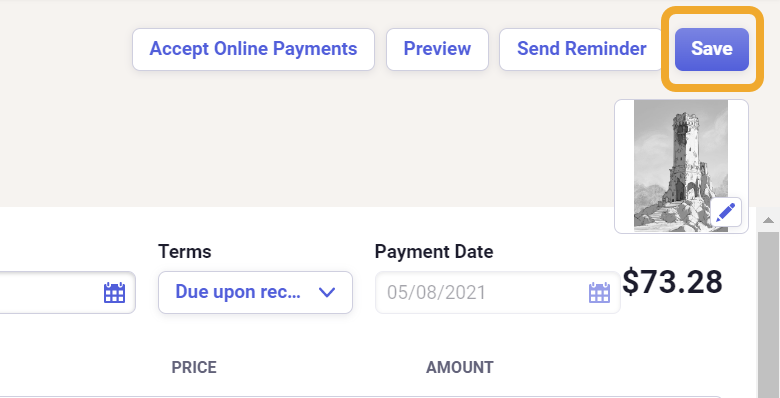
When you're finished editing the invoice, click Save.
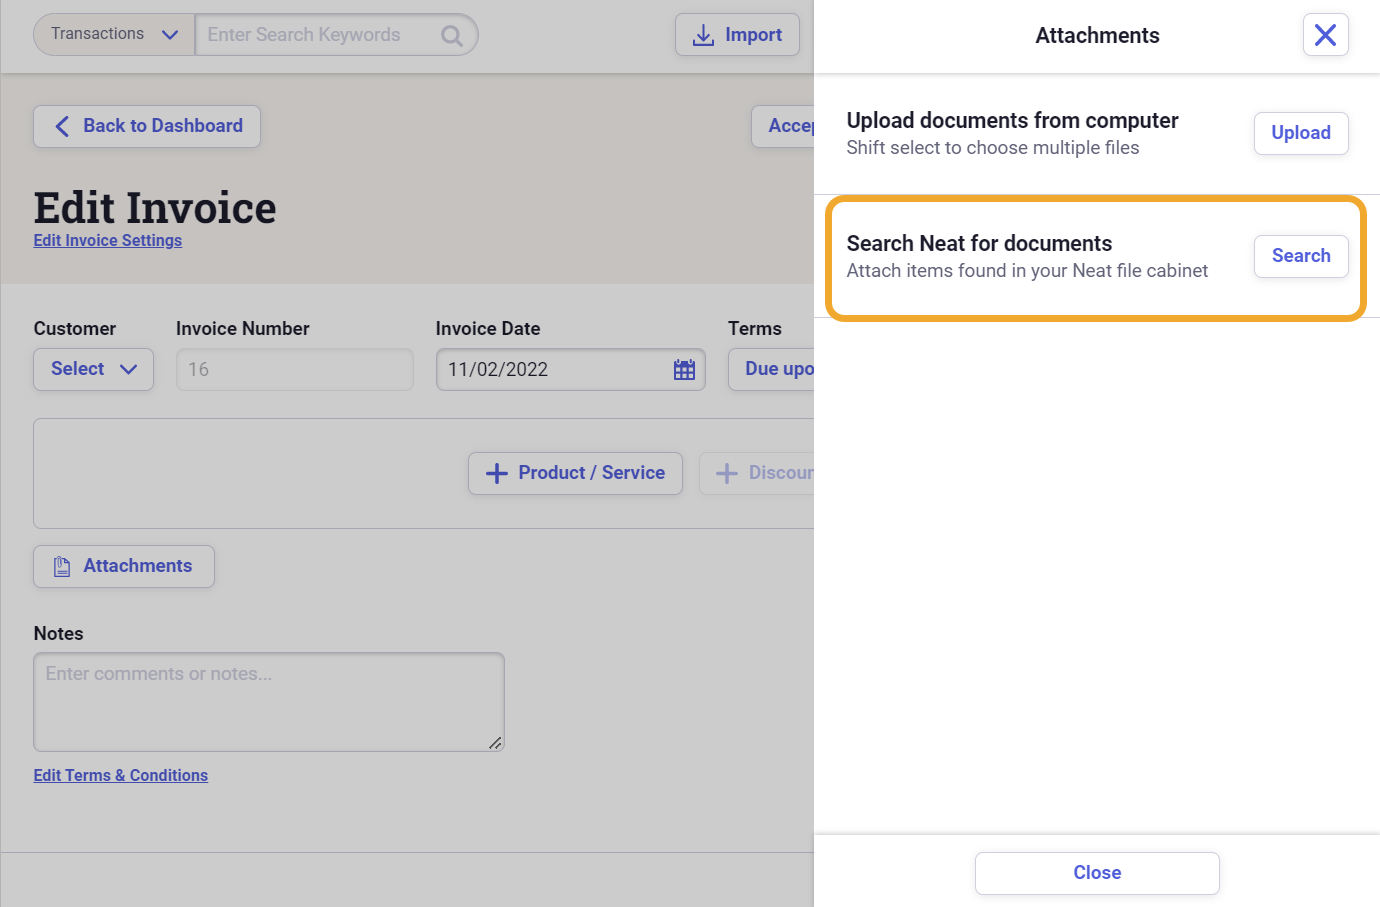
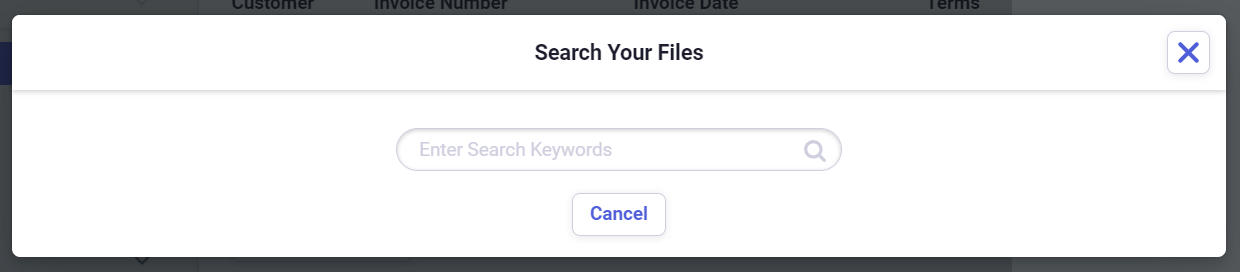
To Search Neat for documents click Search.
Enter a keyword to search for your item.
Click the item you are attaching and then click Select at the bottom.
Only one item can be selected at a time. Repeat the process to add multiple items.
You can click the thumbnail to get a better view of the file after processing or click the trash icon to remove it.
When you're done click Close.
When you're finished editing the invoice, click Save.
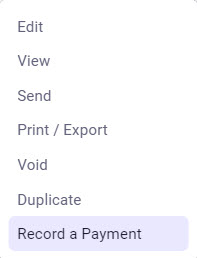
How do I manage my invoices using actions?
You can view available actions for your invoices by going to the Actions column in the Invoice grid and clicking the [...] Action button. You have the following options:
Edit Allows you to make changes to:
Customer
Invoice Date
Terms
Payment Date (if set to Custom)
Edit or Remove Items
Add a Product, Service, Discount, Fee, or Note
Please Note: Not all invoices can be edited. Invoices marked as Void, Partial Payment, or Paid can no longer be edited.
View Displays a copy of the invoice as it will appear after it is sent.
Send Reminder Schedule automatic follow up emails to remind your customer of an upcoming due date or past due balance.
Send Sends the invoice to the email on the customer's profile. (Not available in Void invoices.)
Mark as Sent Changes the invoice status from draft to sent. This cannot not be reversed.
Please Note: Only invoices in Draft stats can be marked as sent.
Print/Export Opens a PDF copy of the invoice that can be printed and mailed.
Void Changes the invoice status to void and cannot be undone. Voided invoices only have actions available for View, Print/Export, and Duplicate. (Not available in Partial Payment, Paid, or Void invoices.)
Duplicate Creates a copy of the invoice in Draft status.
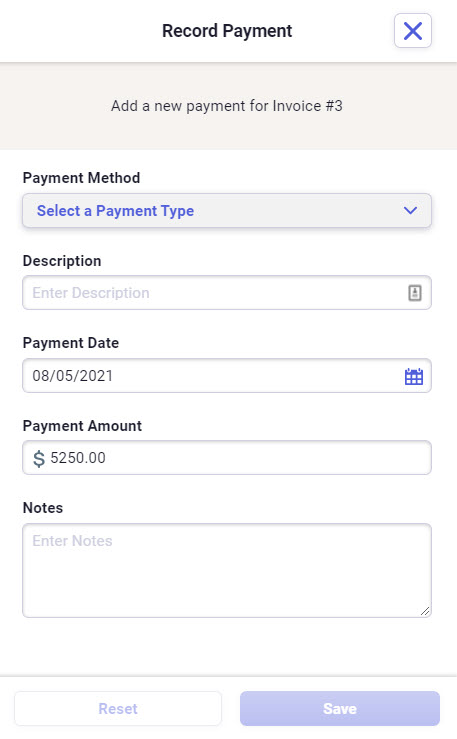
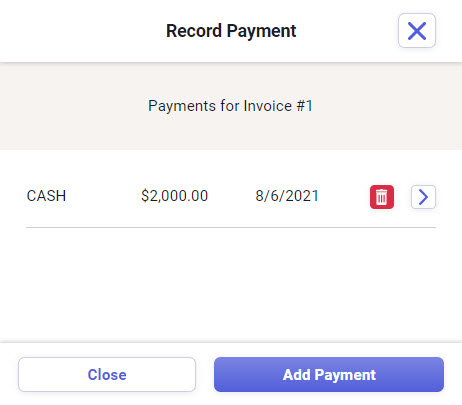
Record a Payment Allows you to record a payment on the invoice. Selectable payment types include Cash, Bank/ACH, Check, Credit Card, and Other. You can also enter a Description, Payment Date, Payment Amount, and Notes. The Payment Date must be either the current date or a past date but cannot be a future date. This will change the invoice status to Paid or Partial Payment depending on the amount paid.
Please Note: Record a Payment is ONLY available for Sent invoices, not drafted or voided invoices.
How do I sort and filter my invoices?
Sorting
You can sort the order of your invoices by Due date, Invoice number, and by Invoice date. Click directly on one of these column headings to change the sorting order of your invoices.
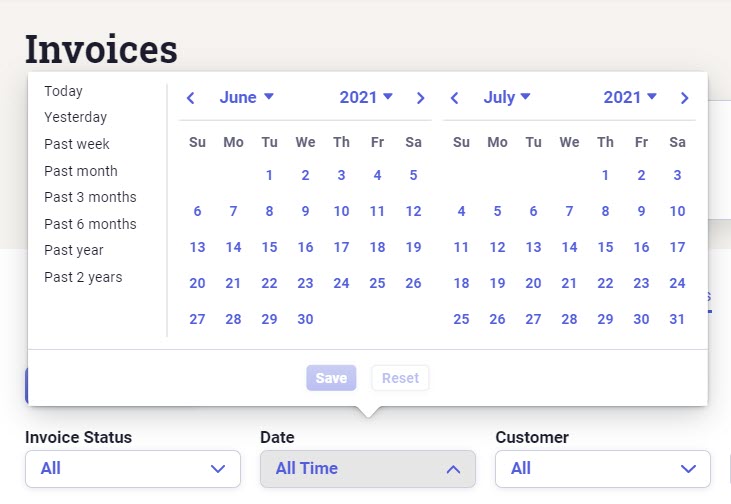
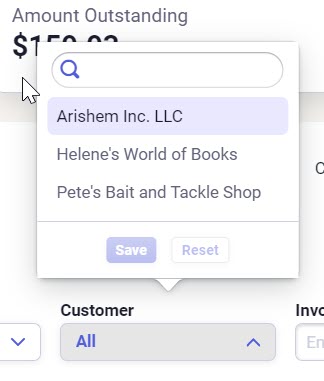
Filtering
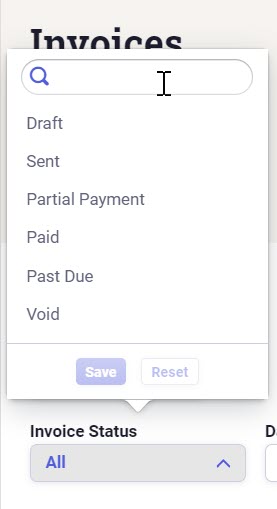
You can filter your invoices by Invoice status, Invoice date, Customer and Invoice number.
Invoice Status
When filtering your invoices by Invoice status, you can select from draft, sent, partial payment, paid, past due and void.
Invoice Date
When filtering your invoices by Invoice Date, you can select a wide range of dates from when you first started using the invoicing feature.
Customer
When filtering your invoices by Customer, you will be able to select from all of the customers you have saved.
Invoice Number
Search for a specific Invoice Number.
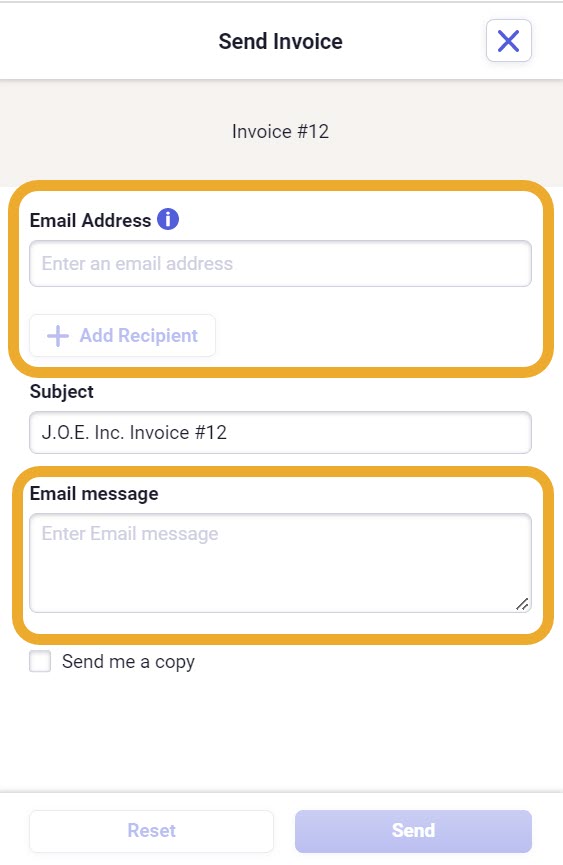
How do I send invoices?
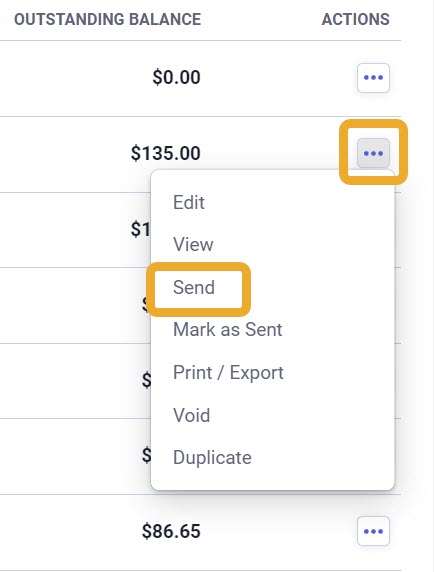
Open your invoices.
Find the invoice you wish to send from the list of invoices.
Click the [...] Action button then, click Send.
Ensure the Email Addresses field is correct. Use + Add Recipient to add multiple email addresses to send your invoice.
Add an optional Email Message if desired. The subject cannot be edited.
When finished, click Send to deliver your invoice.
Please Note: Currently, invoices are sent from no-reply@neatcloud.com but a future update will allow you to use your own email to send invoices from Neat.
Also note: If you find your emails are ending up in the recipient's spam or junk mail folder, please advise them to mark the emails from Neat as safe or "not spam" so they wil begin to appear in their regular inbox making them easier to find.
How do I accept payments for my sent invoices?
Neat allows you to accept all types of payments for your invoices in Neat. Manually mark your invoices as partially paid or paid when your customers make a payment.
Manually recording a payment
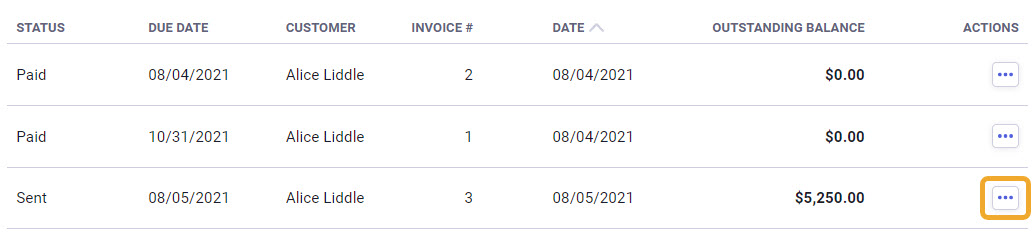
Find a Sent, Partially Paid, or Past Due invoice you need to record a payment for. Click the [...] Action button.
Click Record a Payment.
In the Record a Payment modal, enter details about your payment. Select your payment method from the payment method dropdown, enter a description, a payment date, payment amount, and notes.
When you're done, click Save.
Your invoices status will update to reflect if the invoice was paid partially or in full. The invoice's outstanding balance will also update to reflect any amount paid toward the invoice.
To manage your invoice payments or add another payment, locate the invoice that needs to be updated and click the [...] Action button.
In the Record a Payment modal, you can edit or update previous payments and if the invoice is in Partial Payment status then you can also add more payments to your invoice.
Once the invoice is paid in full, the invoice status will update to paid and the outstanding balance will update to reflect a zero dollar balance.
What is the difference between amount outstanding and amount past due?
An outstanding balance is the amount due on an invoice before the actual due date. For example, if an invoice is created for a customer with a balance of $25 due two weeks from the current date, then the balance will read as outstanding. A balance for a customer will read as “past due” for customers who did not pay their balance by the due date.
Please Note: If your outstanding or past due amounts look incorrect, then we recommend refreshing your web page to ensure the page is up to date with your latest changes.