Using Your Neat Scanner Without the Neat Software
Please note that the information provided on this page is related to products and/or services which are no longer supported and agent support is no longer available. This information is provided as a courtesy for users who may still need troubleshooting or FAQ information on end-of-life products.
For Windows users, Neat suggests installing the free NAPS2 scanning software or using Windows Fax & Scan.
Mac users may work with Apple's built-in Image Capture tool to scan items directly to your Mac without Neat's organizational software.
Before you begin
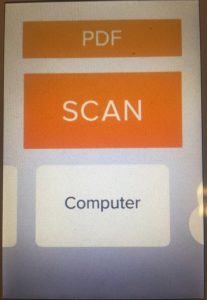
You will need to install the driver for your Neat scanner model.Note: NeatConnect users will also need to set the scan destination to Computer by swiping from left to right on the touchscreen until the display shows Computer as shown here. The scanner must be connected directly to your computer via a USB cable before "Computer" becomes an available option.
Neat Desktop (Windows and Mac)
Our number one recommendation is this free app that allows you to scan and edit images locally at no cost. You can enjoy all the other features of Neat (organization, quick search, reporting, and sharing) with a Neat subscription.For details and a link to download it, click Neat Desktop.
NAPS2 (Windows)
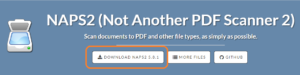
This second option is also consistent and reliable for use with Neat scanners.- Download and install the latest version of NAPS2 from
https://www.naps2.com/
- When you first open NAPS2, you'll need to set up a profile for your Neat scanner by clicking Scan and selecting New Profile.

- Click the radio button for TWAIN Driver.
- Select Choose device and select your Neat scanner model.
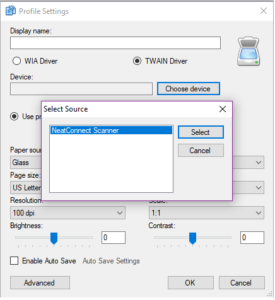
- You can choose your settings if desired. For Neat Desktop and NeatConnect scanners, you can set Paper Source to Feeder for one-sided scans or Duplex for two-sided scans. (You can always return to the Profile Settings by clicking Profiles then Edit for the Neat scanner.)
- You're now ready to scan. You can load your pages in the scanner and click the Scan button at the top left in NAPS2.
- Once done, you have the option to save as PDF or image files.
Image Capture (Mac)
- Close out of the Neat software entirely (go to Neat -> Quit Neat).
- Click on the Spotlight icon (the magnifying glass at the top right of your screen) type Image Capture and hit Enter to launch.
- Once Image Capture launches, select the Neat scanner from Devices on the left side of the window. You can click Show Details to view and change scanner options.
- Scan To allows you to choose where to save your scan.
- Format allows you to specify a file type for your scan.
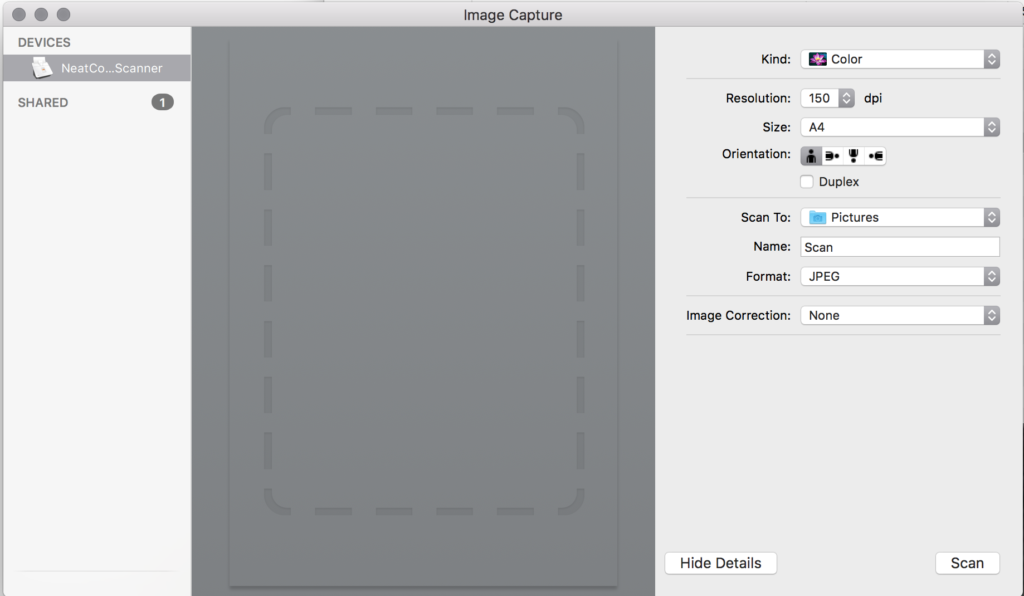
- Insert a document into the scanner and click Scan.
These suggestions will allow scanning outside of the Neat software, however, Neat is not affiliated with nor offers technical support for either NAPS2 or Image Capture.