Neat Smart Organization System - Create a Tax Category Report
Learn how to create a tax category report in the Neat Software. In Neat, you can create a tax category report that aggregates the tax categories you are utilizing using data from the receipts that you've scanned into Neat. The Neat Software can summarize and tax category reports based on the following criteria:
- Client Name
- Receipt Date
- Payment Type
- Total Amount
- Vendor Name
Follow the steps below to create your first tax category report from a selected folder::
Before You Begin
We recommend that you create a folder and put all of the receipts that you would like to include in the tax category report into that folder before creating the report. Click here for instructions on how to create a new folder. Please note: Only receipts can be used for tax category reports created in Neat; other items are excluded.
Create a Tax Category report
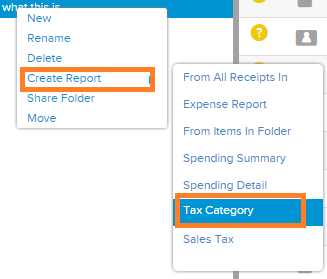
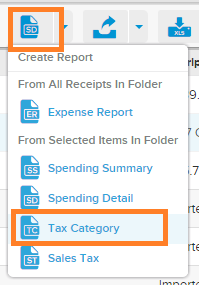
- In the Folders pane, right click on the folder containing the receipts that you would like to create an expense report for. A drop-down menu will appear. Select Create Report and click Tax Category.
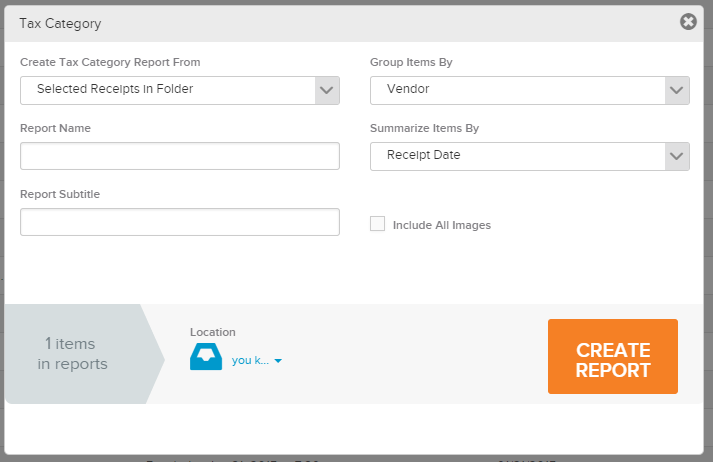
- A Tax Category window will appear. In this window, you will Name the report. You even also opt to NOT include images. You can also click the blue text to select which folder Location that you would like the expense report to be saved in. Name the report. Once finished, click Create Report button.
- A Tax Category Created window will appear, informing you that the report has been created and saved in the folder you selected in Step 2.
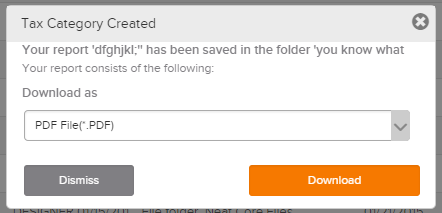
- Click Download to download report as a PDF or Dismiss to close the window.