List Management in Neat
When you edit fields on items in your File Cabinet, Neat automatically saves the values you enter (including the exact spelling and capitalization) to a list for that field. These saved values appear as suggestions the next time you edit the same field, helping you enter information more quickly. Each field, such as Vendor, Category, or Project, maintains its own list.Because these lists are created from your entries, typos, misspellings, or inconsistent naming (for example, "Staples," "Staples Inc.," and "STAPLES") can accumulate over time.
List Management lets you review and maintain these File Cabinet lists. You can edit, rename, merge, or remove list entries to correct mistakes and standardize your data. Keeping your lists consistent makes it easier to organize your documents and produces cleaner, more accurate reports.
Neat Pro Tip: List Management is different than My Categories
- List Management is used to manage the drop-down lists for fields in your File Cabinet, including vendors, categories, projects, and other list-based fields associated with your documents.
- My Categories is used exclusively in the Do My Books section of Neat to manage the vendors and expense categories used for bookkeeping transactions. Changes made in My Categories do not affect the lists used in your File Cabinet.
FAQs
- What lists can I manage in Neat?
- How do I rename a list item?
- How do I merge duplicates?
- How do I manage the lists directly from the fields?
Please Note: There is no option to delete a list item and you cannot save an existing item with no name. If you are looking to remove a misspelled item on the list, you can either edit to change the name or merge it if the correct spelling already exists on the list.
What lists can I manage in Neat?
You can now manage your lists for the following fields:- Category
- Class
- Customer
- Location
- Payment Type
- Product
- Project
- Vendor
How do I rename a list item?
- Click the Settings gear next to your name in the upper right.
- Select Manage My Lists.
- From the left, choose which list you want to manage. The selected list will appear in bold blue letters.
- You can scroll through the alphabetical list or use the search bar at the top to find the list item you want.
- Hover over the item and click the pencil icon to edit the name of the item.
- Click Save when finished.
Neat Pro Tip: Renaming a list item updates its name everywhere it is used throughout your database.
How do I merge duplicates?
- Click the Settings gear next to your name.
- Select Manage My Lists.
- From the left, choose which list you want to manage. The selected list will appear in bold blue letters.
- Scroll through the list and place a check in the box for each item you wish to merge. You must select at least two.
- When ready, click Merge Duplicates at the top.
- A window will appear where you can select which item name everything will be merged into.
- Select Merge to continue.
- When the merge is complete you will see a success message at the top.
Neat Pro Tip: Merging list items updates its name everywhere it is used throughout your database.
How do I manage the lists directly from the fields?
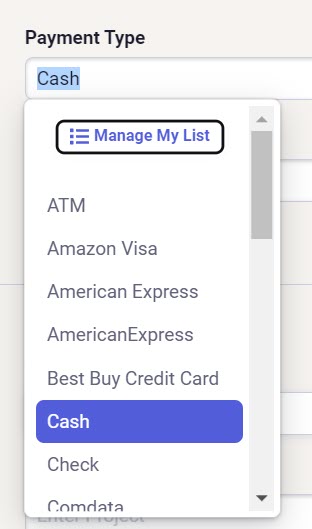
Please Note: You won't see the Manage My Lists button from a field if you haven't added anything to that list. For instance, Payment Type has default list items that cannot be managed, so Manage My Lists only shows up if you have entered a custom payment type.
- When you are viewing an item, click on the field containing the list you wish to edit.
- Select Manage My Lists above the list.
- From there the steps are identical to those above when managing lists from Settings.