Neat Smart Organization System - Adjust Image Preview Setting for Scanning
Please Note: Neat Web App now has ALL of the desktop features, and so much more! You can continue to use this desktop application, however, all new features, improvements, and updates will occur in our Neat web application. Click here to learn more!
Learn how to preview newly scanned images using the Neat Smart Organization System before sending & processing your item in the Neat Cloud. Neat allows you to choose whether you would like to see a thumbnail preview of your scanned items before sending
them for processing. Follow the steps below to learn how to turn image preview on or off.
Turn Image Preview On or Off
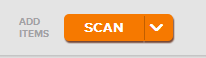
- Click the Scan button.
- A Neat Scan Window will open. In the Neat Scan window, you will see a button beneath the View images before processing option. Slide the button to the right to turn preview image On.
Slide the button to the left to turn preview image Off.


Please note: Having the preview option turned on allows you to make adjustments to the item before it is added to the Neat Cloud. You can make adjustments like adding additional pages to the scan, cropping the image, rotating the image, and more