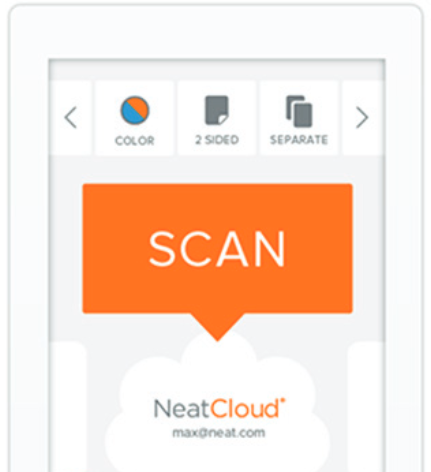
Scan directly to Neat cloud
- On the NeatConnect touchscreen, swipe to the NeatCloud icon and scan your item(s).
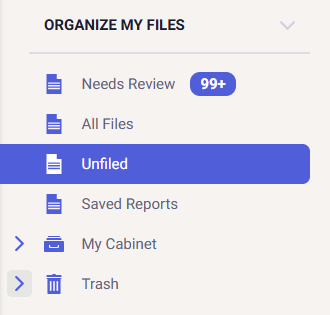
- After the images are processed and uploaded, they will be available in the Neat web app in the Organize My Files section, under the Unfiled filter.
- The Neat cloud service will automatically classify scanned items as receipts, contacts, documents, and more. It will also extract key information from receipts and invoices. You can then move and organize the items in your Neat cloud cabinet as you like.
