Neat Scan Utility - Combine or Separate Items After Scanning
Did you forget to change the scan setting for single or combined pages? No worries! Read on for details on how you can edit items after scanning to combine or separate them before sending them to Neat or saving on your computer.Combine Individual Pages into One Item
Here we'll assume you have 3 separate scanned pages that you wish to combine into one item.Follow the steps below to combine the 3 pages into one item:
- If you wish to select all available images at once, click the Select All icon.
Otherwise, if you wish to select only some of the available images, hold down the Ctrl button on your computer as you click each page to be included in one item. Don't release the Ctrl button until all pages have been selected. You will see a blue outline around the selected pages indicating they have been selected.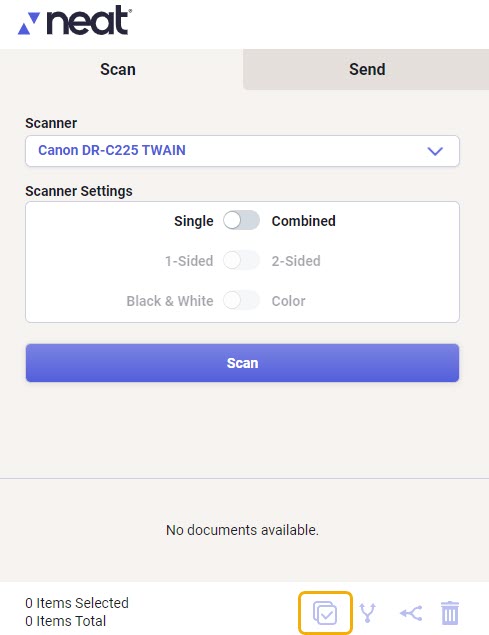
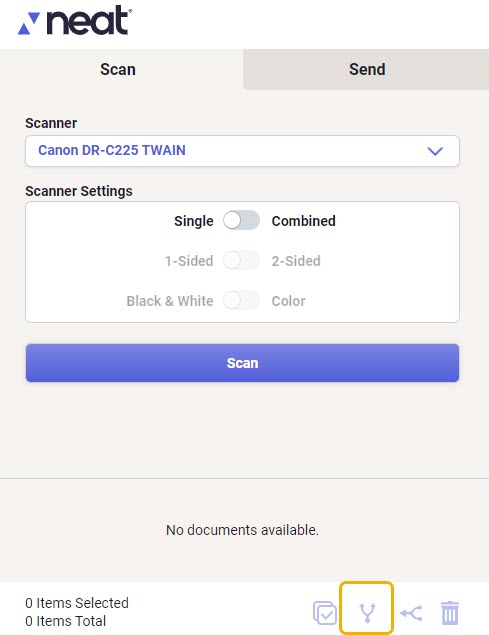
- When all pages have been selected click the Combine button indicated in the screenshot below.
- You will be asked to confirm you wish to combine the selected scans. Click Yes to continue or No to cancel.
- After clicking Yes you will see there is one combined item showing under SCAN. On the right of the image it now displays thumbnails for the multiple pages within that item.
Separate Pages that were Scanned In as a Single Item
Here we’ll assume you have a 3 page item that we wish to separate into three items. The image below shows a single item with 3 pages has been selected. Thumbnails for each page are displayed to the right of the main image.
Follow the steps below to separate the item into 3 separate items, one for each current page.
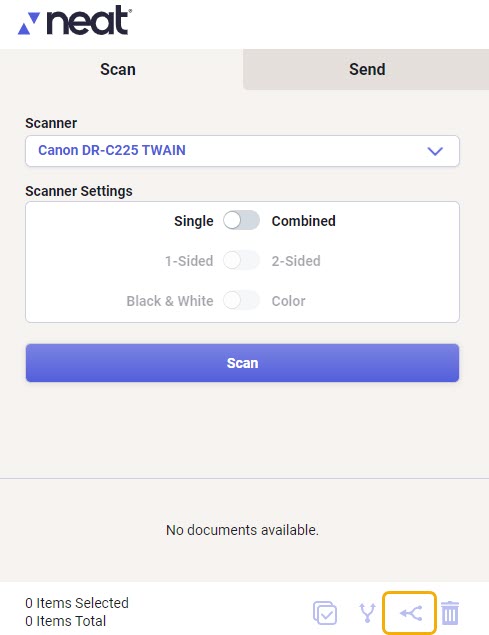
- With the item selected, click the Separate button indicated in the screenshot below.
- You will be asked to confirm you wish to separate the item into individual single page scans. Click Yes to continue or No to cancel.
- After clicking Yes you will see there is one item for each page in the original item. The page thumbnails will display under the SCAN button.