Items & Item Management in Neat
Save various item types in Neat. In addition to Receipts, Contacts, and Documents, Neat also provides item types for Invoices, Bills, Recipes, Statements, Checks, and Mileage items.Please Note: The following FAQs are for the Neat web app or the Neat Desktop App.
Item Management FAQs
- How do I create a new item?
- How do I delete an item?
- How do I move an item?
- How do I edit an item?
- How do I copy an item?
- How do I filter my items?
- How do I sort my items?
- How do I combine or separate items?
- What is the difference between reclassifying and reprocessing my items?
- How do I reclassify my items?
- How do I reprocess my items?
- How do I move items out of the Needs Review grid?
- How do I create a new folder?
- What is the All Files folder?
How do I create a new item?
There are many ways to create new items in Neat:- Email items directly to Neat.
- Capture and upload items via your Neat Mobile App.
- Import items directly to Neat.
- Scan items to Neat using the Neat Desktop App.
- Click Create. Create is located to the upper right corner of the Neat app.
- Select Files.
- Choose the item type you want to create from the list provided.
- A blank record will open. Enter all the information you want included in your new item and select the folder you want the item to be saved in. By default, the item will be saved under the Unfiled folder in the Organize My Files section on the left, if you do not select a folder.
- Select Save from the bottom left corner of the window.
- The newly created item will be created in the folder you selected and a green Item Created window will pop up.
Please Note: If you would like to add an image to an item that you already created, you can do so following the steps to attach an image.
How do I delete an item?
There are many ways to delete an item in Neat.Please Note: When you delete items from your Neat cabinet, they are moved to the trash can and remain retrievable from there until you empty your cabinet’s trash can.
Option 1 – Drag & Drop
- Select the item(s) you want to delete, left-click & hold your mouse button, then drag them to the Trash.
- While hovering over the trash can, release your left mouse button.
- Your item(s) will be moved to the trash.

Option 2 – Delete Item(s) from the Grid
- Put a checkmark in the box to the left of the item(s) you want to delete, then click the trash button under the grid to the bottom left.
- Your item(s) will be moved to the trash.
Option 3 – Delete from Item Edit View
- Double click on an item you want to delete to open the item editor.
- Click the Trash button in the bottom left corner of the editor.
- Your item(s) will be moved to the trash.
How do I move an item?
Neat makes it easy to move items from one folder location to another, helping you keep your information as organized as possible.Option 1 – Drag & Drop
- Select the item(s) you want to move then click and drag them to the folder where you want to move them.
- While hovering over the folder, release your mouse button to drop them in the Trash.
- Neat will reload and your item(s) will be moved to the selected folder.
Option 2 – Move Items from the Edit View
- Double click on an item you want to move to open the item editor.
- Under the Folder drop down, browse your cabinet and select the folder where you want to move the item.
- Select Save from the bottom left hand corner of the editor
- Neat will reload and your item(s) will be moved to the new folder.
Option 3 – Right-click and Move
- Right-click on an item you want to move.
- Select Move from the dropdown list.
- In the Move Item window, click the dropdown, browse your cabinet, and select the new folder into which your item will be moved.
- Select Move when finished.
- Neat will reload and your item(s) will be moved to the new folder.
How do I edit an item?
- Double-click on an item you would like to edit to open the item editor.
- Review the various fields and categories and make changes as needed.
- Once you are done editing your item, select Save in the bottom left-hand corner of the editor.
How do I copy an item?
Copy files to save them in multiple folders or to add more than one expense category to a receipt. You can also see How to Copy Items in the Neat mobile app.- Select one or more files, and right-click to access the action menu.
- Click Copy.
- Select the folder you want to save your copied file(s) in.
- Then click Copy to confirm your changes.

How do I filter my items?
You can filter your items to locate them easily in Neat.- You can filter items from any view in Neat. Locate the items you want to filter from your File Cabinet, Needs Review section, shared folder, or trash from the menu to the left.
- At the top of the window, you will see a button labeled Filters.
- When you click on the dropdown arrow within Filters, you will see multiple options appear.
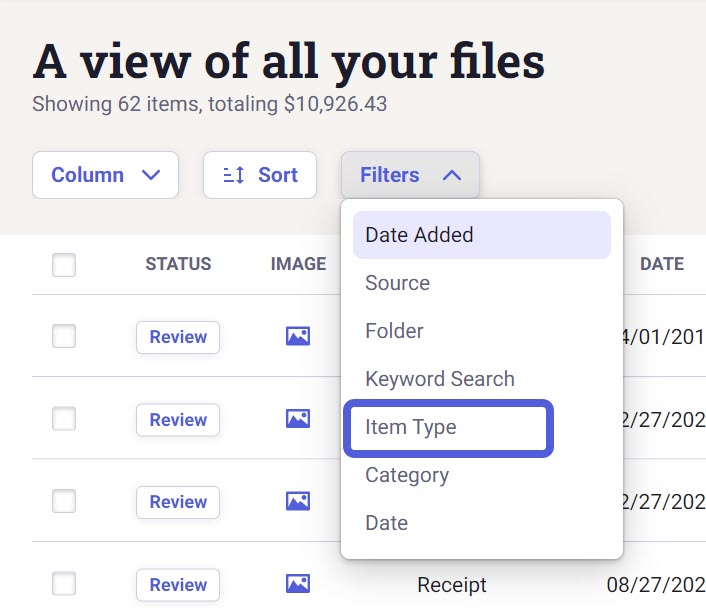
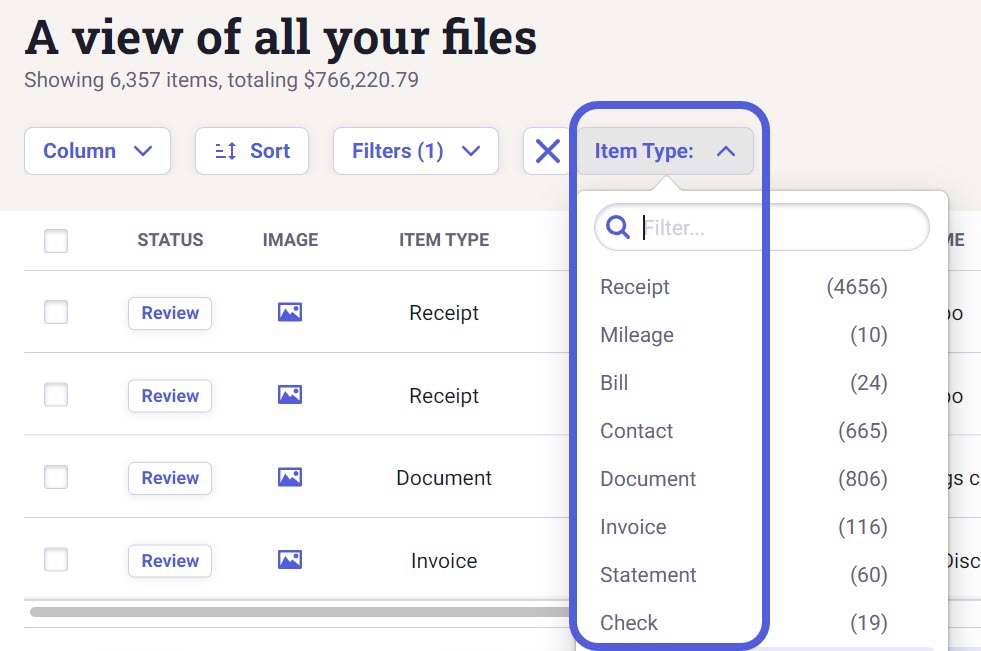
- If you click Item Type, you can select one or more item types to filter only the specific item types you want to view. This is optional but will help narrow your results.
- When you click on the dropdown arrow within Filters, you will see multiple options. Here, you can filter items using the column fields available in Neat. You can filter by multiple categories at one time.
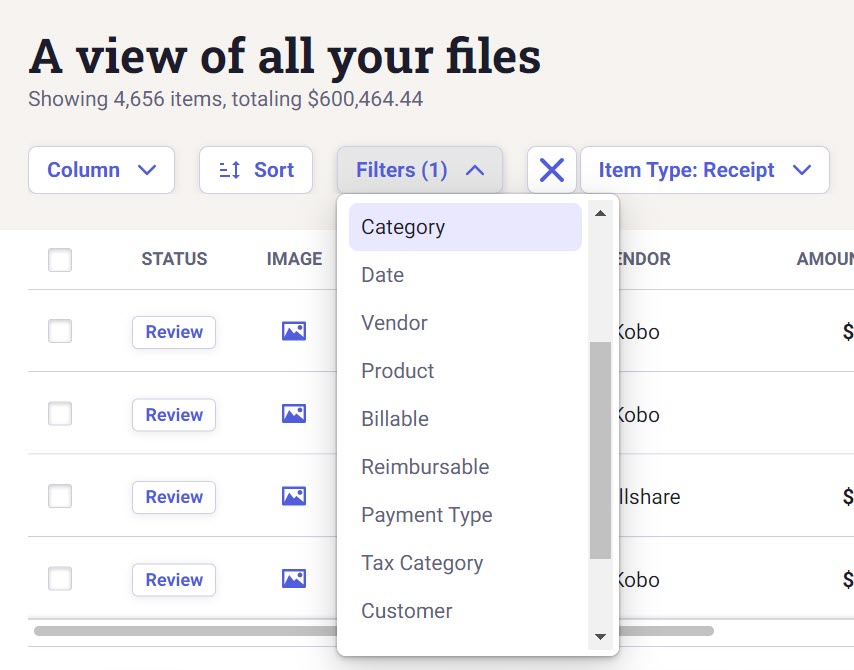
Please Note: The options available in the Filters dropdown will change depending on the what Item Type you have selected. For example, if you select Receipts only, the filter options available will be specifically for receipts only. The options available if you select Documents only will be different. Selecting multiple Item Types will show less options since only common options will be displayed.
How do I sort my items?
Sorting can help you find your items in Neat. By default, items are sorted by the Date Added in descending order.You can sort the order of items displayed in Neat by clicking the top of any column. This will arrange your items alphabetically or numerically based on the column you select. Clicking the top of that column a second time will reverse the order.
To sort by multiple columns:
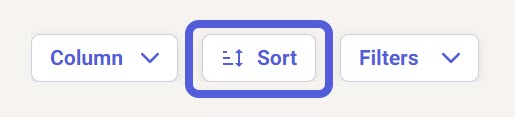
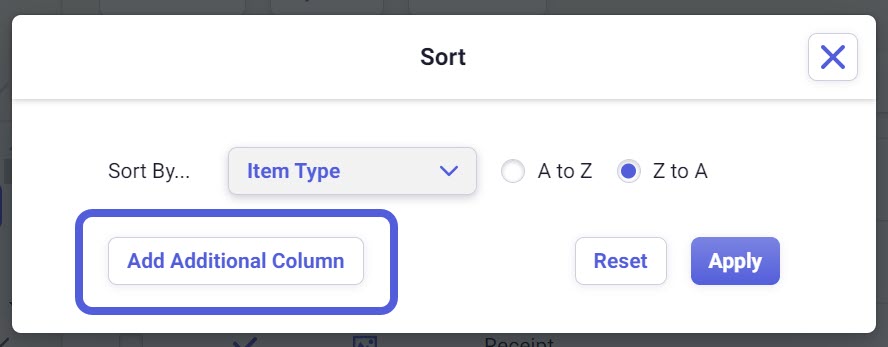
- Click the Sort button.
- This opens a panel where you can set up to three levels of sorting based on the available columns. (Note that setting the Item Type under Filters will change which columns are available.)
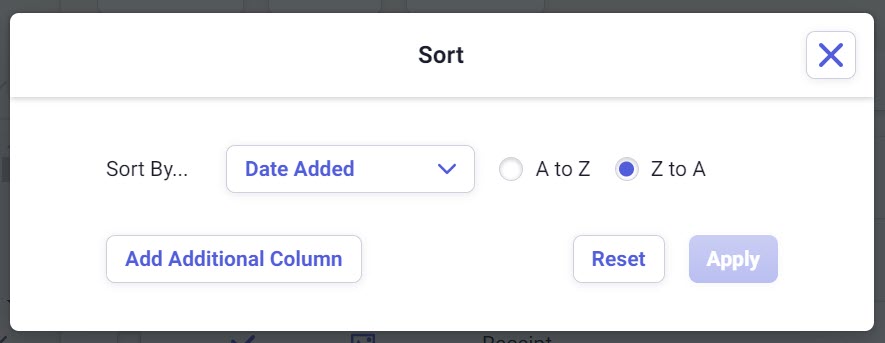
- Select your first column option and choose whether to sort A-Z or Z-A.
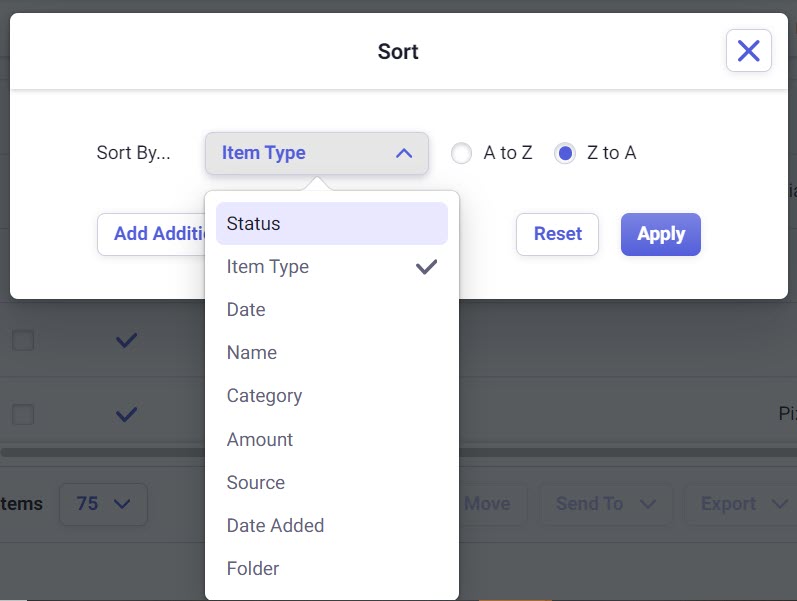
- Click Add Additional Column to set your secondary sorting option. Again, you can set it to sort A-Z or Z-A. You can set a third column option if desired.
- To remove a sorting option, click the trash icon on the right.
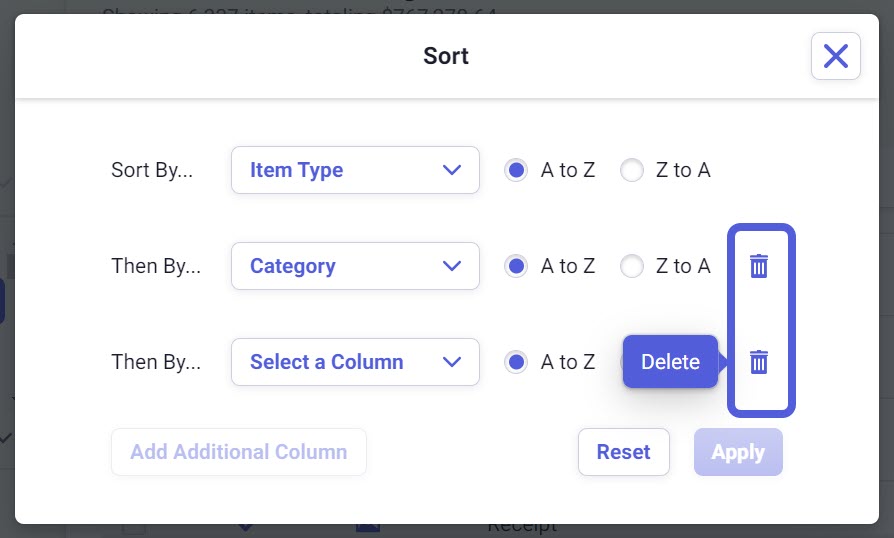
- Click Apply to save your changes and view the results.

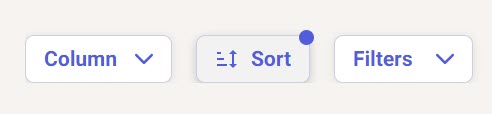
- You'll see a blue dot in the upper left of the Sort button to let you know sorting is currently applied.
Note: Any change made to the columns (adding, removing, clicking the top of a column which sorts by that column) will remove previously set sorting options.
How do I combine or separate items?
Check out this Help Center Article to learn how to combine and separate your items.What is the difference between reclassifying and reprocessing my items?
Both Reclassify and Reprocess let you change the item type for a single item or multiple items, for example, changing a receipt into a bill. The difference is how each option changes the item type:- Reprocessing an item allows you to change your item type AND sends it through OCR processing as if it is a brand new file in your database. OCR (optical character recognition) processing transforms all the words on your item into keyword-searchable terms. It also parses data from receipts, invoices, and bills so data such as the vendor, amount, and date will be populated in the corresponding fields. Reprocessing a file takes longer to complete while the item goes through OCR processing and parsing. Once the item is done processing, it will appear in the Needs Review quick filter for easy access and review.
- Reclassifying an item allows you to change your item type, but SKIPS OCR processing and parsing. Instead, Neat will change the item's type immediately and map your fields and categories to the new item type. Reclassifying a file happens almost instantly, and the change does not appear in the Needs Review quick filter.
How do I reclassify my items?
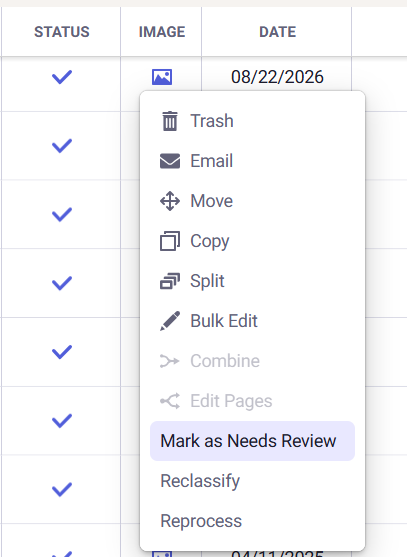
- If you're only reclassifying one item, right-click it and choose Reclassify from the list. You can reclassify multiple items by putting a check next to each and then clicking the ellipsis (...) at the bottom and choosing Reclassify.
- Click Select Item Type and choose the new type from the list.
- Optionally, you can put a check in the box for Also reprocess my item to reprocess your item(s) at the same time.
- Click Continue to finish reclassifying.

How do I reprocess my items?
- If you're only reprocessing one item, right-click it and choose Reprocess from the list. You can reprocess multiple items by putting a check next to each and then clicking the ellipsis (...) at the bottom and choosing Reprocess.
- A dialogue box will open explaining your item(s) will go back through OCR and parsing (if available for that item type).
- Click Continue if you want to reprocess without reclassifying.
- Optionally, you can put a check in the box for Reprocess to do both at one time.
You will need to click Also reclassify my item as and choose an item type from the list under Select Item Type. - Click Continue to finish reprocessing.

How do I move items out of the Needs Review grid?
Needs Review is not a folder per se but a container for any items you have not opened yet. Those items have a status of "unreviewed". To move items out of the Needs Review grid, you simply need to open the item. This allows you to review the item data and make changes as needed. Once opened, the item's status will change and no longer appear in the Needs Review grid.Keep in mind that Needs Review is a status for new items that have not been looked at and is not a folder or location within Neat. It is essentially a filter for any items you have not looked at yet. The Needs Review grid is an easy, convenient way of viewing all items that have not been opened in Neat regardless of which folder they reside in. Once viewed the item will no longer be in Needs Review status. If that item was not already placed in a specific folder, it will appear in the Unfiled section under File Cabinet. You can change an item's location by dragging and dropping it in a folder or right-clicking it and selecting Move.
If needed, you can change the status of a reviewed item. Simply, right-click that item in the grid and select Mark as Needs Review.
Please Note: Moving an item with a status of Needs Review to a specific folder will not remove the item from the Needs Review grid if you have not opened it. When an item's status is updated to reviewed, it will automatically be removed from the Needs Review grid.
How do I create a new folder?
- Right-click on the location where you want to create your new folder and choose New.
- Enter the name of the new folder.
- Confirm the location. You can change the location by clicking the dropdown and choosing a new location.
- Click Create.
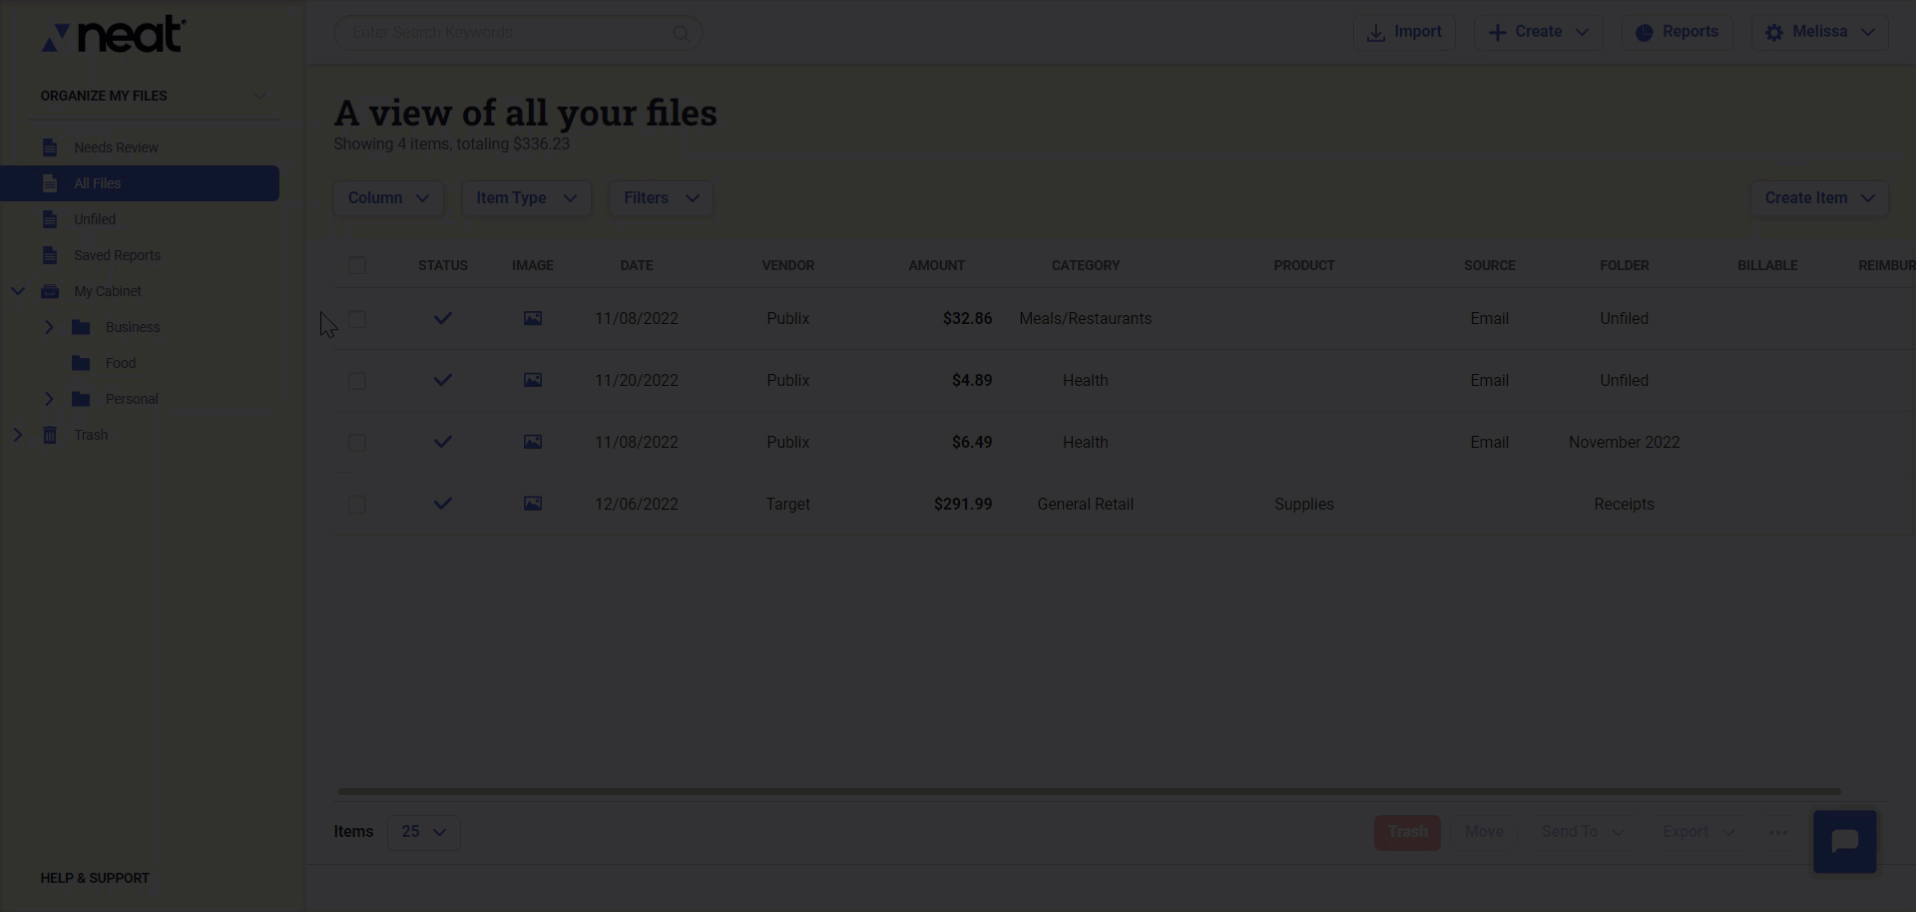
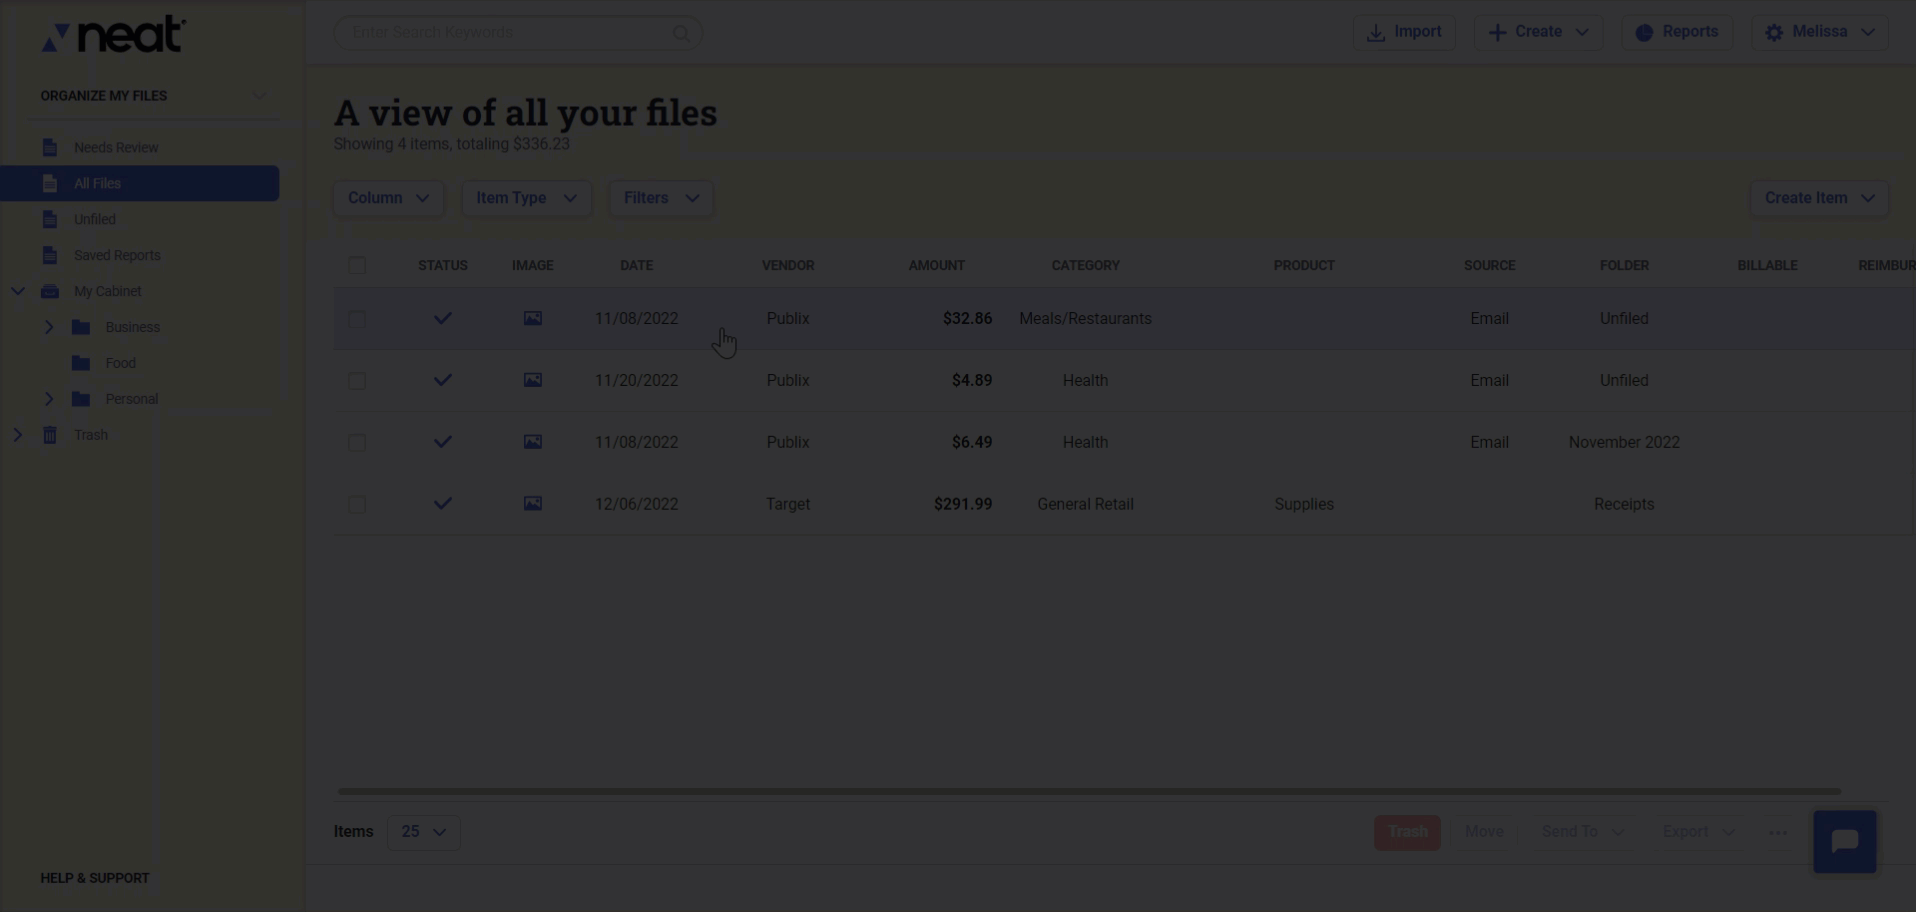
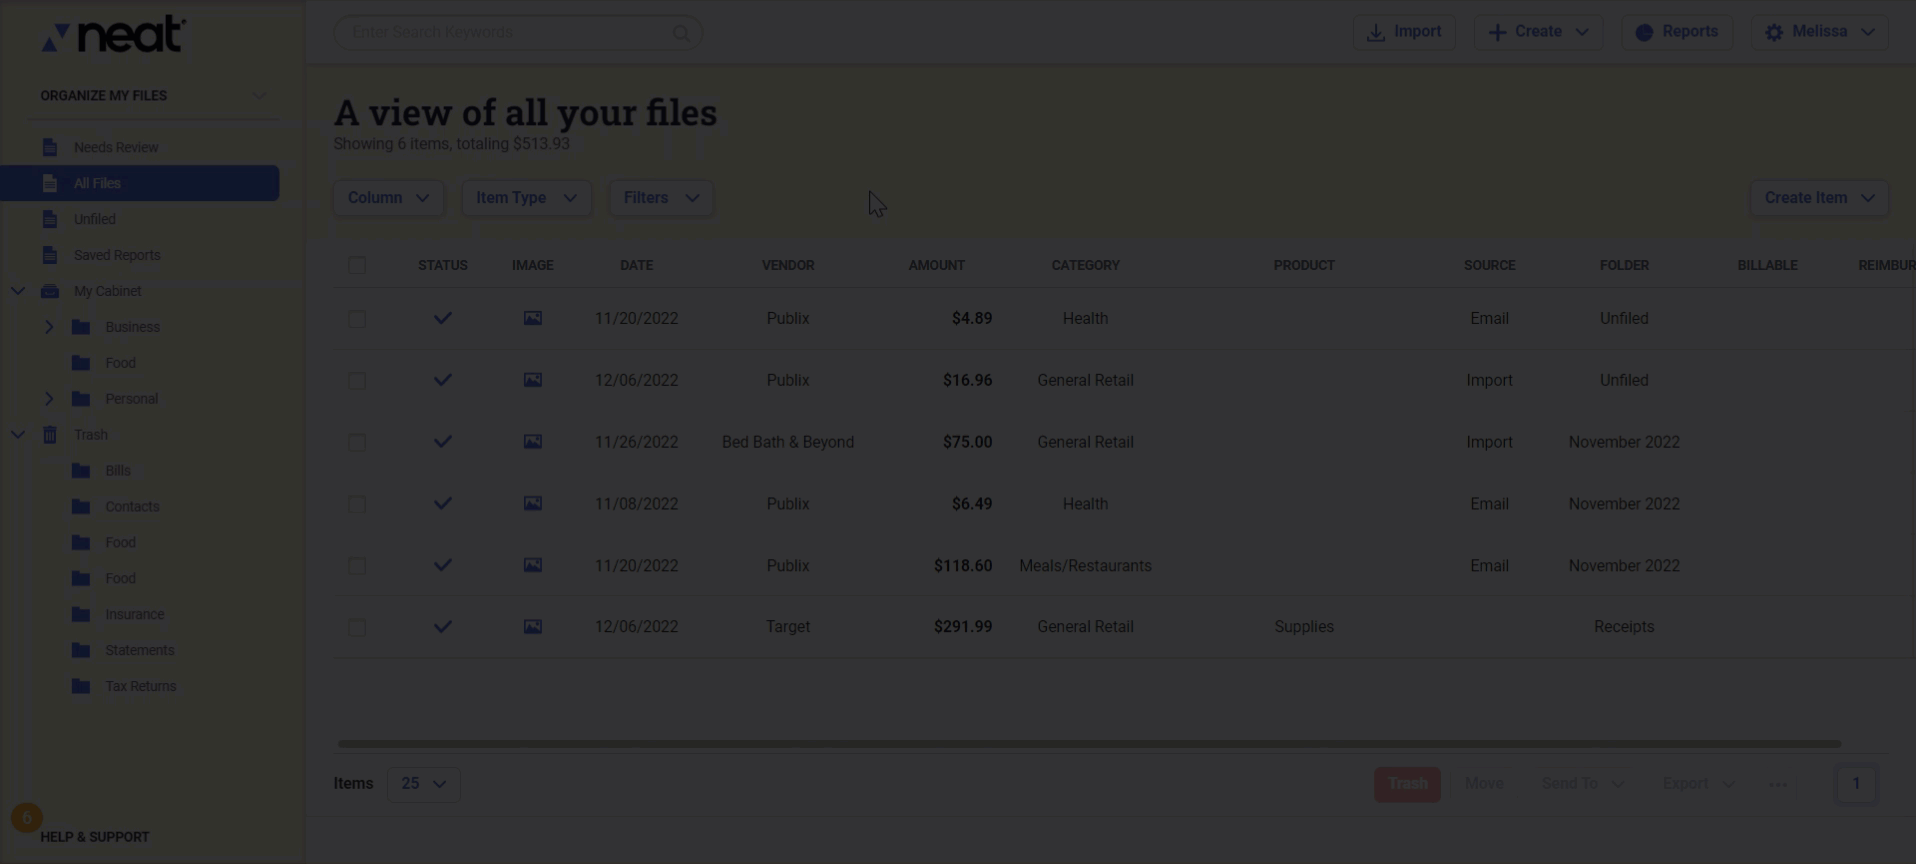
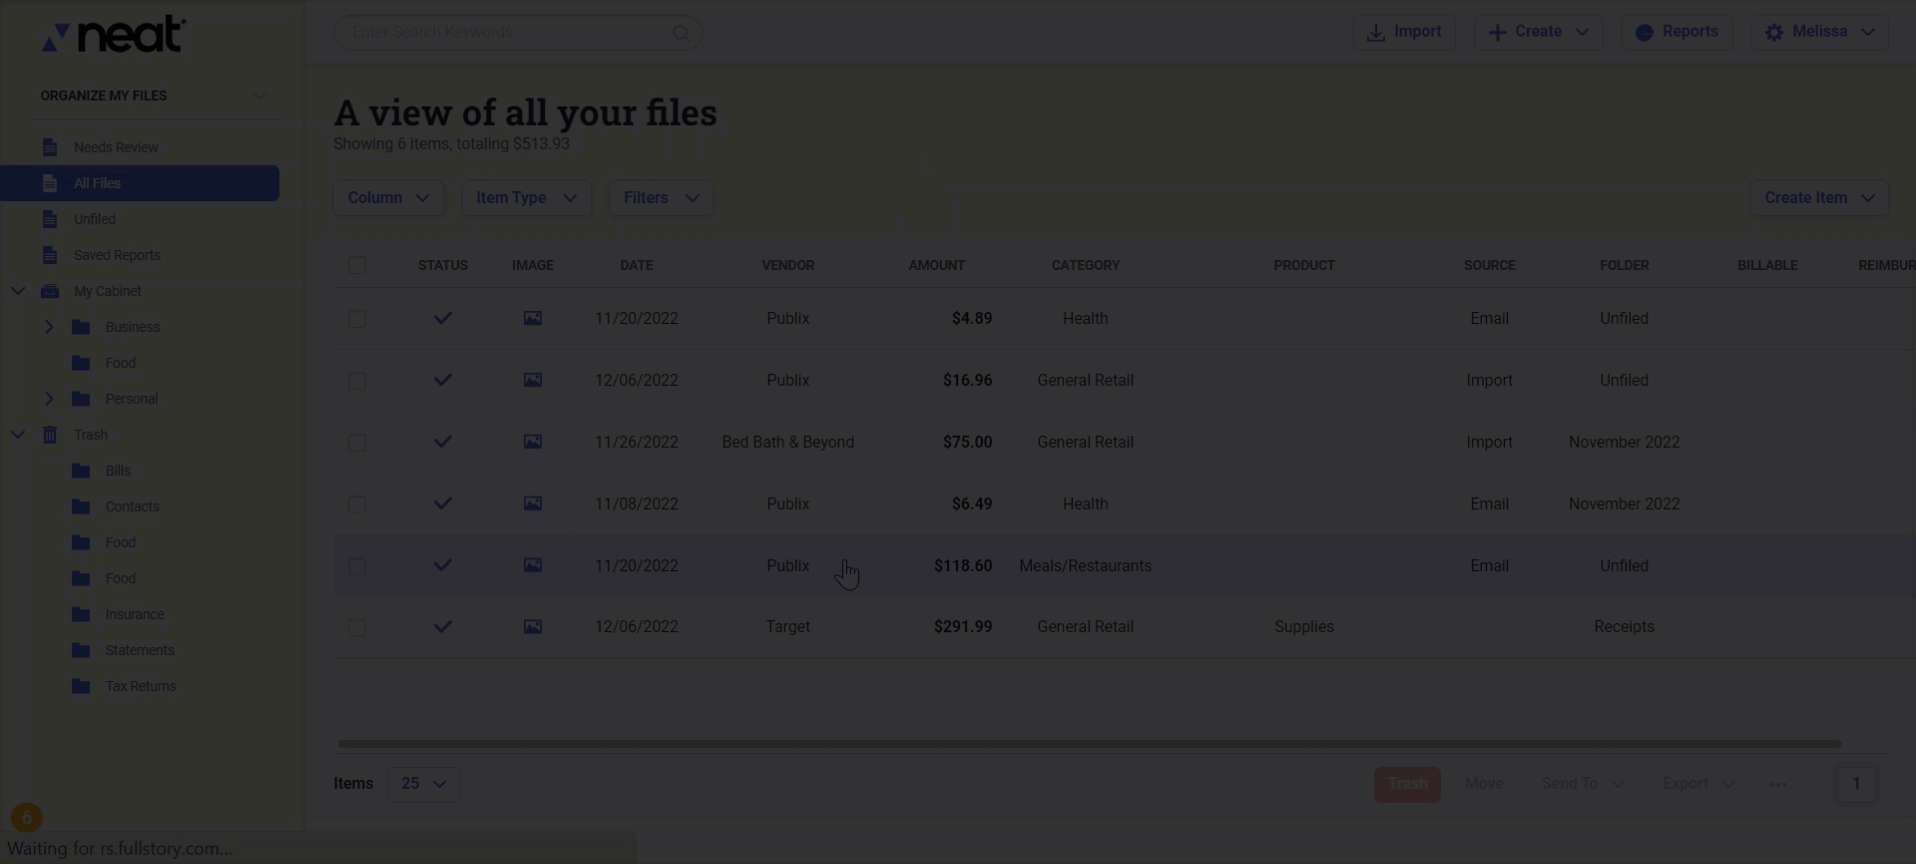
What is the All Files folder?
The All Files "folder" is an unfiltered view that presents every item in your file cabinet on the grid. This "virtual folder" will allow you to filter all items regardless of what parent folder they belong to. The All Files section also supports all filter and grid action items. For example: you can reprocess, send to accounting, export, combine, and separate from the All Files folder as well.
Please Note: As a virtual folder, you will not be able to select this folder from the folder selection when moving items between folders or importing new items into Neat. Also, the All Files folder does not include transactions.