NOTICE: As of October 31, 2023, Neat will no longer process online payments through the invoicing feature. This means that credit card and bank ACH payments will cease to function in your invoices. You will still have the ability to manually record payments in Neat but you won't be able to accept any online payments through invoices created and sent from Neat.
This is a result of our third-party payment processor terminating their service as of December 31, 2023. They are expected to make an announcement regarding future payment processing options at a later date.
Neat is ceasing payment processing at the end of October in order to allow time to resolve any pending payment issues before December 31, 2023.
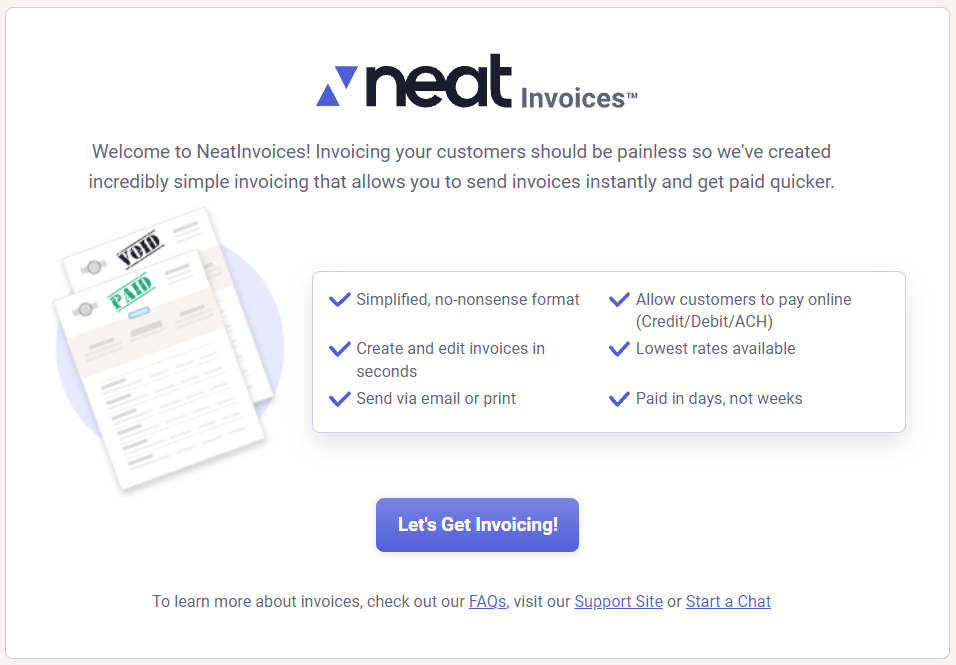
The Online Payments section is your go-to location for handling all matters related to your customer's payments. Within Online Payments you can refund your customers if necessary, run reports and review information regarding chargebacks. Please review the below information to help you navigate through the Online Payments section. For more information about payments, see also Invoicing - Payments
Invoicing - Online Payments FAQs
The features described in the following FAQs will remain available after October 31, 2023.
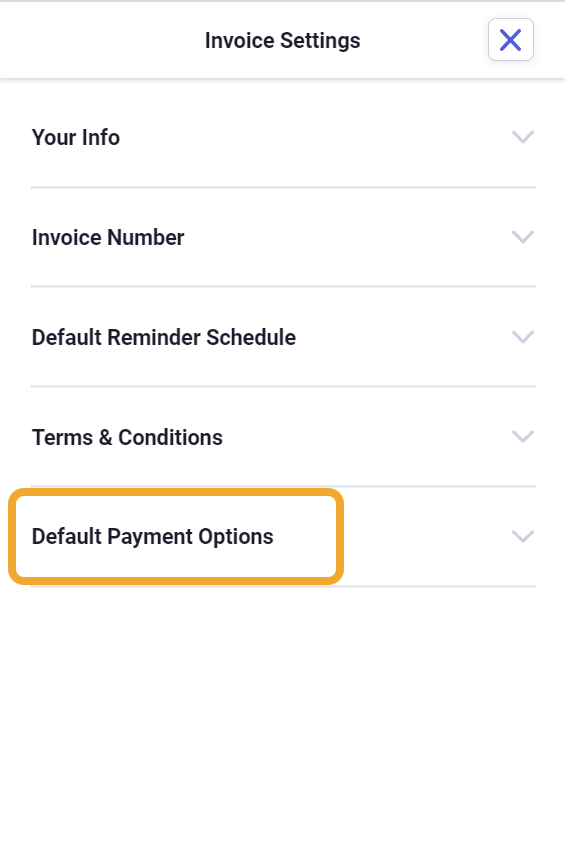
Click on Invoices from the left hand navigation. If you see Welcome to Invoices you have not yet set up Invoicing in Neat. Start with the steps on How to Set up Invoicing in Neat.
From the Invoicing Dashboard, select Settings (gear icon) from the upper right.
Select Default Payment Options. If this is your first time, you will be prompted to Setup Online Payments and create a password.
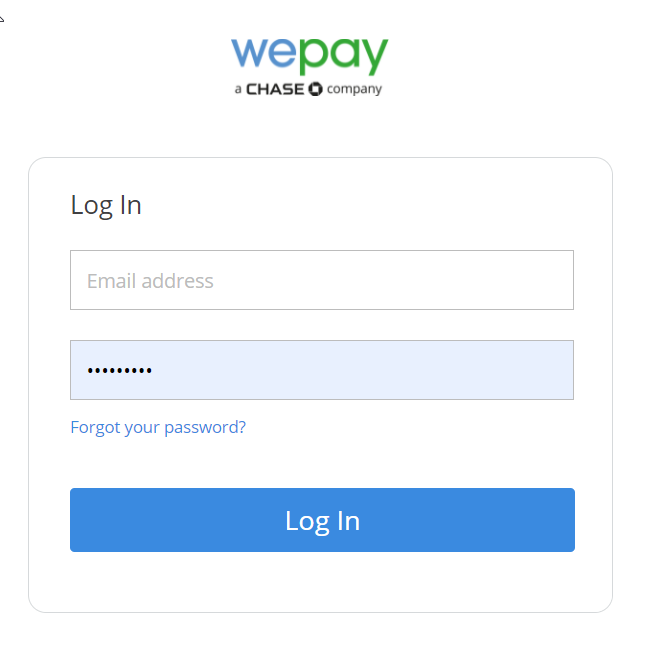
Log in with your credentials to access the Online Payments.
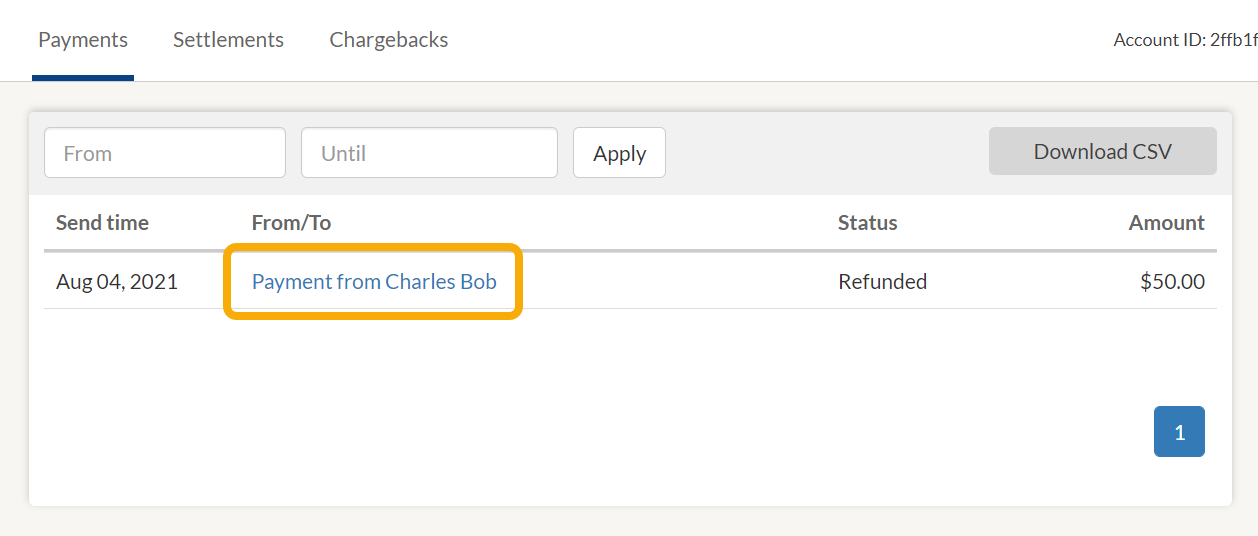
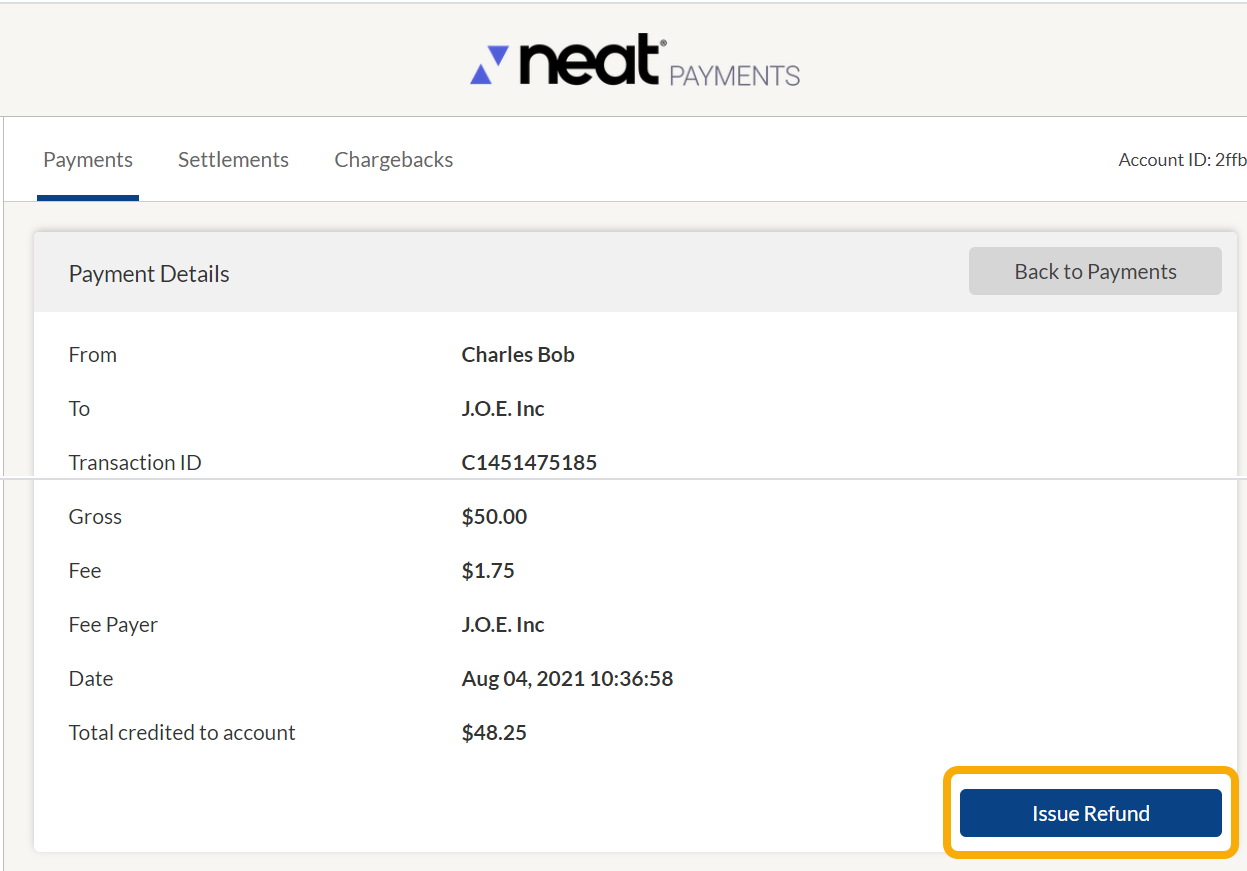
How do I refund my customers in the Online Payments section?
Once you are logged into the Online Payments section, you can locate and select the payment that you would like to refund.
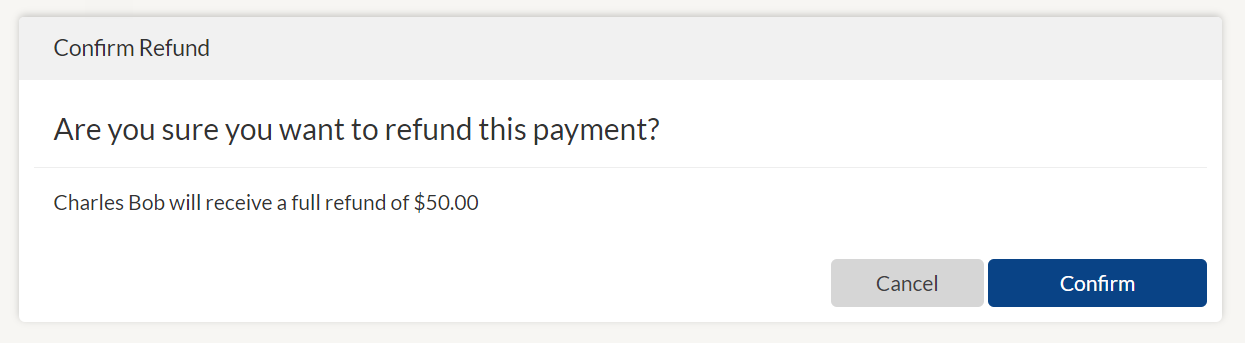
Click the Issue Refund button to initiate the refund.
If you are sure you want to issue the refund, click Confirm.
Refunds take 3-7 business days to be returned to the customer's original payment method.
Please Note: Refunds can be issued through Online Payments within 60 days of payment. If the original transaction is more than 60 days but still within a 365 day window, you can email WePay support at support@wepay.com for the issuing of a paper check to your customer.
Also, if a partial refund is needed, WePay support would have to issue the refund which can be requested via email to supprt@wepay.com.
How do I run reports in the Online Payments section?
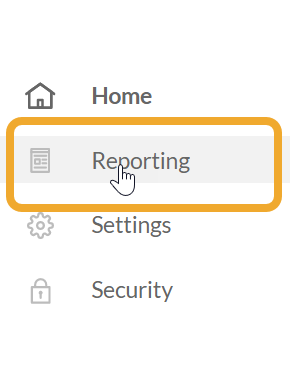
After navigating to Online Payments from your Neat account, choose Reporting from the left hand navigation.
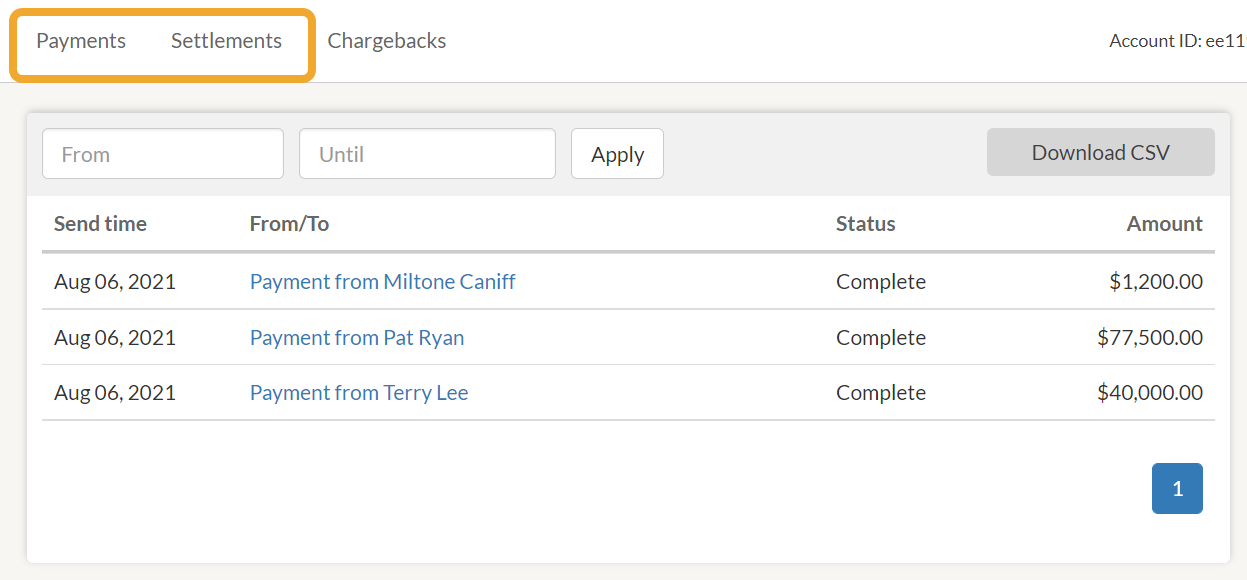
You will then be able to choose between creating a Payments or a Settlements report. A Payments report will show you all payments and payment statuses that have come from customers within the time frame that was selected. A Settlements report will show you the bulk payment of transactions that were transferred to your bank account on file.
From the activity table of your report, you can filter your results further by Total Sales, Disputes, Fees, etc.
Once your report is customized, you will be able to download your report.
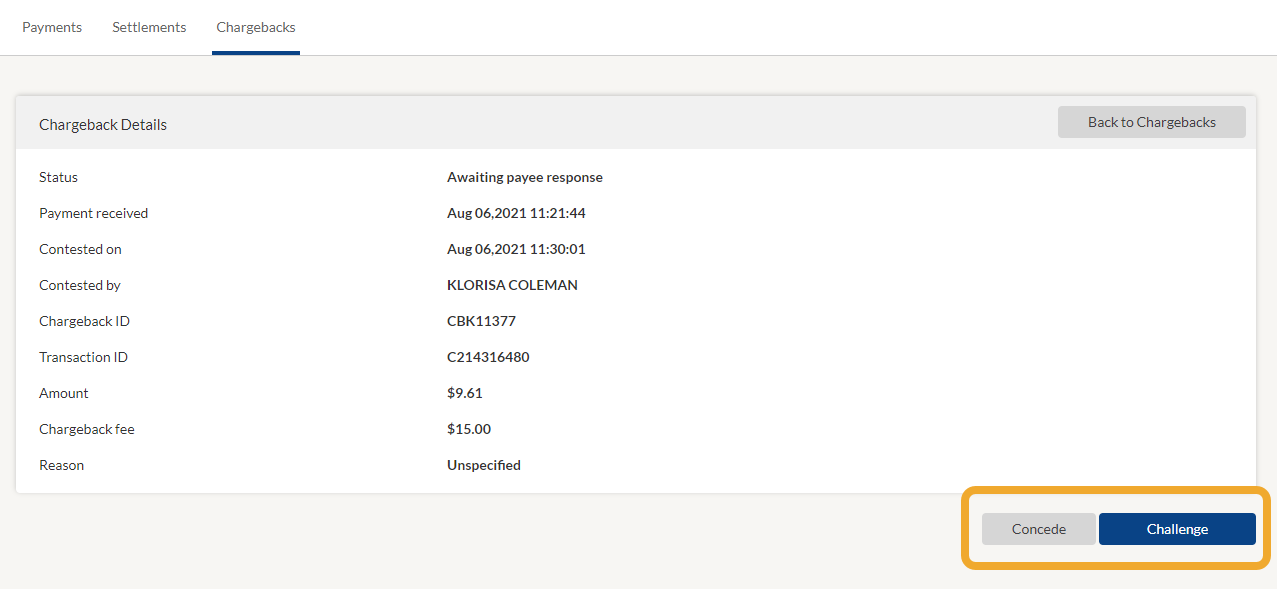
How can I review Chargeback information in the Online Payments section?
Chargebacks can be challenged or conceded within 5 days of the email notification. There is a $15 non-refundable fee associated with chargebacks. Chargebacks can take 30-45 days to be resolved.
After navigating to Online Payments from your Neat account, choose Reporting from the left hand navigation.
Select Chargebacks.
If you have chargebacks in your account, you will be able click on Manage to either Challenge or Concede the chargeback.
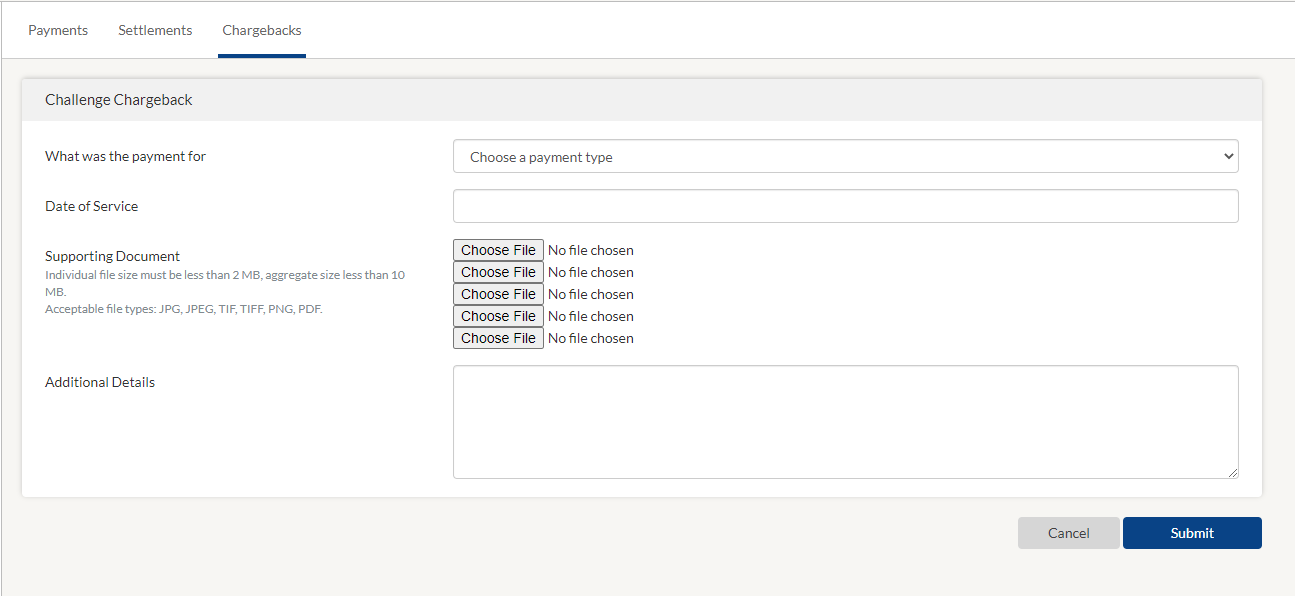
When challenging a chargeback, you will need to submit supporting documents that further prove that the transaction was valid. Supporting documents include signed contracts, receipts, tracking numbers/delivery confirmations, refund policy, etc. These documents can be used to help you win the Chargeback dispute.
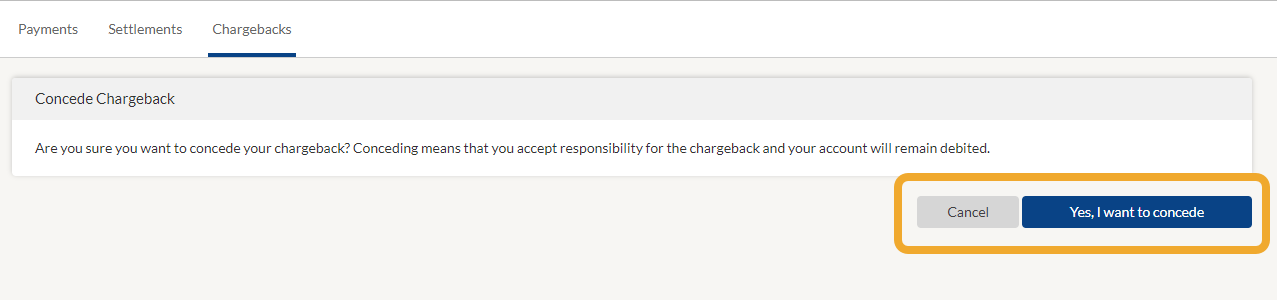
If you choose to Concede the chargeback, you are agreeing that the charge was not a valid charge.
How can I check the verification status of my payout account?
In order to receive funds paid to you by your customers, you must connect a US bank account. When you first connect the account, it will need to be verified before any payments can be deposited. To avoid delays, make sure that the first and last name and business or organization legal name you entered during verification is the same name on file with your bank. You may also be asked to provide further documentation to verify your identity and account even after you have completed initial verification.
To check the current status of your account verification:
Payouts are deposited in the settlement bank account you chose when setting up payments. You can choose to have daily, weekly, or monthly payouts.
Once your settlement bank account is verified, funds will be released based on the payout frequency selected (daily, weekly, or monthly). If the frequency is set to daily, funds will appear in the merchant’s bank account within 1-3 business days.
There is a settlement limit which is held in reserve to protect the account against refund requests, chargebacks and disputes. The default settlement limit is $10,000 per week. You may request a review to raise the limit if you expect higher weekly volumes. Additional documents may be required to process the request. It can take 1-2 business days for documents to be reviewed.
With a settlement limit of $10,000 per week, all funds up to $10,000 will be deposited in your settlement account. As soon as the $10,000 limit is reached, all other funds will be held in reserve and paid the following week. For example, if you receive 3 payments of $5,000 each, then the first two will be deposited and the rest will be held in reserve. If you receive a payment of $15,000 the entire payment will be held in reserve as well as any additional payments for that week.
How do I request an increase of my settlement limit?
The default settlement limit is $10,000 per week. Settlement limits are reviewed periodically and may be increased or decreased over time. You may also request a manual review to raise the limit for your account if you expect higher weekly volumes. Additional documents may be required to process the request. There is no guarantee that the limit will be increased after review.
If you wish to request a manual review to increase your limit please reach out to WePay at support@wepay.com with the following information:
Name of the Parent Company, if applicable
Business Model or industry (MCC) code
Invoicing history - preferably 3-6 months of the most recent processing statements from a previous processor
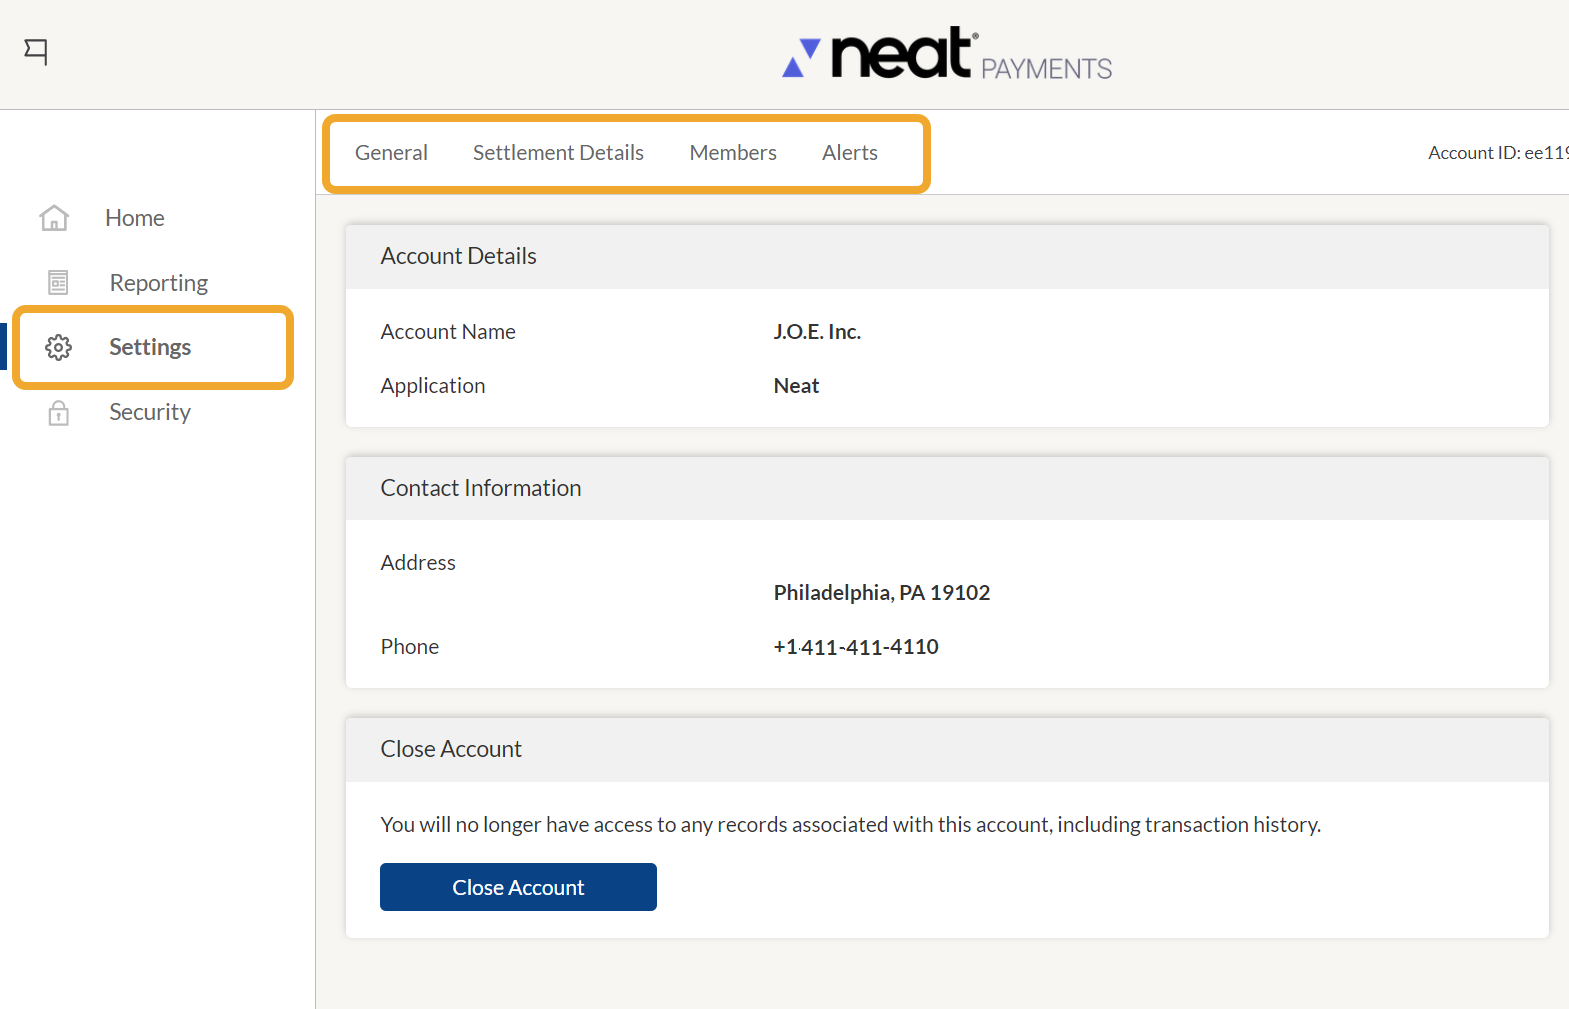
What options appear in Settings in Online Payments?
Selecting Settings from the left side navigation provides you the following options:
General - Displays your Account Details, Contact Information, and the Close Account option. If you choose to close the account, you will no longer have access to any records associated with this account, including transaction history.
Settlement Details - Displays your selected bank account for receiving payouts and settling fees and/or the address you wish to receive checks.
Members - Displays your users with access to the Online Payments.
Alerts - Displays important notices for your account.
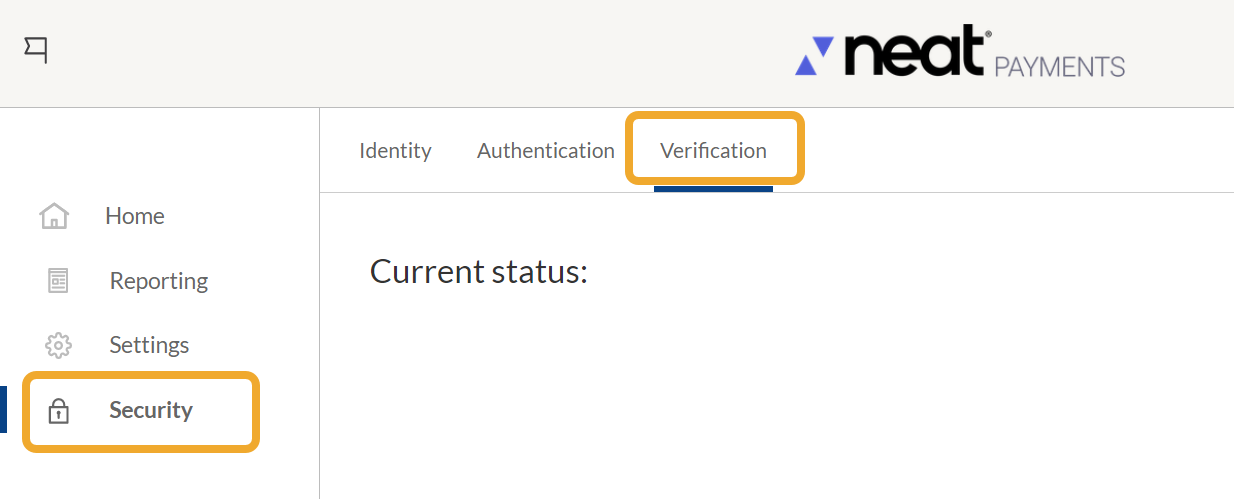
What options appear in the Security section of Online Payments?
Selecting Security from the left side navigation provides you the following options:
Identity - Allows you to edit your email or password credentials.
Authentication - Allows you to add Multi-Factor Authentication to your account to enhance security.
Verification - Provides your account verification status.