Manage Grid Columns in Neat
Neat allows you to customize the way your data is displayed in the grid by allowing you to show or hide available columns.
Please Note: For the following, you will need to be logged in to the Neat web app.
FAQs
- How do I view columns in Neat?
- How do I show columns in Neat?
- How do I hide columns in Neat?
- How do I sort column data in Neat?
- How do I rearrange columns in Neat?
- How do I adjust column width in Neat?
- Can I create custom columns in Neat?
- Which columns are available in Reports in Neat?
- What is the 'source' column used for?
How do I view columns in Neat?
The column headers run across the top of any data grid in Neat and are shaded in a light gray as shown below. Available columns will vary depending on the item type you are viewing. The example below shows columns for receipts.
How do I show columns in Neat?
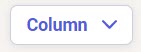
- Click the Columns dropdown.
- To show a column that is not currently displayed, put a check mark in the box next to that column name you want to display. Neat will reload and display the newly selected column.
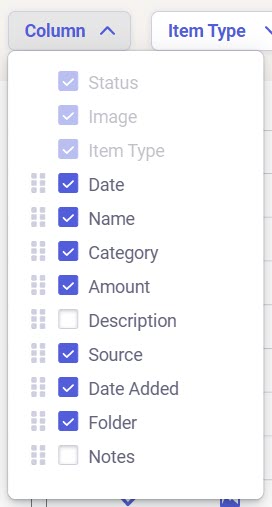
Please Note: The available columns displayed in the drop-down list will vary depending on which View you select. For instance, when you view Receipts you will have columns for Vendor, Total Amount, Sales Tax, etc. While viewing Contacts will have columns for Last Name, Company, Work Phone, etc.
How do I hide columns in Neat?
- Click the Columns dropdown.
- To hide a column that is currently displayed, remove a check mark in the box next to that column name you wish to hide. Neat will reload and display the newly selected column.
Please Note: The available columns displayed in the drop-down list will vary depending on which View you select. For instance, when you view Receipts you will have columns for Vendor, Total Amount, Sales Tax, etc., while viewing Contacts will have columns for Last Name, Company, Work Phone, etc.
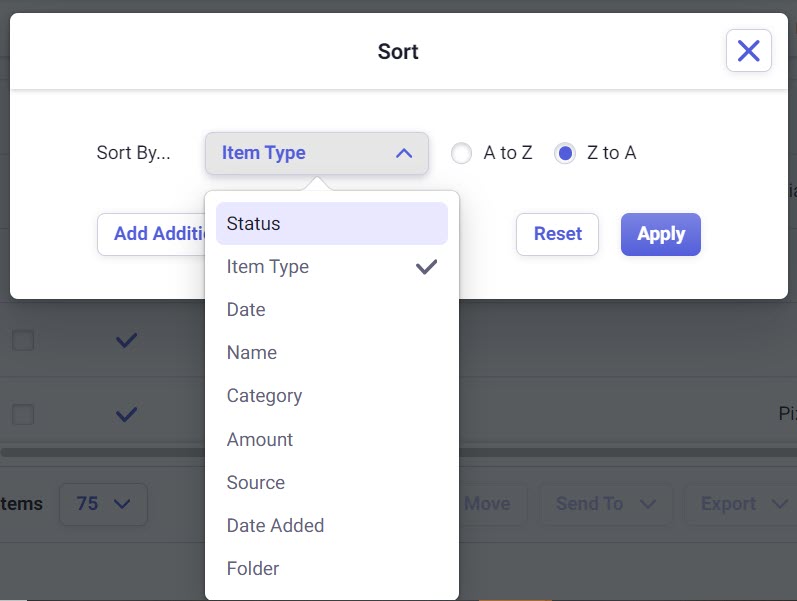
How do I sort column data in Neat?
Sorting can help you find your items in Neat. By default, items are sorted by the Date Added in descending order.You can sort the order of items displayed in Neat by clicking the header at the top of any column. This will arrange your items alphabetically or numerically based on the column you select. Clicking the column header a second time will reverse the order.
To sort by multiple columns:
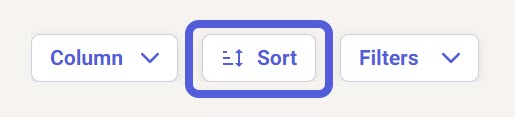
- Click the Sort button.
- This opens a panel where you can set up to three levels of sorting based on the available columns. (Note that setting the Item Type under Filters will change which columns are available.)
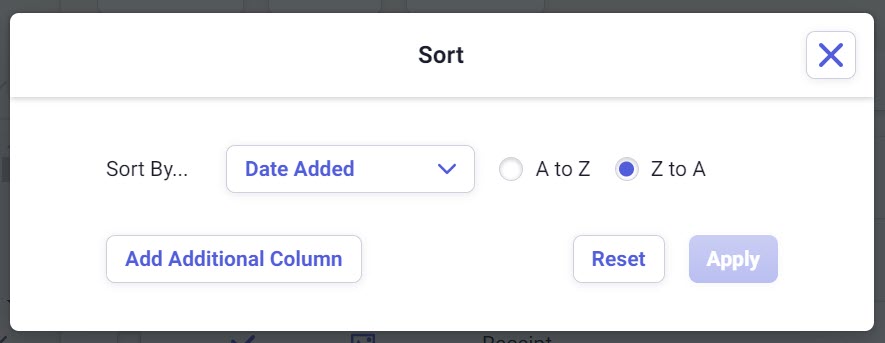
- Select your first column option and choose whether to sort A-Z or Z-A.
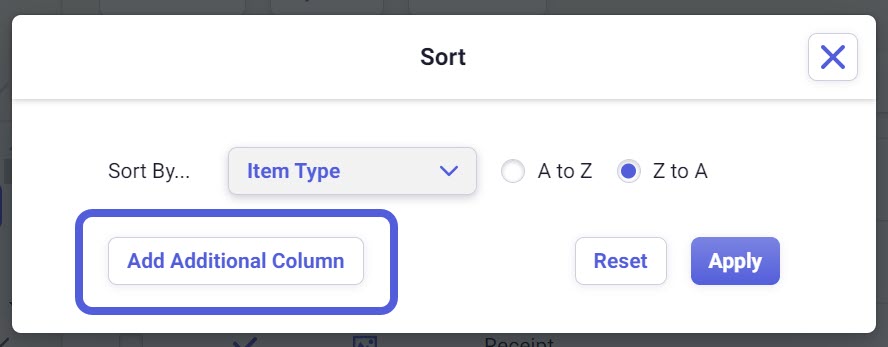
- Click Add Additional Column to set your secondary sorting option. Again, you can set it to sort A-Z or Z-A. You can set a third column option if desired.
- To remove a sorting option, click the trash icon on the right.
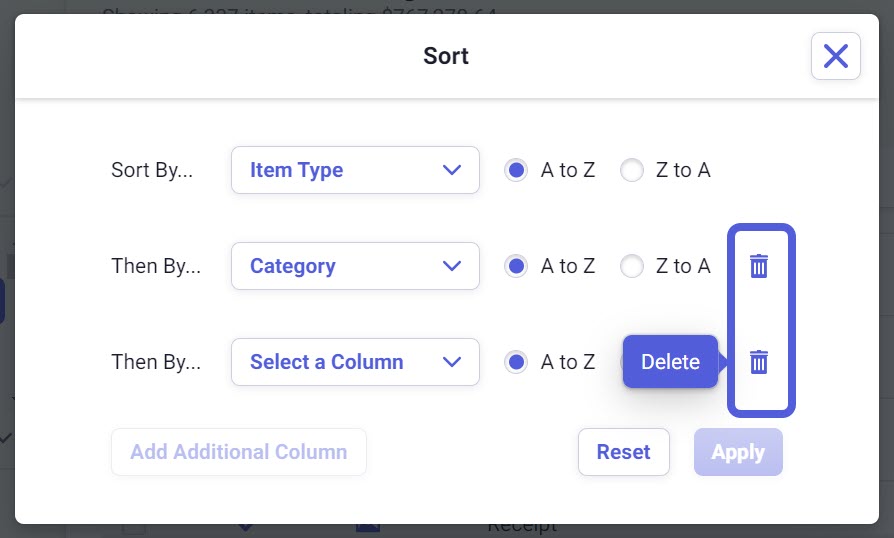
- Click Apply to save your changes and view the results.

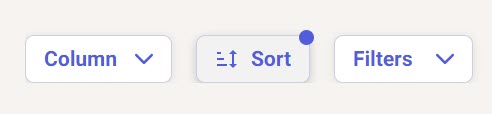
- You'll see a blue dot in the upper left of the Sort button to let you know sorting is currently applied.
Note: Any change made to the columns (adding, removing, clicking the top of a column which sorts by that column) will remove previously set sorting options.
How do I rearrange columns in Neat?
- Click the Columns dropdown.
- To rearrange the order in which you are viewing your columns, click on the 6 square dots in front of the column you want to move, and drag the column up or down in the list to the location you like. Neat will reload and display your columns in this new order.
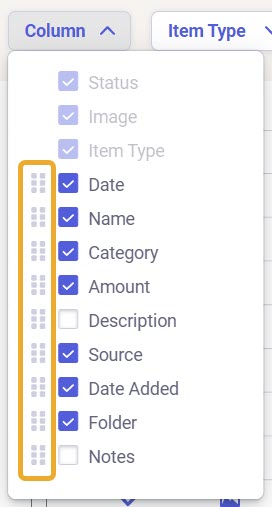
Please Note: The columns for Status, Image (in Cabinet), Item Type (in Cabinet), and Matched (in Transactions) are fixed columns which cannot be rearranged.
How do I adjust column width in Neat?
Adjust column widths using the headers at the top. Select the column divider line to the right of the column header you want to resize. When you place your cursor on the line between two column headers, a thicker blue line will appear if the columns are adjustable. Simply click and drag the blue line to set the width as desired.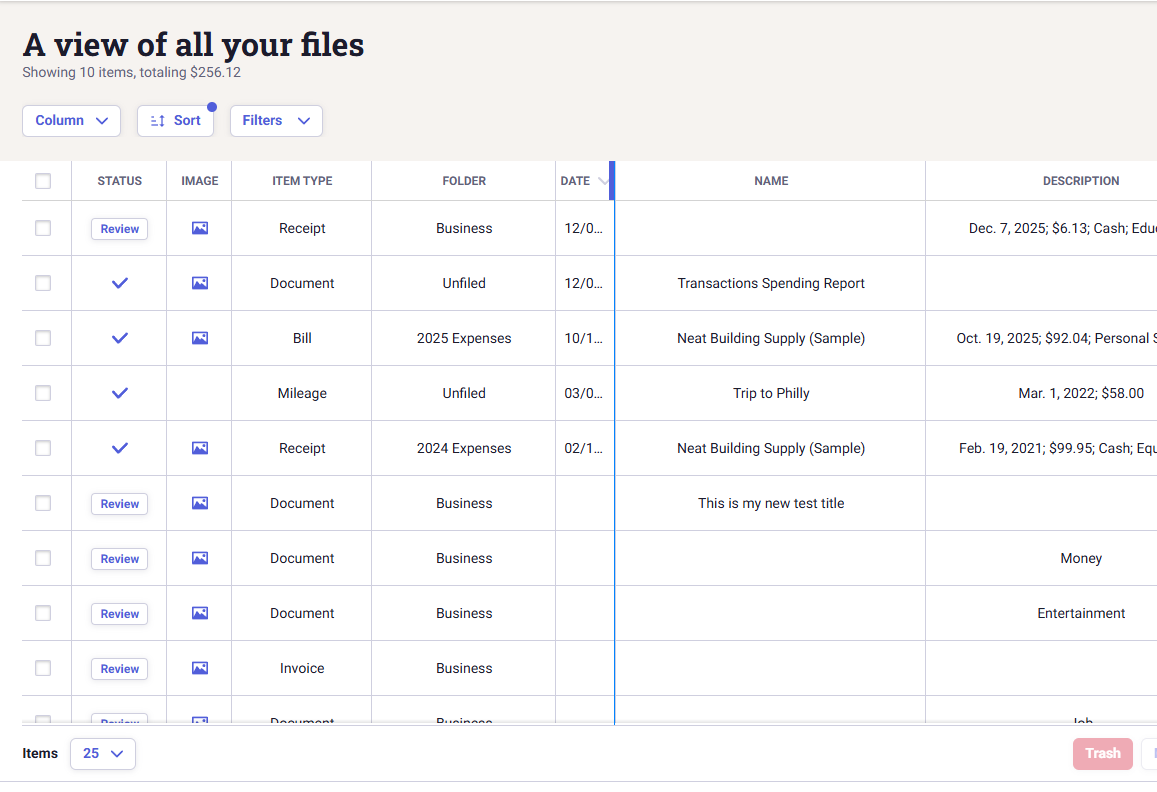
Please Note: The columns for Status, Image (in Cabinet), and Matched (in Transactions) are fixed columns; the width cannot be adjusted for fixed columns.
Columns with a check box (i.e., Personal in the Transactions section) do not allow for adjusting the width.
Columns with a check box (i.e., Personal in the Transactions section) do not allow for adjusting the width.
Can I create custom columns?
Custom columns are not available at this time. However, this feature is being considered as a possible future update.Which columns are available in Reports in Neat?
Please Note: Receipt categories are the only categories available for reports.
- Vendor
- Category
- Date (Expenses Date)
- Payment Type
- Sales Tax
- Amount
- Tax Category
- Reimbursable
- Notes (Comments)

What is the 'source' column used for?
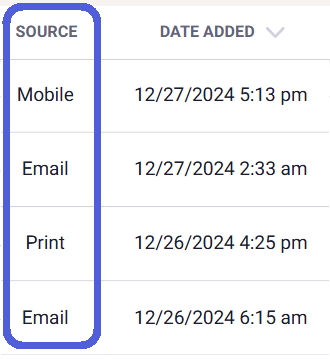
There are many ways to add items to Neat, the source column helps you keep track of where each of your items was added from. The source column can only be viewed from the grid view and cannot be edited. The source column is a newer Neat feature that was added on 9/6/2019, therefore only items added to Neat after 9/6/2019 will have a source listed. All items added before 9/6/2019 will have a blank value for source.