Reviewing your invoices regularly helps ensure your financial records stay accurate and up to date. In this article, you’ll learn how to quickly filter your file cabinet to view only invoices, apply simple review strategies to work through them efficiently, and reclassify one or more invoices as bills when needed, without reprocessing. These tips are especially helpful when cleaning up historical data, correcting misclassified items, or resuming a review after a break, so you can stay organized and confident in your records.
The terms Bill and Invoice are often used interchangeably; however, in Neat the terms have very specific meanings.
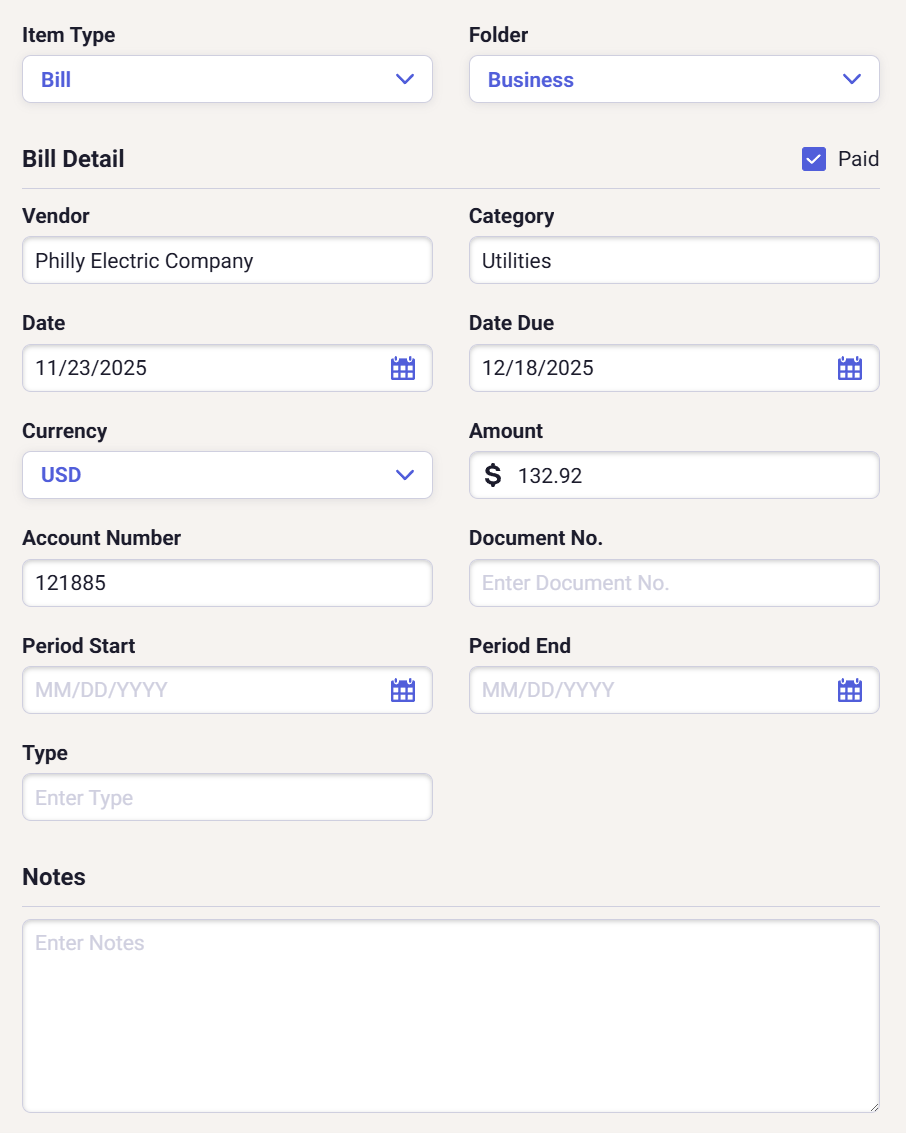
Bill: Something someone, typically a vendor, sends you in order for you to pay them. Also referred to as a payable.
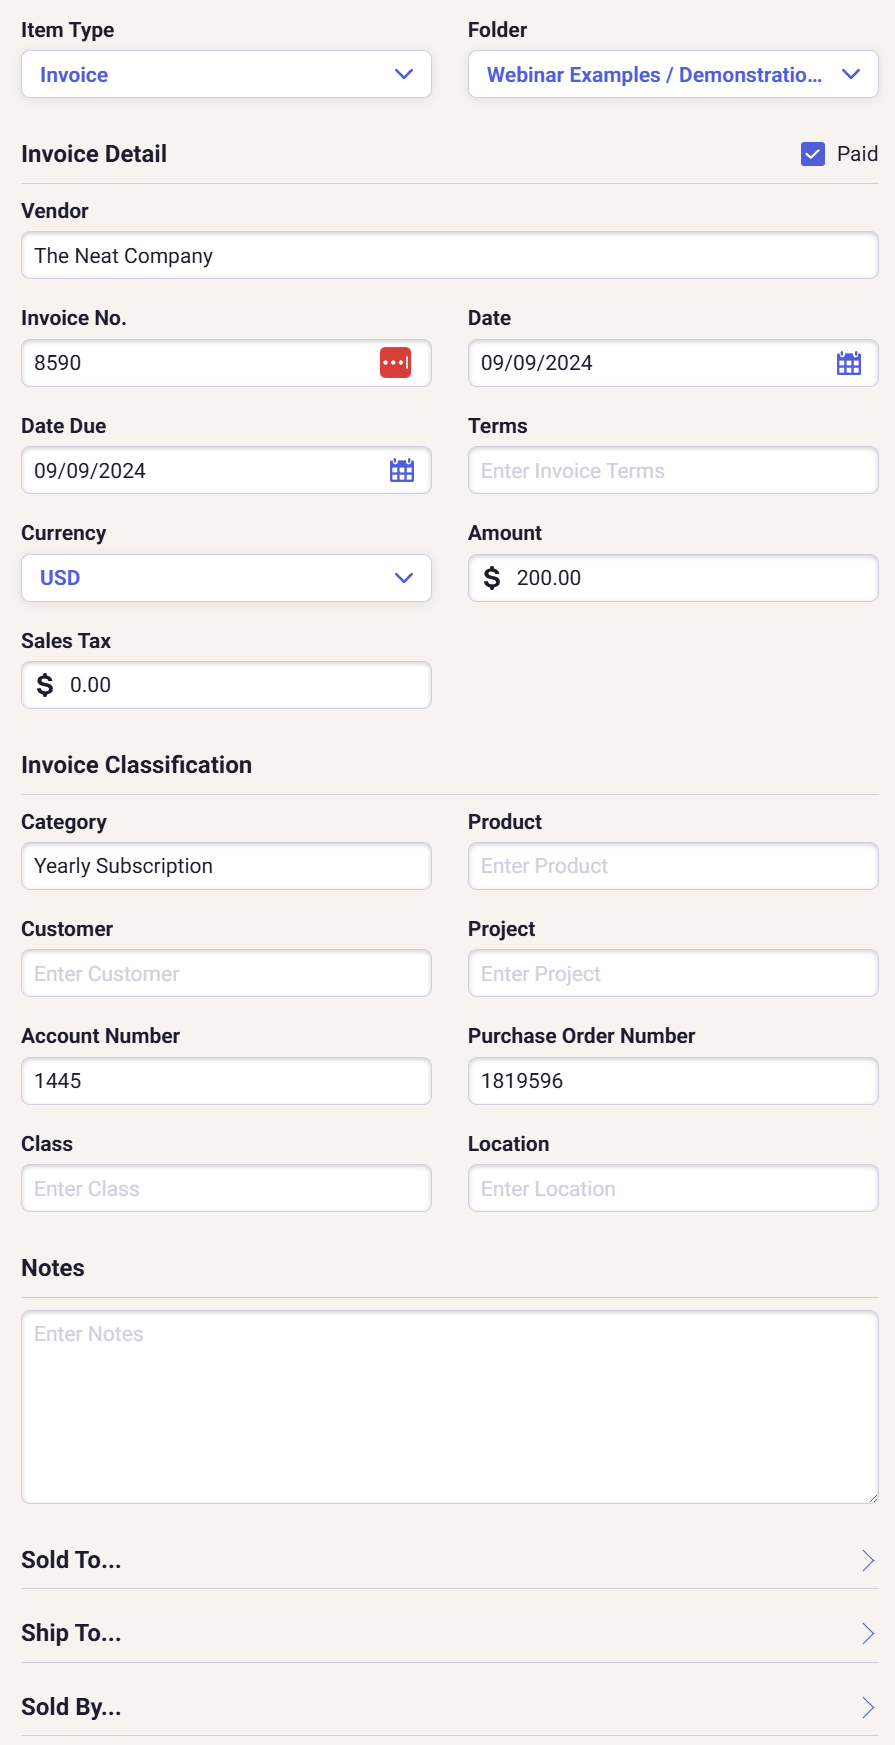
Invoice: Something you send to someone else, typically a customer, in order for them to pay you. Also referred to as a receivable.
Quickly Filter and Find Your Invoices
Neat filters are powerful and help you to locate certain files in your File Cabinet with ease. To find all your invoices in your Neat File Cabinet, regardless of the folder they are in, follow the steps below.
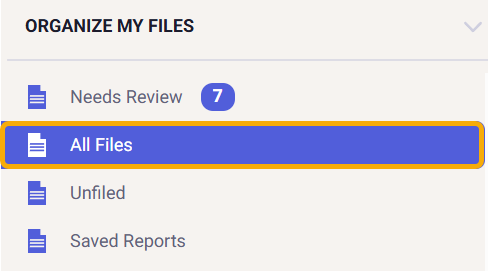
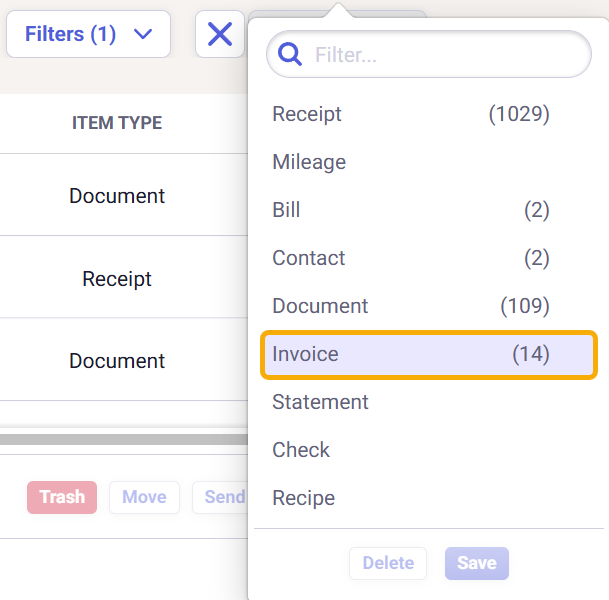
Open all your files from the All Files filter.
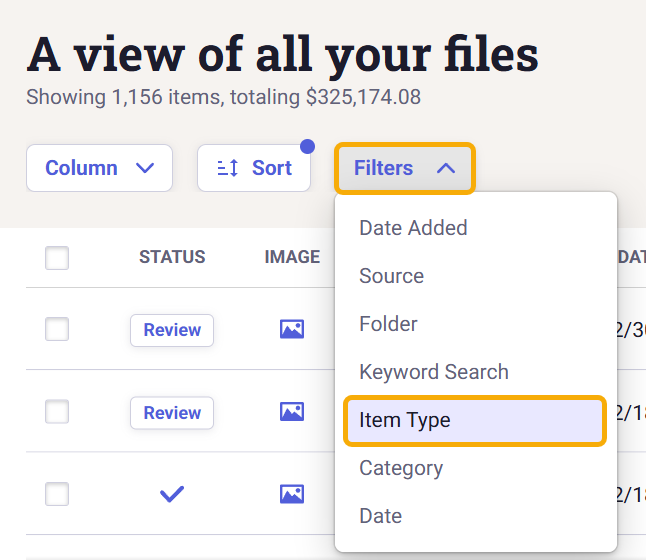
Click on the Filter drop-down and add a filter for Item Type.
Select the Invoices item type. Neat shows you how many invoices there are in your database in the parentheses next to the invoices filter.
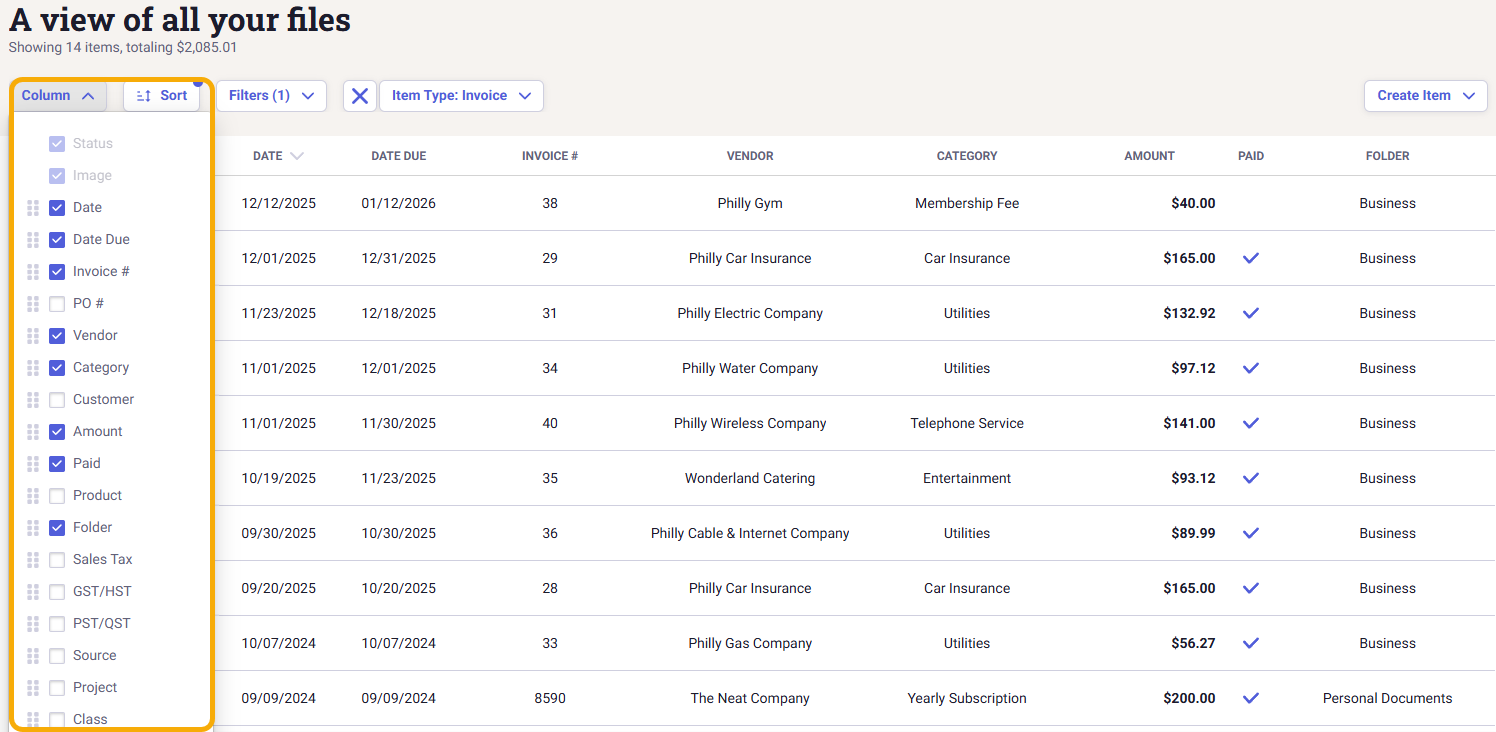
You can now see all the invoices in your database in the grid and can now add invoice-specific columns and file fields to the grid layout.
Neat Pro Tip: When reviewing invoices, sort them by the Date column in ascending order (oldest to newest). This creates a clear, chronological review flow and makes it easy to note the last invoice date you reviewed. If you need to pause and return later, you can quickly pick up where you left off, without rechecking invoices or missing any along the way.
If you are missing data in your date columns, then sort by whatever field is most commonly populated.
Reclassifying Invoices to Bills
You may discover that you have some bills currently saved as invoices in Neat. We recommend reclassifying any bills that have been saved as invoices so your data accurately reflects how money flows in and out of your financial accounts. Using the correct item type ensures your payables and receivables are tracked properly, keeps your reports accurate, and allows Neat to deliver the most meaningful insights.
In Neat, item types are defined as follows:
Bill (Payable): Something a vendor sends you that you are responsible for paying.
Invoice (Receivable): Something you send to a customer to request payment.
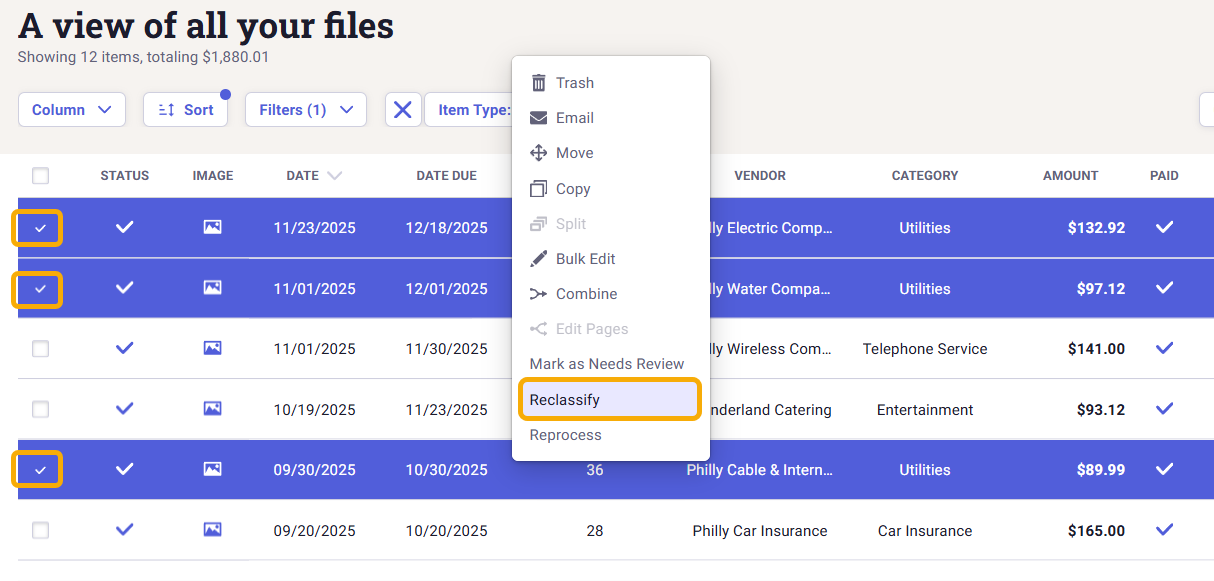
Select one or more invoices, then right-click and select Reclassify.
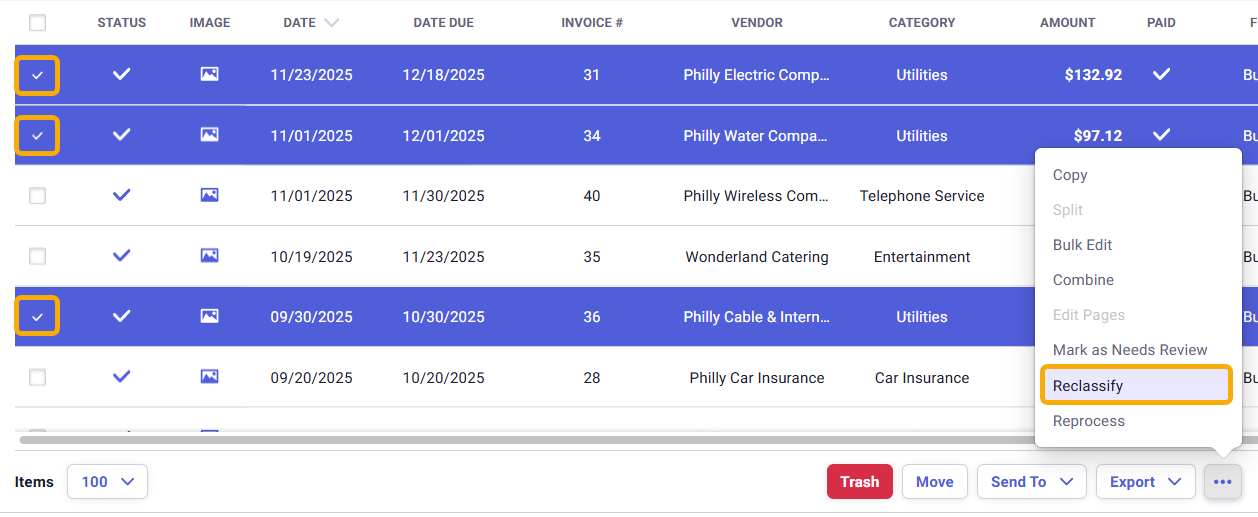
OR you can select one or more invoices, then click [...] and select Reclassify.
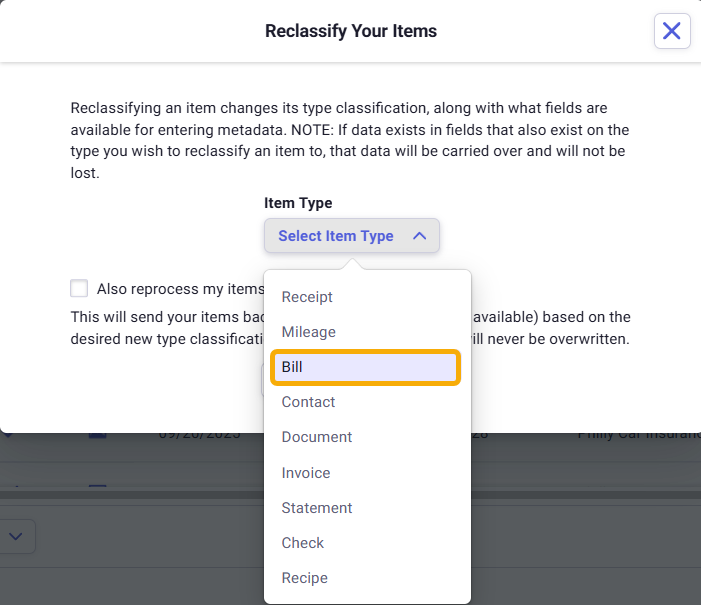
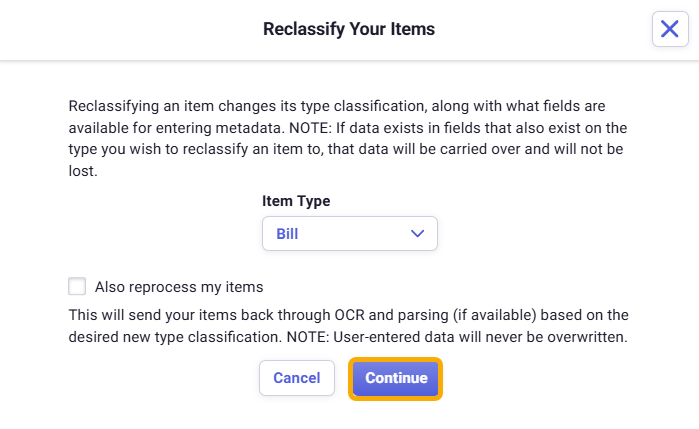
In the Reclassify Your Items window, select Bill from the Item Type drop-down.
Only check the box Also reprocess my items if you want these files to be reprocessed by Neat as if it's a brand new file. If you check this box, the file will be sent through OCR and parsing again, and will take longer to reclassify your invoices. Once processing is complete, the file will appear in your Needs Review filter for review.
If you leave the checkbox blank, your items will not be reprocessed through OCR and parsing and will be viewable immediately after reclassification. Invoice fields such as vendor, date, date due, customer, project, etc., will automatically migrate over to the bill.
 You can now see all the invoices in your database in the grid and can now add invoice-specific columns and file fields to the grid layout.
 Your item(s) will be reclassified as a Bill.