NEW! Neat Desktop Application
We are thrilled to welcome you to the launch of our new all-in-one desktop application! This innovative application merges the Neat Scan Utility with the Neat Web Application, creating a seamless and integrated experience for all our users.Previously, Neat required two applications: one for scanning and sending files from your computer, and another (the Neat Web Application at app.neat.com or the Neat Mobile app) for accessing and managing your files.
With the new Neat Desktop application (NDA), you can now scan, access, and manage your files all in one place, directly on your computer. This new all-in-one desktop solution provides the convenience of having all Neat tools in a single application!
When you’re away from your computer, don’t worry—you can still access all your data on the Neat Web Application at app.neat.com or the Neat Mobile Application. This feature isn’t going away!
Neat Desktop Application FAQs
- I have the Neat Scan Utility installed already, do I have to transition to this?
- Can I use the Neat Desktop Application without a Neat subscription?
Neat Desktop Application How Tos
- Download and install the new Neat Desktop Application
- Scanning using the new Neat Desktop Application
- ScanSnap Scanners & the Neat Desktop Application
- Print-to-Neat & the Neat Desktop Application
- Report a problem
I have the Neat Scan Utility installed already, do I have to transition to this?
Yes, that's correct! The Neat Desktop Application is designed to eventually replace the Neat Scan Utility, offering a comprehensive, all-in-one solution for managing your files. With the new Neat Desktop Application, you’ll have all the scanning capabilities of the Neat Scan Utility, plus enhanced features that allow you to organize and access your documents seamlessly from your desktop. This unified application brings all of Neat's powerful tools together in one place, providing greater convenience and efficiency for managing your files directly on your computer.
Can I use the Neat Desktop Application without a Neat subscription?
Yes! Just like Neat Scan Utility, you can use the Neat Desktop Application with or without a Neat Subscription.
- With a Neat subscription - Scan and save files to your Neat database or scan and save files to your computer hard drive.
- Without a Neat subscription - Scan and save files to your computer hard drive.
Download and install the Neat Desktop Application
BEFORE You Install the Neat Desktop Application
Before installing the Neat Desktop Application, please follow these two steps if you currently have the Neat Scan Utility installed:
- Save any pending scans in the Neat Scan Utility
Open the Neat Scan Utility and check the pending scans window (highlighted in orange) for any scans. If there are scans here, then send them to your computer desktop or Neat Cloud account.
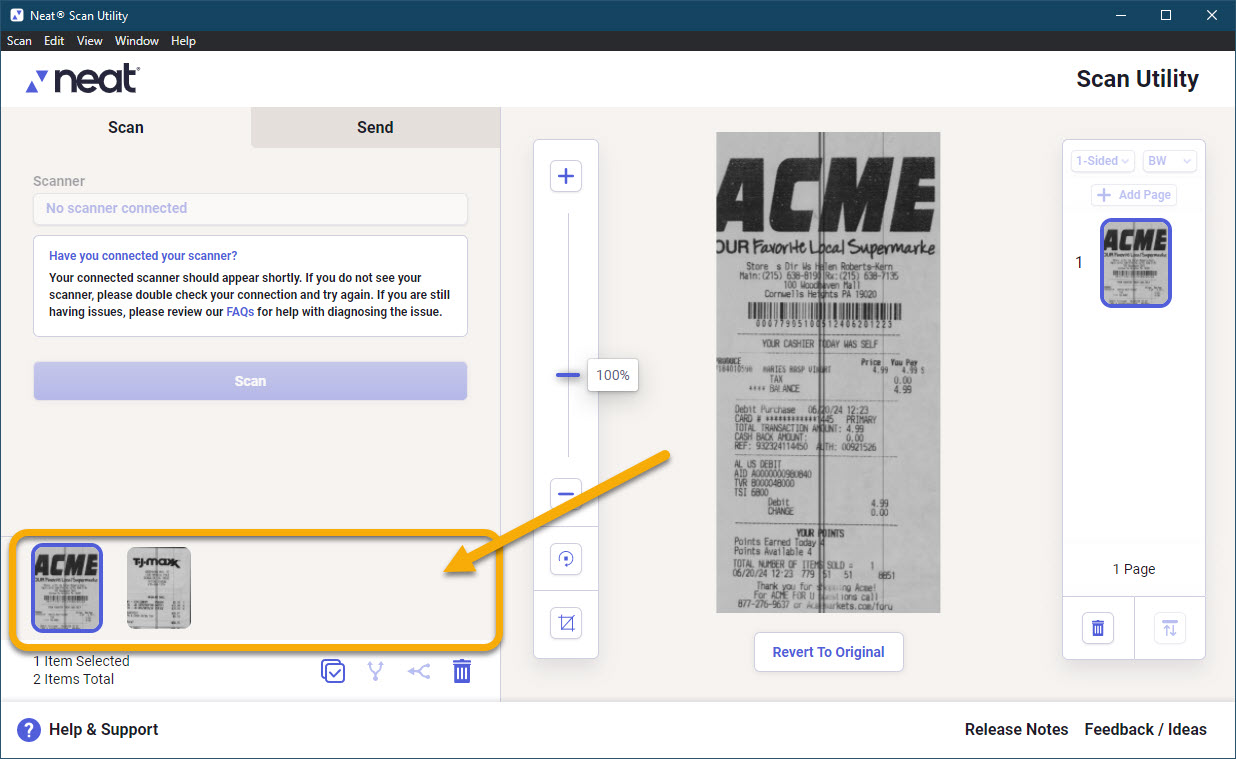
- Uninstall the Neat Scan Utility before installing the Neat Desktop Application
Installing the Neat Desktop Application
- Disconnect your scanner if it's connected to your computer.
- Find your OS and click the link below to download the Neat Desktop Application. Once your download is complete, click on the file to start the installation. You can locate the downloaded file in your downloads folder.
Windows Download
Apple Downloads
 MacOS Download (Intel CPUs)
 MacOS Download (Apple Silicon)
- The installation progress indicator will open.
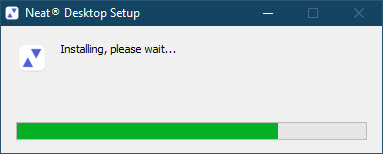
- Installation is complete! Launch the new Neat Desktop Application then connect your scanner to get started!
Scanning using the Neat Desktop Application
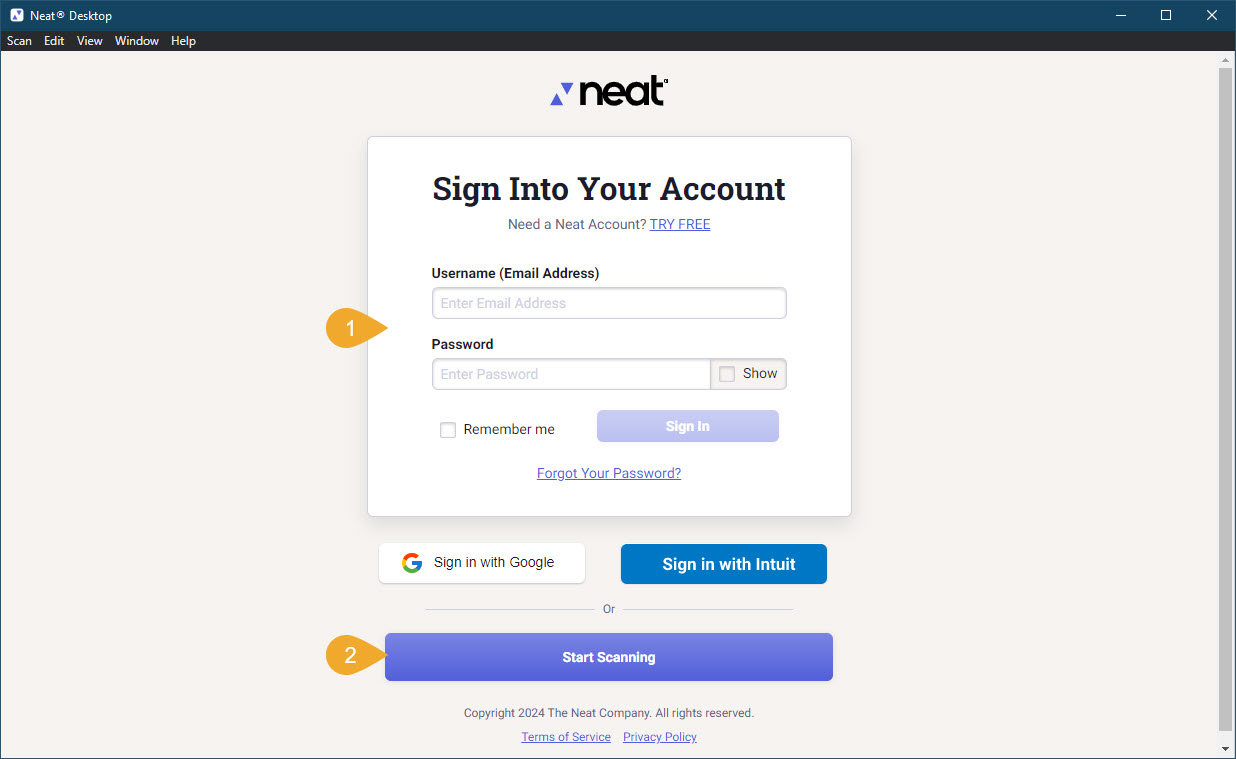
Sign In or click Start Scanning to get started
- Sign In to your Neat account to scan and send files to your Neat Account.
- Click Start Scanning to bypass login and scan and send files to your computer hard drive.
Scanning to a Neat folder
Click the Scan button in any folder to scan to that folder.
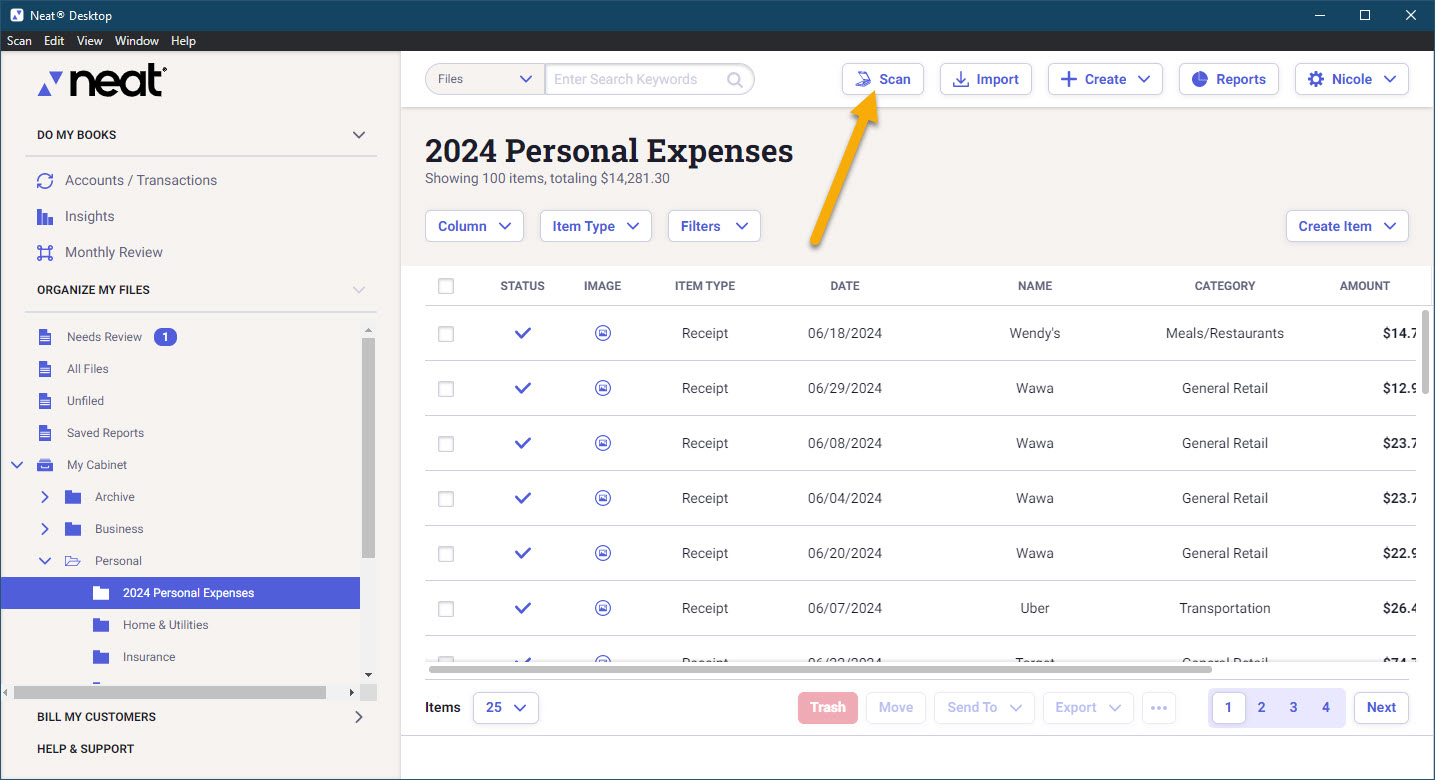
Save your files to your Neat account or to your computer hard drive
- Connect your scanner, and scan files to the Neat Desktop Application. Select the files you want to save and click Save to save your files in Neat or your computer hard drive.
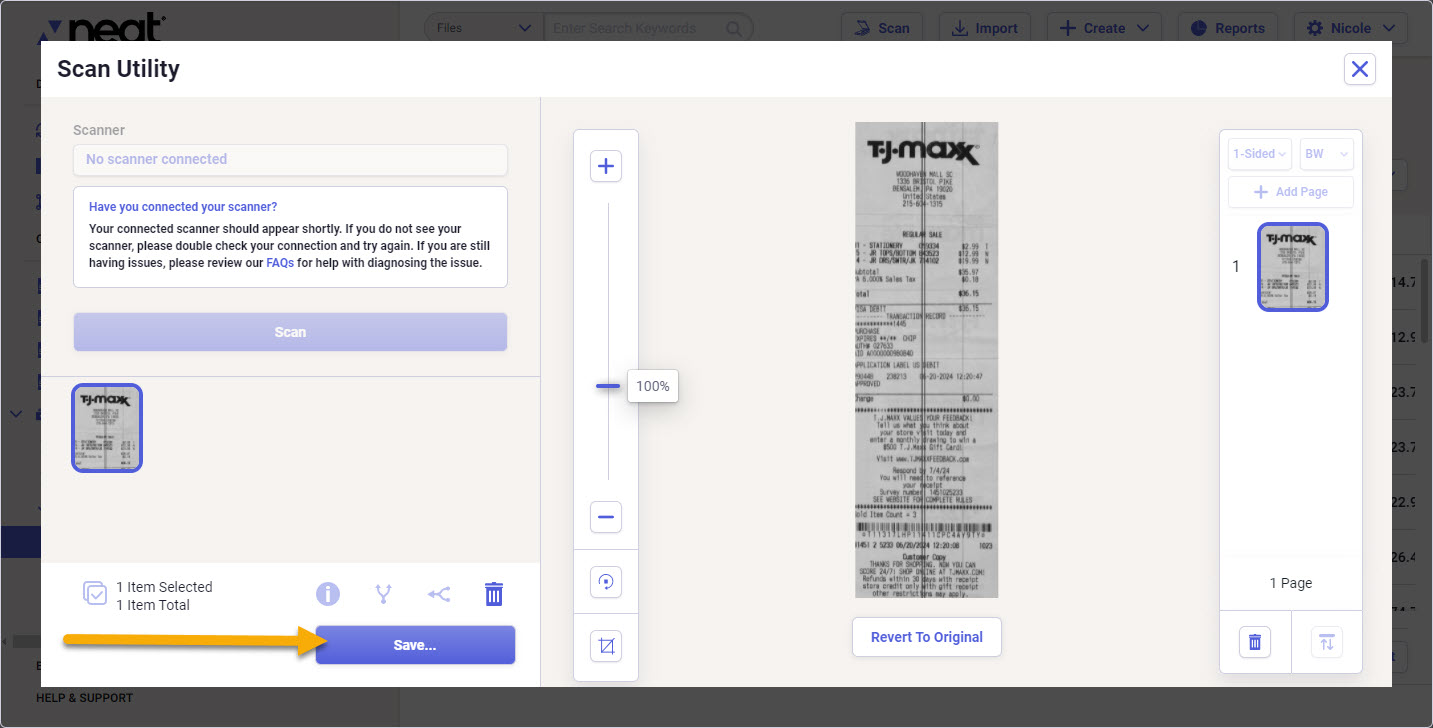
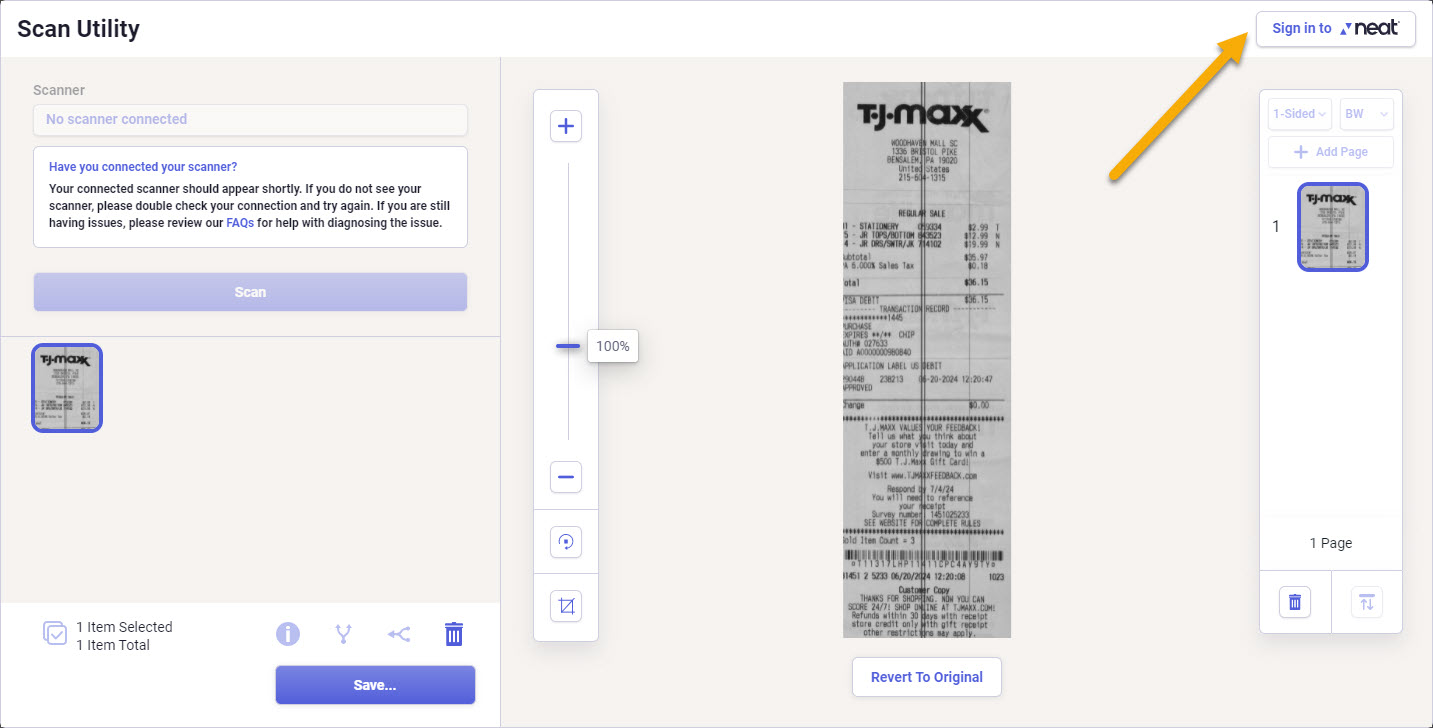
Please Note: If you want to send files to your Neat account and you are not already logged into your Neat account, then click Sign In to Neat at the top right corner of the scanning window to login to your Neat account.
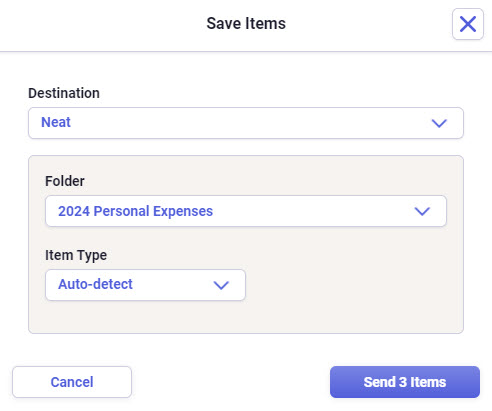
- Choose Neat from the destination dropdown to save your files in your Neat account. Choose My Computer to save your files on your computer hard drive.
 Please Note: If you are not logged into a Neat account, then the destination dropdown will be grayed out and the only option for saving files is to your computer hard drive.
-
When you save files to your Neat account, you can select the specific Neat folder where you want to store them and the item type you want to save your files as.
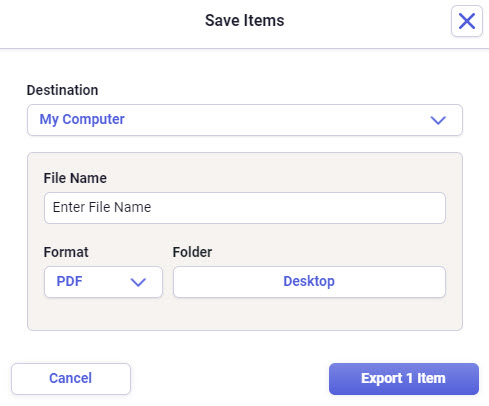
-
When you save files to your computer's hard drive, you can name the files, select the file type, and choose the specific location on your hard drive where you want to save them.
ScanSnap Scanners & the Neat Desktop Application
ScanSnap scanners work exactly the same as they do with the previous Neat Scan Utility. You will still need to use both ScanSnap Home & the Neat Desktop Application to scan to Neat using a ScanSnap scanner.
All ScanSnap devices are required to push data into Neat from their the ScanSnap software. There are no ImageCapture or TWAIN drivers for ScanSnap devices, and so similar to the Neat Scan Utility, the Neat Desktop Application can not control scanning via a ScanSnap device. This is a specific design element implemented by Ricoh.
Since the Neat Desktop Application is a whole new application, you will need to reconfigure your ScanSnap scanner to work with the new Neat Desktop Application.
Print-to-Neat & the Neat Desktop Application
Print-to-Neat has been tested to work with the new Neat Desktop Application.
Since the Neat Desktop Application is a whole new application, you will need to reconfigure your Print-to-Neat driver to work with the new Neat Desktop Application.
