Getting Started Checklist for Doing Your Taxes in Neat
- Step 1: Read Essential Knowledge
- Step 2: Download, Install, and Configure the Tools Needed to Get Files into Neat
- Step 3: Set Up your Folder Structure
- Step 4: Upload and Organize your Receipts, Expenses, and Tax Documents
- (Optional) Connect Financial Accounts to Neat
- (Optional) Set Up your Categories and Map your Vendors
Getting Started Checklist
- Read Essential Knowledge
- Download, Install, and Configure the Tools Needed to Get Files into Neat
- Set Up your Folder Structure
- Upload and Organize your Receipts, Expenses, and Tax Documents
- (Optional) Connect Financial Accounts to Neat
- (Optional) Set Up your Categories and Map your Vendors
Step 1: Read Essential Knowledge
If you haven't done so already, we highly recommend reading our Essential Knowledge for Doing Your Taxes in Neat Help Center article. This article walks you through five essential key concepts and tools for doing your taxes in Neat. It also includes many of our best tips and tricks for making the most out of Neat! From understanding item types in Neat, to understanding what the IRS requires for digital receipt storage, to how Neat helps you do your taxes.Step 2: Download, Install, and Configure the Tools Needed to Get Files into Neat
There are five ways to upload files to Neat! Every file you add to Neat, regardless of how you uploaded it, is processed with OCR (Optical Character Recognition), transforming your files into keyword-searchable items, so you can quickly find what you need. After uploading files to Neat, check the Needs Review quick filter to quickly access all newly added files, regardless of what folder you uploaded them to. Click on an upload method below to learn how to set it up.
Neat Pro Tips: To make the most out of Neat, we recommend using ALL the available upload methods. Doing so can help you stay organized all year long!
For Physical Documents that need to be digitized, there are two ways to upload files to Neat. These upload methods require that you download, install, and set up certain tools before you can start using them:
For E-Documents, or documents that are already digitized, there are three more ways to upload those files to Neat. Email-forwarding and importing do not require that you install any additional software to use these tools. However, Print-to-Neat does require an installation and configuration process:

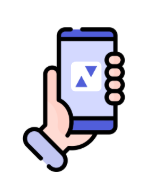
Neat Mobile App Capture
Our mobile app transforms your smartphone or tablet into a scanning powerhouse. Snap crystal-clear pictures of your files instantly within the mobile app, turning your device into a documentation tool with just one click. Beyond camera capture, you can also seamlessly import screenshots and images directly from your device's photo gallery. All Neat Cloud subscriptions include access to the Neat Mobile App.
To get started with the Neat Mobile App:
Capture Items with the Neat Mobile App
Our mobile app transforms your smartphone or tablet into a scanning powerhouse. Snap crystal-clear pictures of your files instantly within the mobile app, turning your device into a documentation tool with just one click. Beyond camera capture, you can also seamlessly import screenshots and images directly from your device's photo gallery. All Neat Cloud subscriptions include access to the Neat Mobile App.
To get started with the Neat Mobile App:
- First, install the Neat Mobile App from your mobile device's app store. Text "Get Neat" to 267-367-NEAT (6328) to receive our mobile download link or click one of the links below:

- Next, open the Neat Mobile App and sign in to your Neat account.
- Click Capture.
- Click Take a Photo to use your device's camera to take a picture of the receipt you want to upload to Neat. OR, click Import to import files from your device's photo gallery to Neat.
Capture Items with the Neat Mobile App
Scanning - The Neat Desktop App
To scan files into Neat, you need the Neat Desktop App. The Desktop App is compatible with both Mac and Windows and is free to use with or without a Neat Cloud subscription. The Desktop App transforms your physical files into digital items you can store, organize, and search for in your Neat Cloud account. The Desktop App is compatible with the 1000 series model Neat scanners (NM-1000, ND-1000, & NC-1000) and most 3rd party TWAIN-compliant scanners.
To get started with scanning:
Neat Desktop App FAQ
Have a ScanSnap scanner? Check out our Neat + ScanSnap Integration.
Having trouble getting your scanner connected? Please open a support case and a Neat support representative will be happy to help you!
By default, Neat starts you off with some sample folders that you can keep or delete. Folders are ordered alphabetically and numerically.

To create new folders in your structure:
To delete folders in your structure:
Option 1: Drag & Drop
File Cabinet (Organize My Files):
The File Cabinet is where you store and organize your documents, source receipts, and proof of purchase. These files support and validate your financial records.
Transactions (Do My Books):
Transactions contain the raw financial activity from your connected accounts, including every incoming and outgoing transaction. This data provides the foundation for understanding your cash flow and overall financial picture.
Connect Financial Accounts to Neat To start taking advantage of the Automated Insights Add-On, you'll need to connect your financial accounts to Neat.
Once you set up your categories, you can map them to your vendors. Once a category is mapped to a vendor, Neat will automatically apply the correct, preferred category to any transactions with the same vendor, reducing manual data entry, saving you time, and keeping your records consistent.
To scan files into Neat, you need the Neat Desktop App. The Desktop App is compatible with both Mac and Windows and is free to use with or without a Neat Cloud subscription. The Desktop App transforms your physical files into digital items you can store, organize, and search for in your Neat Cloud account. The Desktop App is compatible with the 1000 series model Neat scanners (NM-1000, ND-1000, & NC-1000) and most 3rd party TWAIN-compliant scanners.
To get started with scanning:
- First, with your scanner disconnected, install the Neat Desktop App.
- Next, install drivers for your scanner model. You can find drivers for the 1000 series model Neat scanners here.
- Connect your scanner to your computer. Your scanner should then appear in the scanner dropdown in the Neat Desktop App.
Neat Desktop App FAQ
Have a ScanSnap scanner? Check out our Neat + ScanSnap Integration.
Having trouble getting your scanner connected? Please open a support case and a Neat support representative will be happy to help you!
Email-Forwarding
With every Neat Cloud subscription, you get your own personalized Neat Cloud Email-In address (@neatcloud.com). Using your Neat Cloud Email-In address, you can forward your e-receipts and other digital documents straight to Neat, and they’ll automatically appear in your account.
To get started with email forwarding:
Email-In Feature in Neat
With every Neat Cloud subscription, you get your own personalized Neat Cloud Email-In address (@neatcloud.com). Using your Neat Cloud Email-In address, you can forward your e-receipts and other digital documents straight to Neat, and they’ll automatically appear in your account.
To get started with email forwarding:
- Log in to your Neat account.
- Click your name at the top right corner of Neat, then in the drop-down click User Profile.
- Scroll down to the Your NeatCloud Email address section. Here you can see your unique NeatCloud Email-In address. Any emails you forward to that address will be uploaded, processed by Neat, and added to your Needs Review filter for you to review and organize.
The body of your email and its contents will be uploaded as one item to Neat, and any supported attachments (PDF, HTML, JPG/JPEG, BMP, PNG, and TIF/TIFF attachments) get uploaded and added to Neat as separate items. - In the Your NeatCloud Email address section, you can also set the default item type your forwarded documents get uploaded as. For example, choose Receipt if you forward mostly e-receipts.
Neat Pro Tips:
For more information about email-forwarding and for a list of How-Tos, check out our Help Center Article:- Save even more time by setting up email forwarding rules in your email accounts to forward common types of files to Neat the moment they hit your inbox.
- When asked for an email address at the point-of-checkout at a department store, give them your Neat Cloud email address so that your receipt is sent straight to your Neat account instead of your email inbox.
Email-In Feature in Neat
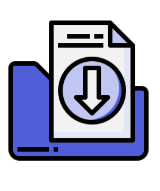
Importing
You can import all your e-receipts into Neat to make it easy to keep all your important documents organized and accessible in one place. Neat supports a variety of file types for importing, including PDF, JPG, TIF, PNG, and BMP. By bringing your files into Neat, you can quickly organize, search, and manage them without worrying about losing track of important information, making your workflow simpler and more efficient.
To get started with importing:
Import Items to Neat
You can import all your e-receipts into Neat to make it easy to keep all your important documents organized and accessible in one place. Neat supports a variety of file types for importing, including PDF, JPG, TIF, PNG, and BMP. By bringing your files into Neat, you can quickly organize, search, and manage them without worrying about losing track of important information, making your workflow simpler and more efficient.
To get started with importing:
- Log in to your Neat account.
- Click Import at the top right corner of Neat.
- Click Choose Files to browse through and select files on your computer. Or, drag and drop files from your computer to the Import window.
- Select the types of files you are importing from the Item Type drop-down.
- Then select the folder you want to save these files in from the Folder drop-down.
- Click Import. Your files will be imported to Neat and processed. Check your Needs Review quick filter to quickly access the imported files regardless of the folder you imported them to.
Import Items to Neat
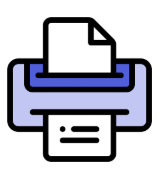
Print-to-Neat
Print-to-Neat is a virtual printer and scanner you can use to send items to your Neat Desktop Application. Print-to-Neat lets you send documents, receipts, or other files directly to your Neat account as if you were printing them, except instead of going to a physical printer, they go straight into Neat digitally. You can use it from any program that can print, like a web browser, Word, or Adobe Acrobat. When you choose the Neat Virtual printer, your e-receipt is automatically captured, stored, and ready to organize in Neat, just like a scanned item. Print-to-Neat is currently only available on Windows devices.
To get started with Print-to-Neat:
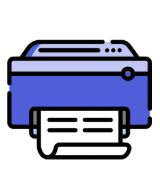
Print-to-Neat in Windows
Print-to-Neat is a virtual printer and scanner you can use to send items to your Neat Desktop Application. Print-to-Neat lets you send documents, receipts, or other files directly to your Neat account as if you were printing them, except instead of going to a physical printer, they go straight into Neat digitally. You can use it from any program that can print, like a web browser, Word, or Adobe Acrobat. When you choose the Neat Virtual printer, your e-receipt is automatically captured, stored, and ready to organize in Neat, just like a scanned item. Print-to-Neat is currently only available on Windows devices.
To get started with Print-to-Neat:
- First, you must have the Neat Desktop Application installed.
- Then, in the Neat Desktop Application, you need to configure Print-to-Neat.
Once configured, the Neat Virtual Printer will become an available printer option in your printers list. Next time you make a purchase and get that order confirmation page, click Print, then choose the Neat Virtual Printer from your printer list. When you print the confirmation page, the Neat Desktop App will open, and the confirmation page will appear in the scan utility to be sent to Neat!
Neat Pro Tip: Print-to-Neat is a great tool for sending order confirmation pages to Neat after making a purchase, without printing or saving the order confirmation page.
For more information about Print-to-Neat and for a list of How-Tos, check out our Help Center Article:Print-to-Neat in Windows
Step 3: Set Up your Folder Structure
A well-organized folder structure in Neat helps you store, find, and manage your receipts, expenses, and tax documents efficiently. Neat’s File Cabinet lets you create folders and sub-folders tailored to your specific needs. Check out How to Setup a Folder Structure That Works for our recommended best practices and tips & tricks on setting up a folder structure that works and is scalable.By default, Neat starts you off with some sample folders that you can keep or delete. Folders are ordered alphabetically and numerically.
Neat Pro Tip:
Create a centralized ‘Tax Documents’ folder to store all your tax documents for the year in one place. This simplifies organization by reducing the risk of lost documents, saves time by eliminating the need to search through multiple folders, and reduces errors by ensuring no forms are overlooked. Having everything consolidated also makes it easier to provide records to your accountant, the IRS, or a financial advisor when needed.
Create a centralized ‘Tax Documents’ folder to store all your tax documents for the year in one place. This simplifies organization by reducing the risk of lost documents, saves time by eliminating the need to search through multiple folders, and reduces errors by ensuring no forms are overlooked. Having everything consolidated also makes it easier to provide records to your accountant, the IRS, or a financial advisor when needed.
To create new folders in your structure:
- Select Organiz My Files, from the left hand menu.
- Right-click on My Cabinet to create a new parent folder or right-click on any parent folder to create a new subfolder and select New.
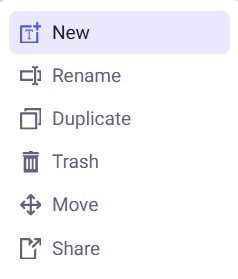
- In the New Folder window, you can change the folder location if you need to.
- Enter a name for your folder, then select Create.
- Neat will re-load, and your new folder will be in the location you confirmed in step 3.
To delete folders in your structure:
Option 1: Drag & Drop
- Locate the folder you want to delete.
- Select the folder and drag it to the Trash.
- Neat will re-load and your folder will be moved to the Trash. Any subfolders will also be moved to the Trash.
- To permanently delete the folder, empty your trash.
- Locate the folder you want to move to the trash.
- Right-click on the folder and select Trash.
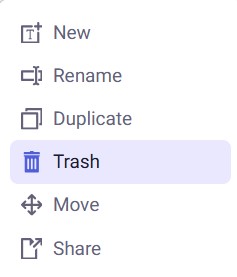
- Neat will re-load and your folder will be moved to the Trash. Any subfolders will also be moved to the Trash.
- To permanently delete the folder, empty your trash
Step 4: Upload and Organize your Receipts, Expenses, and Tax Documents
Once you’ve completed the other getting-started steps, you’re ready to begin uploading your files to Neat! Below is our recommended workflow for uploading and organizing your receipts, expenses, and tax documents in Neat, so everything stays easy to find and manage.- Upload your physical and digital receipts, expenses, and tax documents to Neat using the five upload methods.
- Find all your newly uploaded files in the Needs Review quick filter, regardless of the folder you saved the file in.
Neat Pro Tip: Think of the 'Needs Review filter' as the 'New Files filter'.

- Open each file and check that the file Item Type is accurate.
Neat Pro Tips:
- Use a Receipt item type when you want to track money out that is not tied to a bill you are managing separately.
- Use a Bill item type when you want to track an obligation to pay, not just the proof that payment occurred. Bills can be marked as 'paid' once they have been paid.
- Use an Invoice item type to track revenue you are billing for.
- Use a Document item type for storing and organizing important tax documents.
For more information about Item Types in Neat, check out Understanding Item Types in Neat. - Check that the file Details, such as vendor, date, and amounts, are accurate and make sure your file is saved in the right folder within your database.
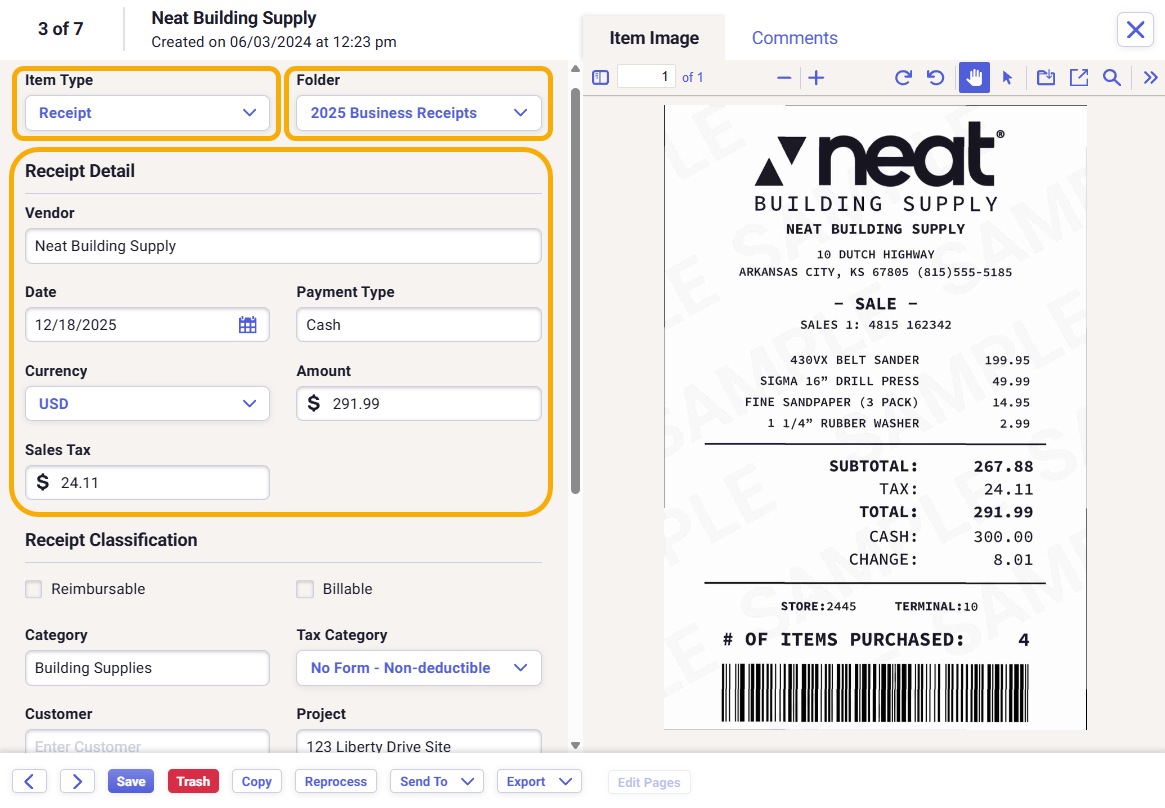
- In the Classification section, make sure your file expense Category is accurate and best represents the type of expense it is.
Neat Pro Tips:
- Through the Neat Smart Categorization feature, over time, Neat will learn which categories you prefer for certain vendors and will automatically apply your preferred category whenever that vendor is detected, reducing manual data entry.
- Keeping itemized receipts whenever possible makes it easier to support deductions and avoid issues during an IRS audit. For most tax deductions, the IRS expects itemized receipts that show what was purchased, not just the total amount, because they help prove an expense was necessary and business-related. Itemization is especially important for meals, travel, and mixed-use purchases, where deductible and non-deductible items may be combined. Use Neat's receipt splitting feature to split your receipts between different expense categories and itemize your receipts.
- Add a Tax Category to each of your files.
Neat Pro Tip: Neat provides you with a long list of US and Canadian tax categories in the tax category file classification field that you can use to track your expenses in Neat. You can set which tax categories you see in this drop-down in your Account Settings.
- Add other tags to your file in the Classification section. Adding other tags helps you to filter, sort, and find files in your database with ease.
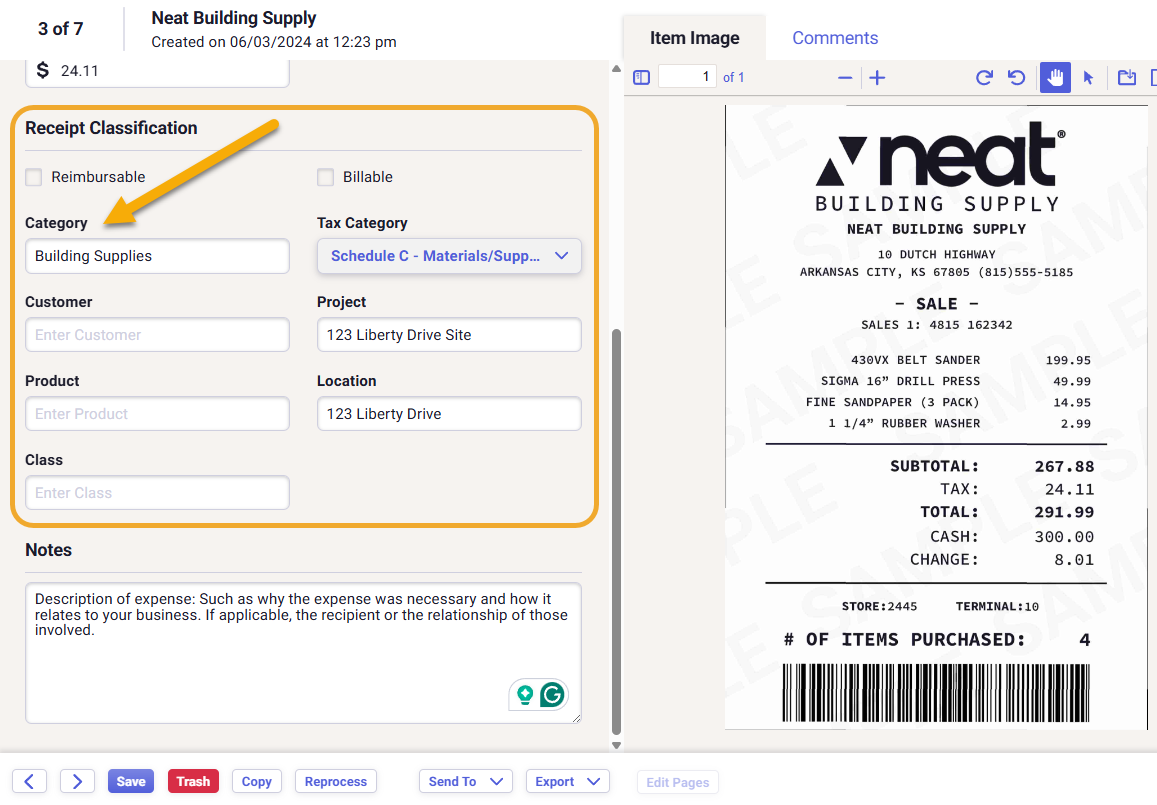
- Add Notes to your file. File notes are included in keyword searches and will also help you locate files more quickly.

- Save your file and move to the next file in the list.
Once you open and review a file from the Needs Review quick filter, the file will no longer appear in the filter.

- Work through your list of newly added receipts and expenses, reviewing them for accuracy, adding classification tags, and notes until you have reviewed all your newly added files and the Needs Review quick filter is empty.
Neat Pro Tip:
Spending just 10 minutes each week uploading, categorizing, and organizing your receipts and expenses in Neat is all you need to stay in control and up to date on your finances year-round! This simple weekly habit keeps your finances tidy, ensures you are always audit-ready, and saves you hours down the road.
(Optional) Connect Financial Accounts to Neat
With the Automated Insights Add-On, you can securely connect your bank, credit card, and loan accounts to Neat. This allows all incoming and outgoing transactions to automatically stream into one central place, reducing the risk of missing activity. Having both your documents and your financial activity in Neat gives you clearer insight into where your money is coming from, where it’s going, and how everything connects.File Cabinet (Organize My Files):
The File Cabinet is where you store and organize your documents, source receipts, and proof of purchase. These files support and validate your financial records.
Transactions (Do My Books):
Transactions contain the raw financial activity from your connected accounts, including every incoming and outgoing transaction. This data provides the foundation for understanding your cash flow and overall financial picture.
Connect Financial Accounts to Neat To start taking advantage of the Automated Insights Add-On, you'll need to connect your financial accounts to Neat.
- Open Accounts / Transactions underneath under Do My Books.
- Click Connect Account, from the bottom right corner.
- Select or search for the institution you want to connect to Neat.
- Next, enter your finanical account credentials to connect it to Neat.
- An account connected successfully message will appear once the account has been authenticated and connected.
It can take up to an hour for your financial account's transactions to finish streaming into your Neat account. They will be viewable in the Accounts / Transactions grid once complete. - Click Add Account, from the bottom right corner, to connect more accounts to Neat.
Neat Pro Tip: We recommend logging into your Neat account twice a month at minimum to ensure a smooth transaction streaming experience. Logging in frequently allows your financial accounts to continuously reauthenticate your account connection with Neat to ensure all transactions stream to Neat successfully.
(Optional) Set Up your Categories and Map your Vendors
If you have the Automated Insights Add-On, then you should also set up your transaction categories in My Categories. The My Categories section of Neat is a list of the categories used to classify and distinguish financial assets, liabilities, and transactions. You can use the list of default categories that Neat provides you, and also create custom categories that match your needs.Once you set up your categories, you can map them to your vendors. Once a category is mapped to a vendor, Neat will automatically apply the correct, preferred category to any transactions with the same vendor, reducing manual data entry, saving you time, and keeping your records consistent.
Neat Pro Tip: You can customize your expense categories so that they align with your tax return, ensuring your reports are always accurate and ready for filing.