Scanner Not Detected in Windows 11
Recently, we received reports that some Windows 11 users were suddenly not seeing their scanner in the Neat Desktop App. This has only affected a limited number of users on Windows 11.The scanners can be detected and will function with other scanning software, but not the Neat Desktop App or the older Neat Scan Utility (NSU). Scanner brands that may experience this issue include, but aren't necessarily limited to Canon, Epson, Fujitsu, HP, and Neat.
We are currently investigating a solution for this issue, which seems to occur after a Windows 11 update.
Many Windows 11 users have successfully resolved this scanner connection issue by carefully following the precise steps below. However, these steps have not resolved the issue for all users:
- Basic Scanner Troubleshooting
- Device Manager
- Neat Desktop App/Driver Installation & Reinstallation
- Task Manager
- Print to Neat
- Windows Scan App
Basic Scanner Troubleshooting
Start with basic scanner troubleshooting to eliminate any simple connection issues:- Always make sure the Neat scanner USB cable is connected directly to the computer. (Directly means not connected through a hub, dock, USB adapter, etc, that is connected between the computer and the cable.)
- If that doesn't work, move the cable to another port directly connected to the computer.
- If possible, try a different USB cable. This will help verify that the cable is not defective.
- Test the scanner with other software: MS Paint or NAPS2 (see naps2.com). See if it detects the scanner. If it does not detect the scanner in Paint or NAPS2, it is a different issue. You may need to reinstall the driver (see Neat Desktop App/DRIVER INSTALLATION & REINSTALLATION below), try another cable, move the cable to other ports directly on the computer, or try the steps in this article. There is also a chance that the USB port on either the computer or scanner is faulty.
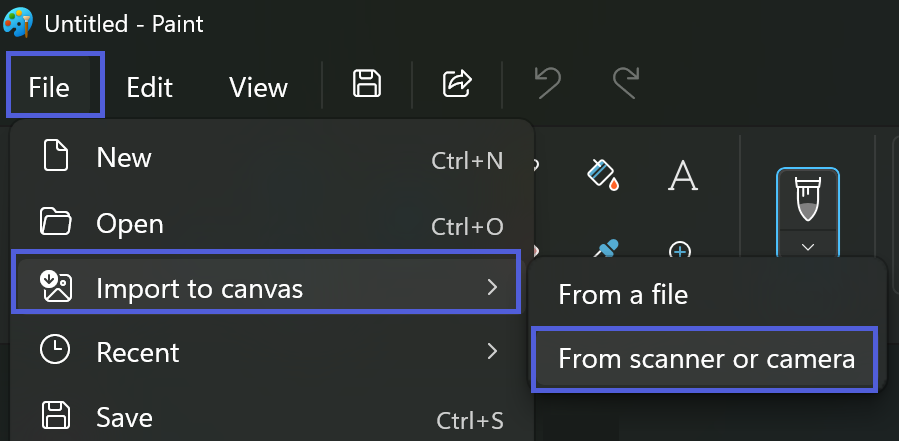
- To Test in Microsoft Paint
- Connect your scanner directly to your computer.
- Power on the scanner.
- Open Paint.
- Click File > Import to Canvas > From scanner or camera.
Device Manager
With the scanner powered on and directly connected via USB, press the Windows Key on your keyboard and type 'device manager' in the search box. Select Device Manager. Once that opens, check that your scanner appears under Imaging Devices. If it does not, follow the troubleshooting steps in this article.Neat Desktop App/Driver Installation & Reinstallation
Sometimes a driver installation issue can have the same effect as this issue. To rule that out, follow these steps:- Uninstall the driver.
- Click the Windows Start button. Type "Device Manager" in the Windows search field.
- Check for your scanner under "Imaging devices" or "Other devices" and right-click it.
- Select "Uninstall device."
- Check the box to "delete the driver software for this device" if available.
- Uninstall Neat scan software.
- Right-click the Windows Start button.
- Click Installed Apps (or you may see Apps & features)
- In the Search apps, type "Neat".
- To the right of "Neat Desktop App" (or "Neat Scan Utility"), click the ellipsis (3dots) and choose "Uninstall".
- Restart the computer.
- Download a fresh copy of the current driver.
- If you're using a third-party scanner, check the manufacturer's support website.
- If you're using a Neat scanner, download the 64-bit driver from our driver download page.
- Download the Neat Desktop App here.
- Run the installers as an administrator: Right-click the installer file and select "Run as administrator" to ensure proper installation.
- Restart the computer again.
Task Manager
- To open Task Manager, press Ctrl + Alt + Delete simultaneously on your keyboard, then click Task Manager.
- Look for Neat Desktop and right-click it.
- You may see multiple instances of Neat Desktop, but look specifically for NeatTwainWrapper which should only appear once.
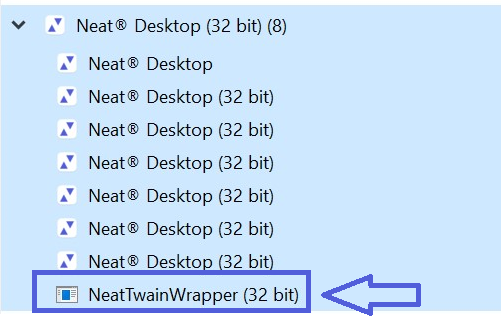
- If you see only one instance of NeatTwainWrapper, close Task Manager and move on to the next step.
- If you see more than one NeatTwainWrapper, right-click each instance and select End Task.
Then close and reopen the Neat Desktop App.
Print to Neat
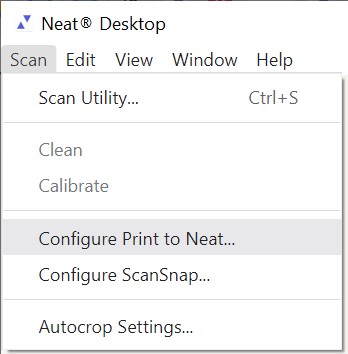
- In the top left corner of Neat Desktop App, click Scan > Configure Print to Neat.
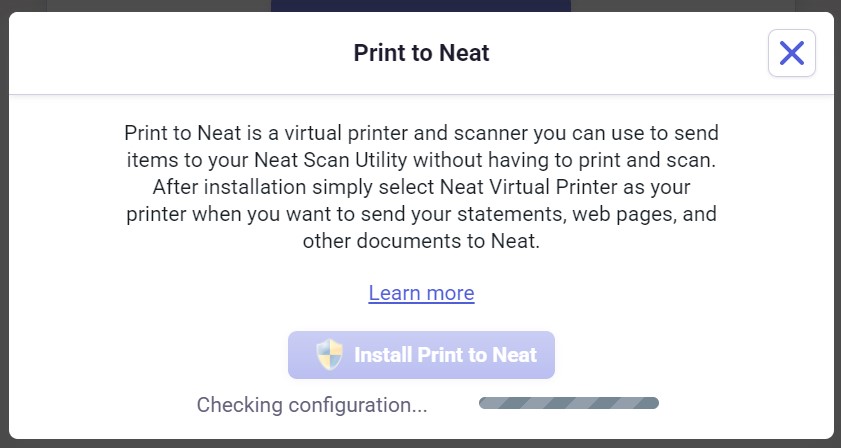
- Install or Reinstall/Repair Print to Neat.
- Close all apps, including Neat Desktop App.
- Re-open Neat Desktop App.
- Sign in to Neat - it will open a login page in your browser, sign in, and then go back to Neat Desktop App.
- Again, click Scan > Configure Print to Neat > Then “Reinstall/Repair Print to Neat”.
- Go to your Neat Cabinet.
- Now try clicking Scan to go back to the scanning side of Neat Desktop App. See if the scanner is now detected.
Windows Scan App
- Type Settings in the Windows search bar.
- Click the Settings icon to open it.
- Select Bluetooth and devices on the left.
- Select Printers and Scanners.
- Click on Get Scanner App, then load and install that app.
- Note: You may not see “Get Scanner App”. If that's the case, skip past step 7.
- Go back to the Neat sw and check if the scanner now shows up.
- Restart the computer.
- Go back to the Neat Desktop App and see if the scanner now shows up.
If you did not see “Get Scanner App” above, try these steps to get it from the Microsoft Store:
- Connect your scanner to the PC.
- Open the Start menu by pressing the Windows key or clicking the Start button.
- Search for "Scan".
- If the Windows Scan app doesn't appear, open the Microsoft Store and search for "Windows Scan" to install it.

- Open the Windows Scan app after downloading & installing.
- Select the scanner from the dropdown list.
- Click "Scan". This will most likely work even though it’s not detected in Neat Desktop App/NSU.
- Your scanned document will be saved in the default folder, usually Pictures > Scans.
- Go back to Neat Desktop App and see if the scanner is now detected.
If none of the steps above resolved your scanner detection issue, please be assured we are actively investigating to find a solution that works for all users. Thank you for your patience while we work to resolve this.