If you need to detach a Neat account from your NeatConnect scanner, to login with a different account, or if you want to wipe the device clean, you will need to do a Factory Reset. Follow the steps below to begin. Factory Reset
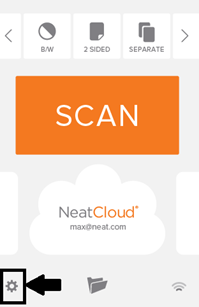
Click the Settings gear in the left corner of the home screen on the touchscreen.

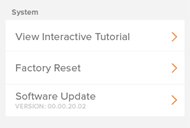
Scroll until you see a section titled System. Under this heading, tap Factory Reset.

A message box will appear, prompting you to confirm that you want to reset your scanner to the original factory settings. Please note: A factory reset will permanently delete all of your scans, history, accounts, and preferences. Tap Reset to continue.
A message will appear confirming that the factory reset has been completed. Tap OK.
The device will reboot and prompt you to begin the Neat Setup Wizard process.
