NeatConnect: Using Local Access Mode

Please note that the information provided on this page is related to products and/or services which are no longer supported and agent support is no longer available. This information is provided as a courtesy for users who may still need troubleshooting or FAQ information on end-of-life products.

When turned on (from the Settings menu), NeatConnect will broadcast it’s own local Wi-Fi signal. You can then connect a nearby Wi-Fi device to NeatConnect so you can view all of the saved images in NeatConnect on that Wi-Fi device, allowing you to save those images directly to the device or to push them to other destinations from the device. This feature is helpful if you lose Wi-Fi in your home and office and you need to gain access to the images saved in NeatConnect. Click here to learn more about using Local Access mode.

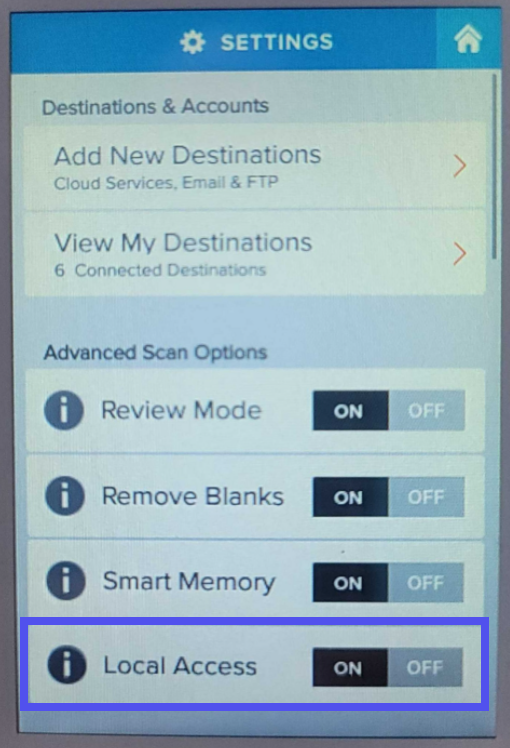
Follow these steps to use Local Access:

  1. Press the Gear icon in the lower left corner of the NeatConnect screen to access the Settings menu. Under Advanced Scan Options, touch ON to turn Local Access Mode on.
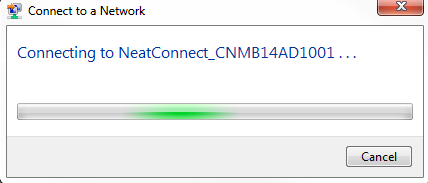
    NC settings local access
  2. From your local Wi-Fi enabled device, choose NeatConnect’s wireless network (“NeatConnect_Serial #”) as your WIFI connection to connect.
    lcm
  3. If a new browser page does not launch automatically on your local Wi-Fi device, open a new browser page (e.g. using Safari or Chrome) and type in the URL: neat.com
  4. You will now see all of the images in the scanner as shown here:
    lam
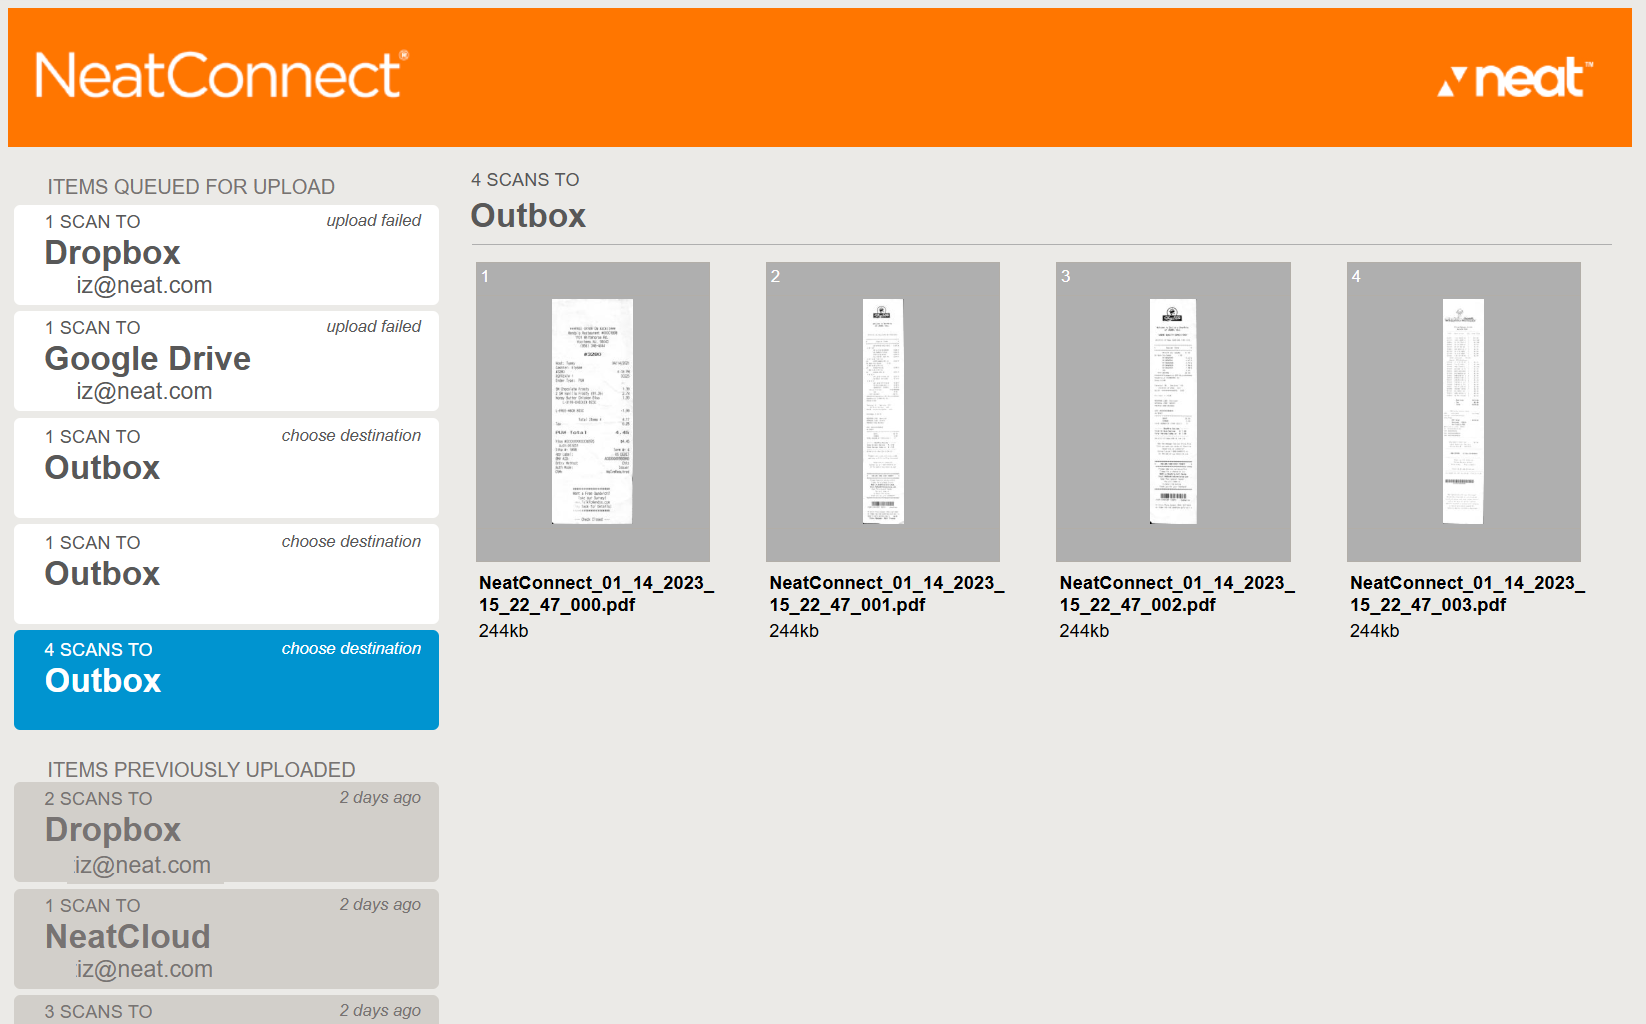
  5. Tap a scan session on the left to display the images in it, then select an image.
  6. Tap on the image and choose an option (save, print, email, etc) as available


How did we do?


Powered by HelpDocs (opens in a new tab)