Import Items to the Neat Mobile App
Learn how to import items into Neat using your mobile device and the Neat Mobile App. With the Neat Mobile App, you can import items from your mobile device's photo gallery. Follow the steps below.
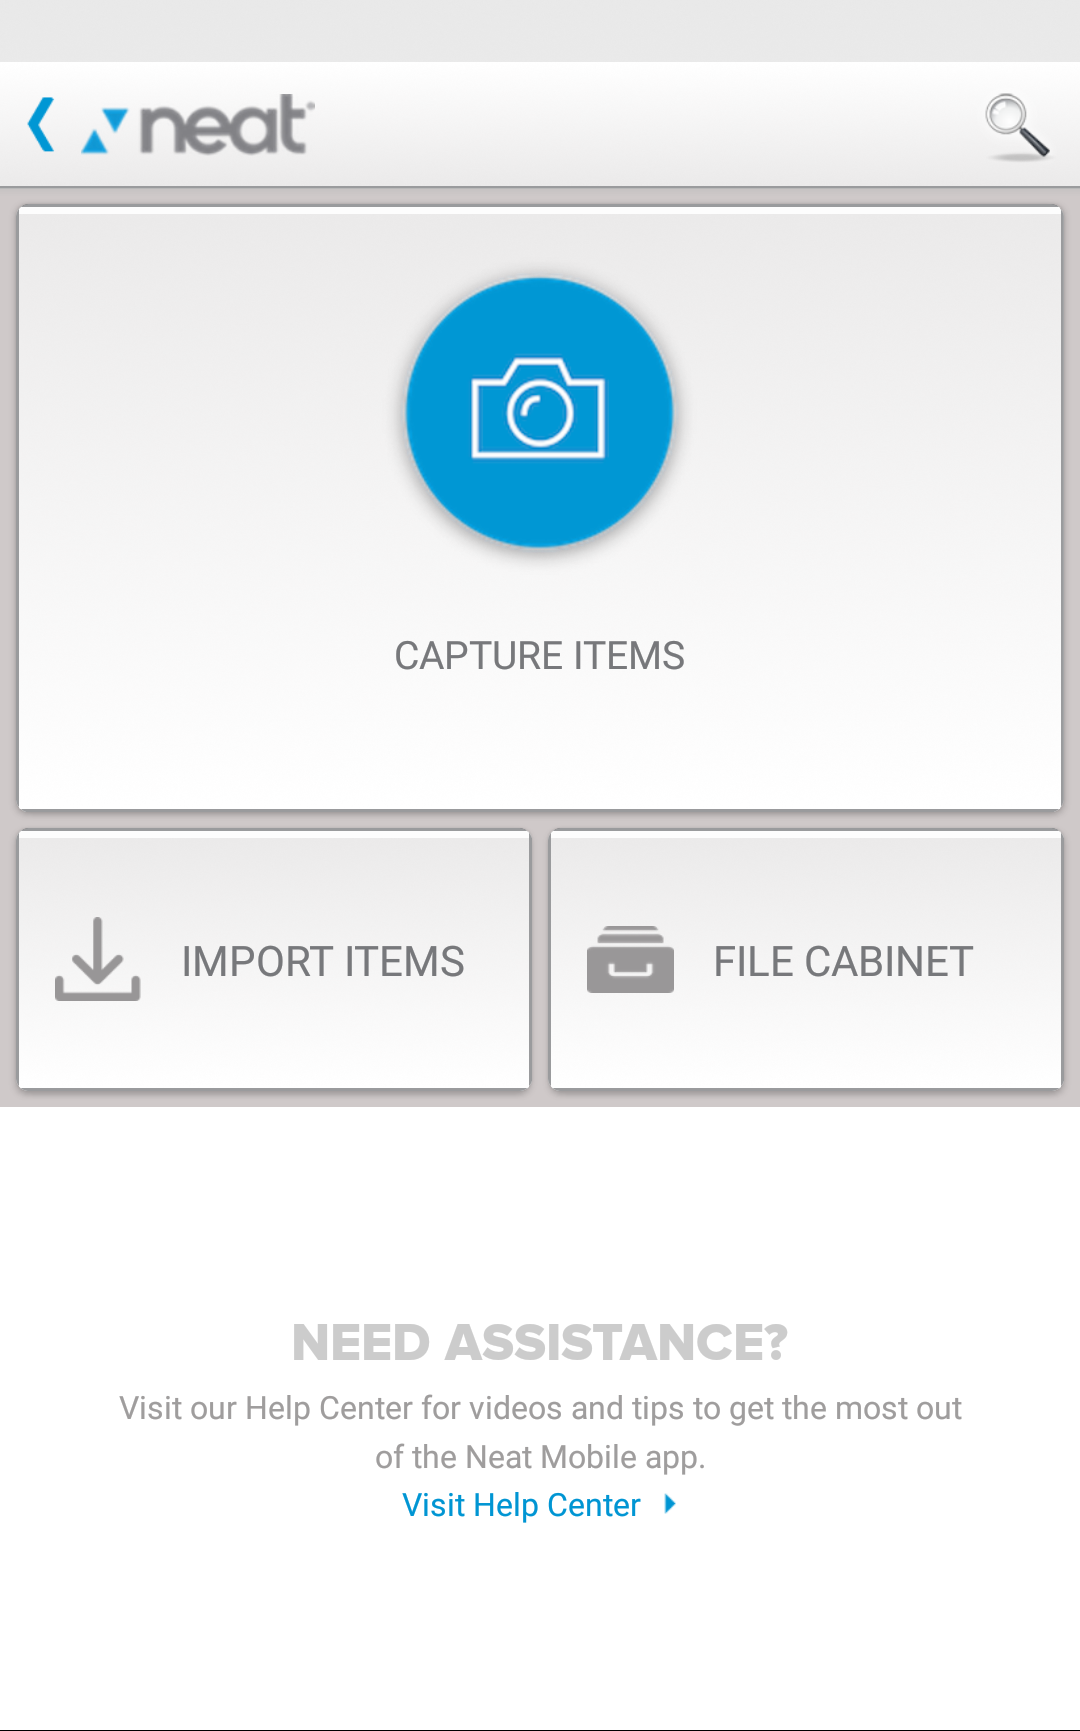
- On the home screen of the Neat Mobile App and press Import Items.
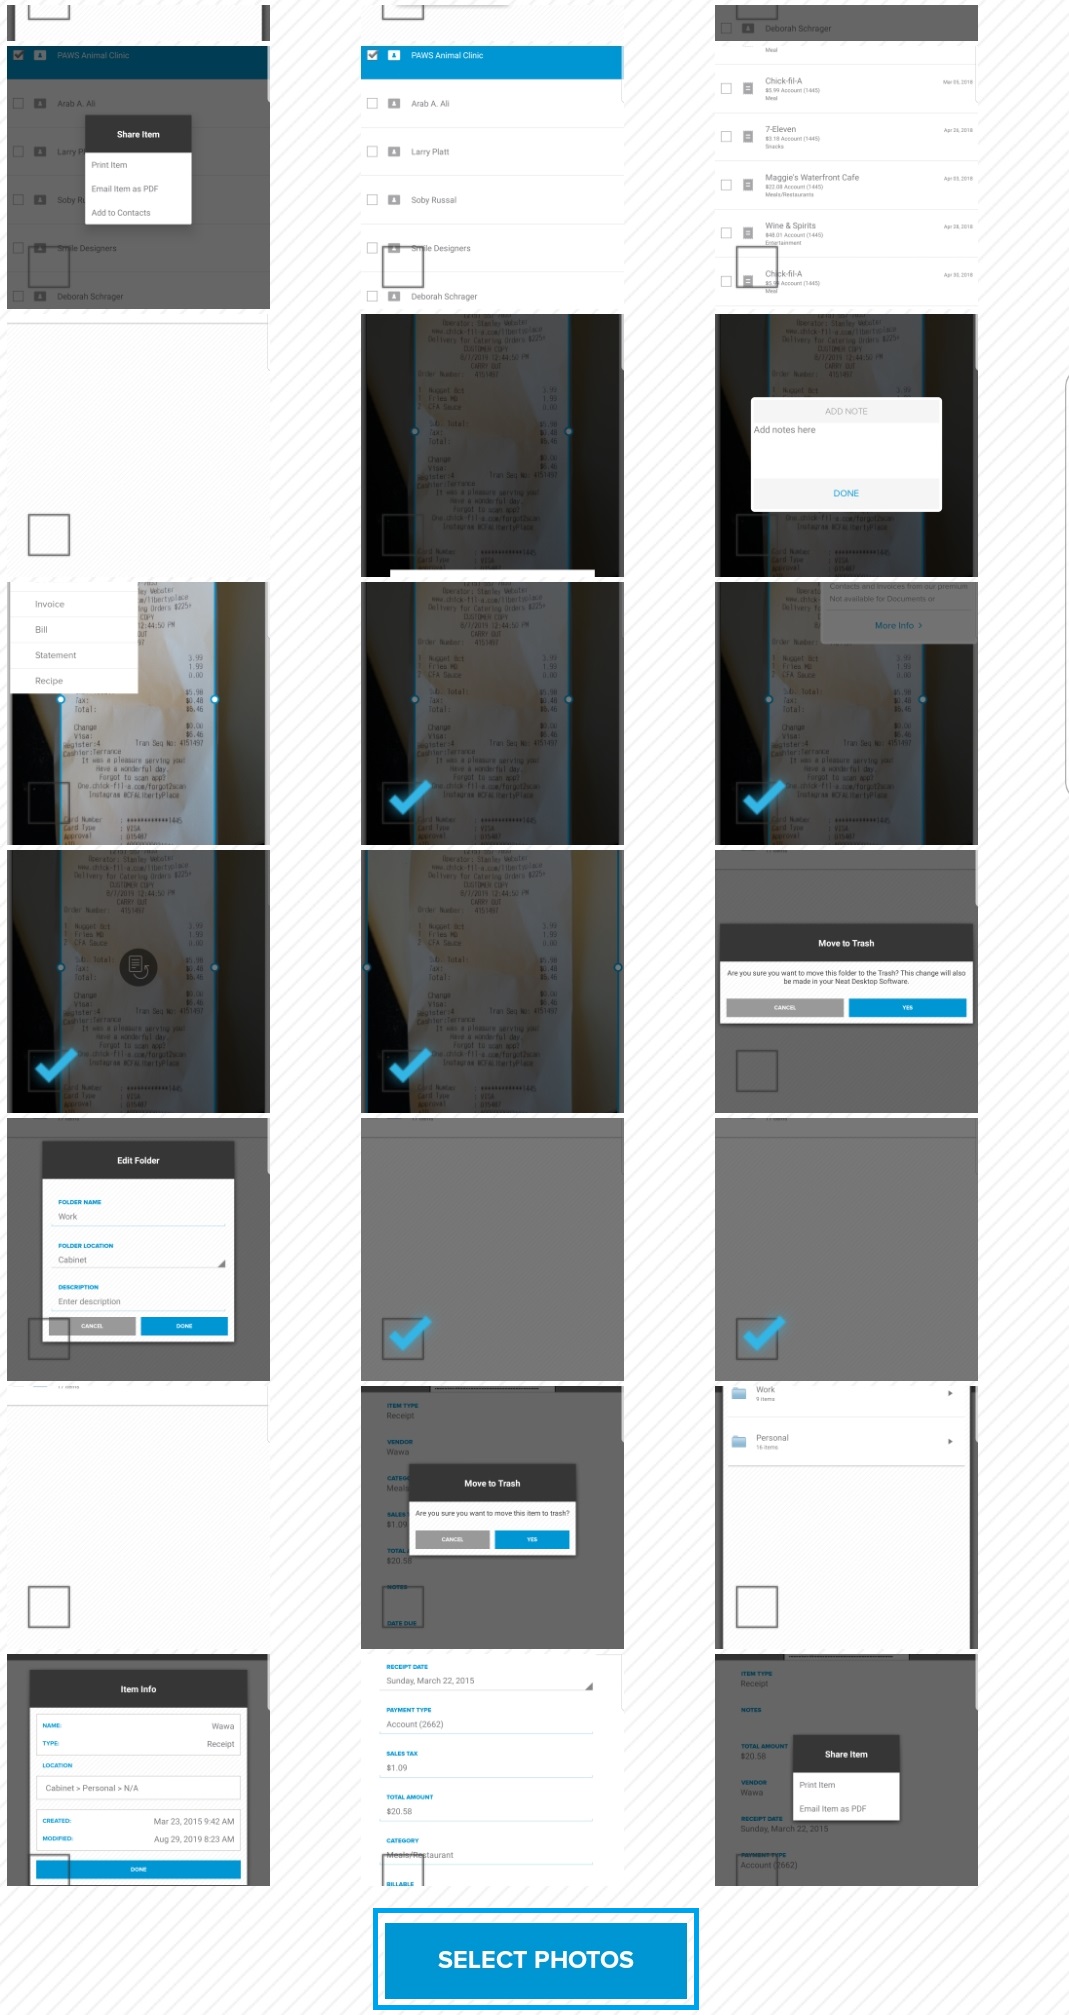
- On the next window that appears, select the item(s) you want to import from your photo gallery. When finished selecting items, tap Select Photos.
- In the Import items menu, you can modify the following:
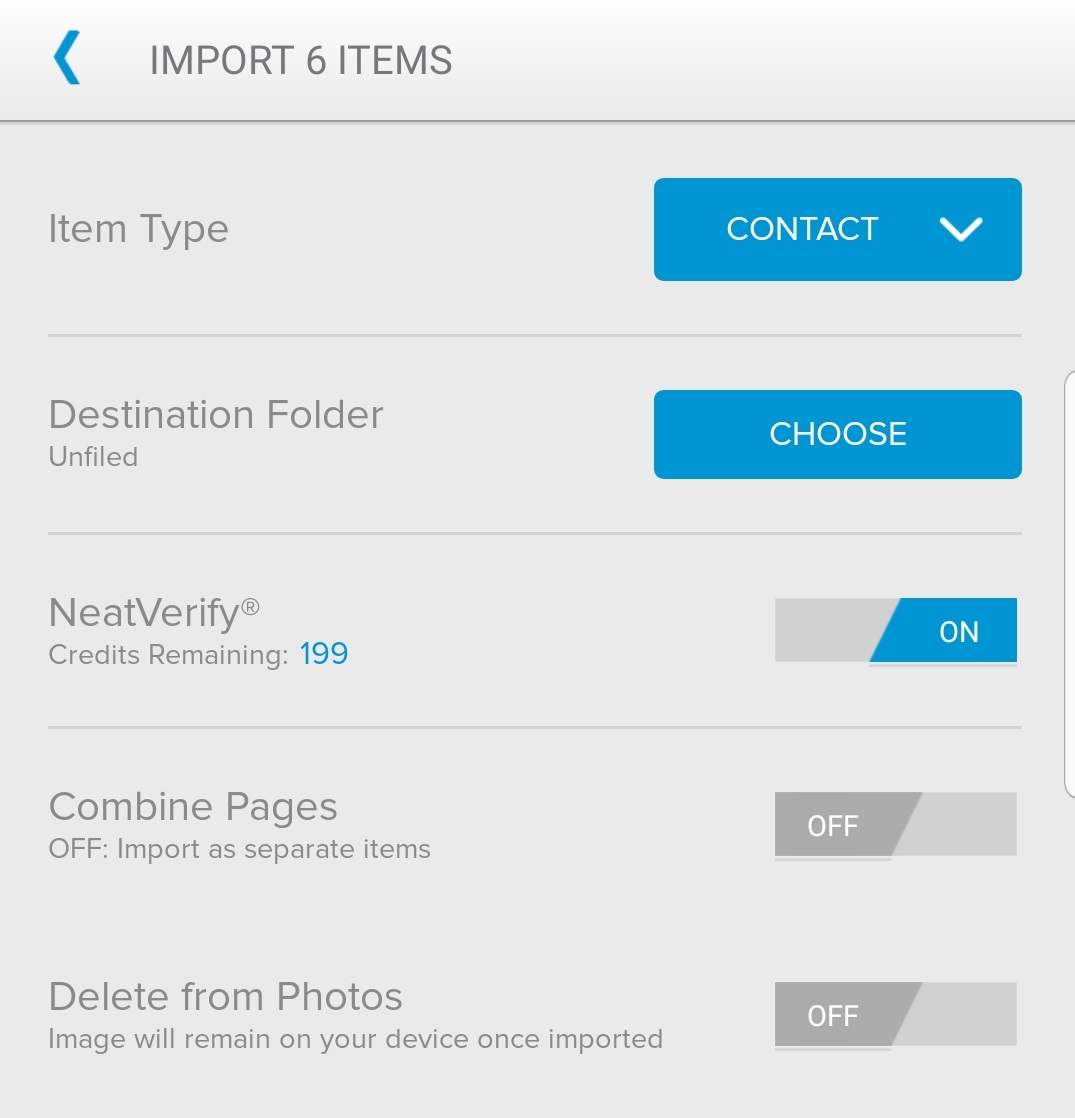
- Choose the Item Type by selecting Receipt, Contact, Document or Invoice from the drop-down menu.
- Tap the Choose button to select the Destination Folder that the imported items will be placed in.
- Slide the NeatVerify indicator to the On position to verify the imported items using NeatVerify credits. You can also opt to save your NeatVerify credits by sliding the indicator to the Off position.
Please Note: If you are on a Neat Complete Plan, then you have unlimited Neat Verify credits and it is always enabled for verifiable item types.- Slide the Combine Pages indicator to the On position to combine the imported items. When the indicator is in the Off position, items will be imported separately.
- Slide the Delete from Photos indicator to the On position to delete the item from the photo gallery on your phone once the item has been imported to Neat. When the indicator is in the Off position, items will remain on your device once imported.
- When finished making selections, press the Check to begin processing the import.
- You will see a notification from the Neat Mobile App when the import is complete.
