Print to Neat - Mac
Print to Neat is only available on Windows OS, but there is a simple workaround already available for Mac users.Neat Pro Tip: If you want to get an email or an email attachment into Neat, you can either follow the print steps below or simply use the Email-In feature to forward emails and attachments into your Neat account!
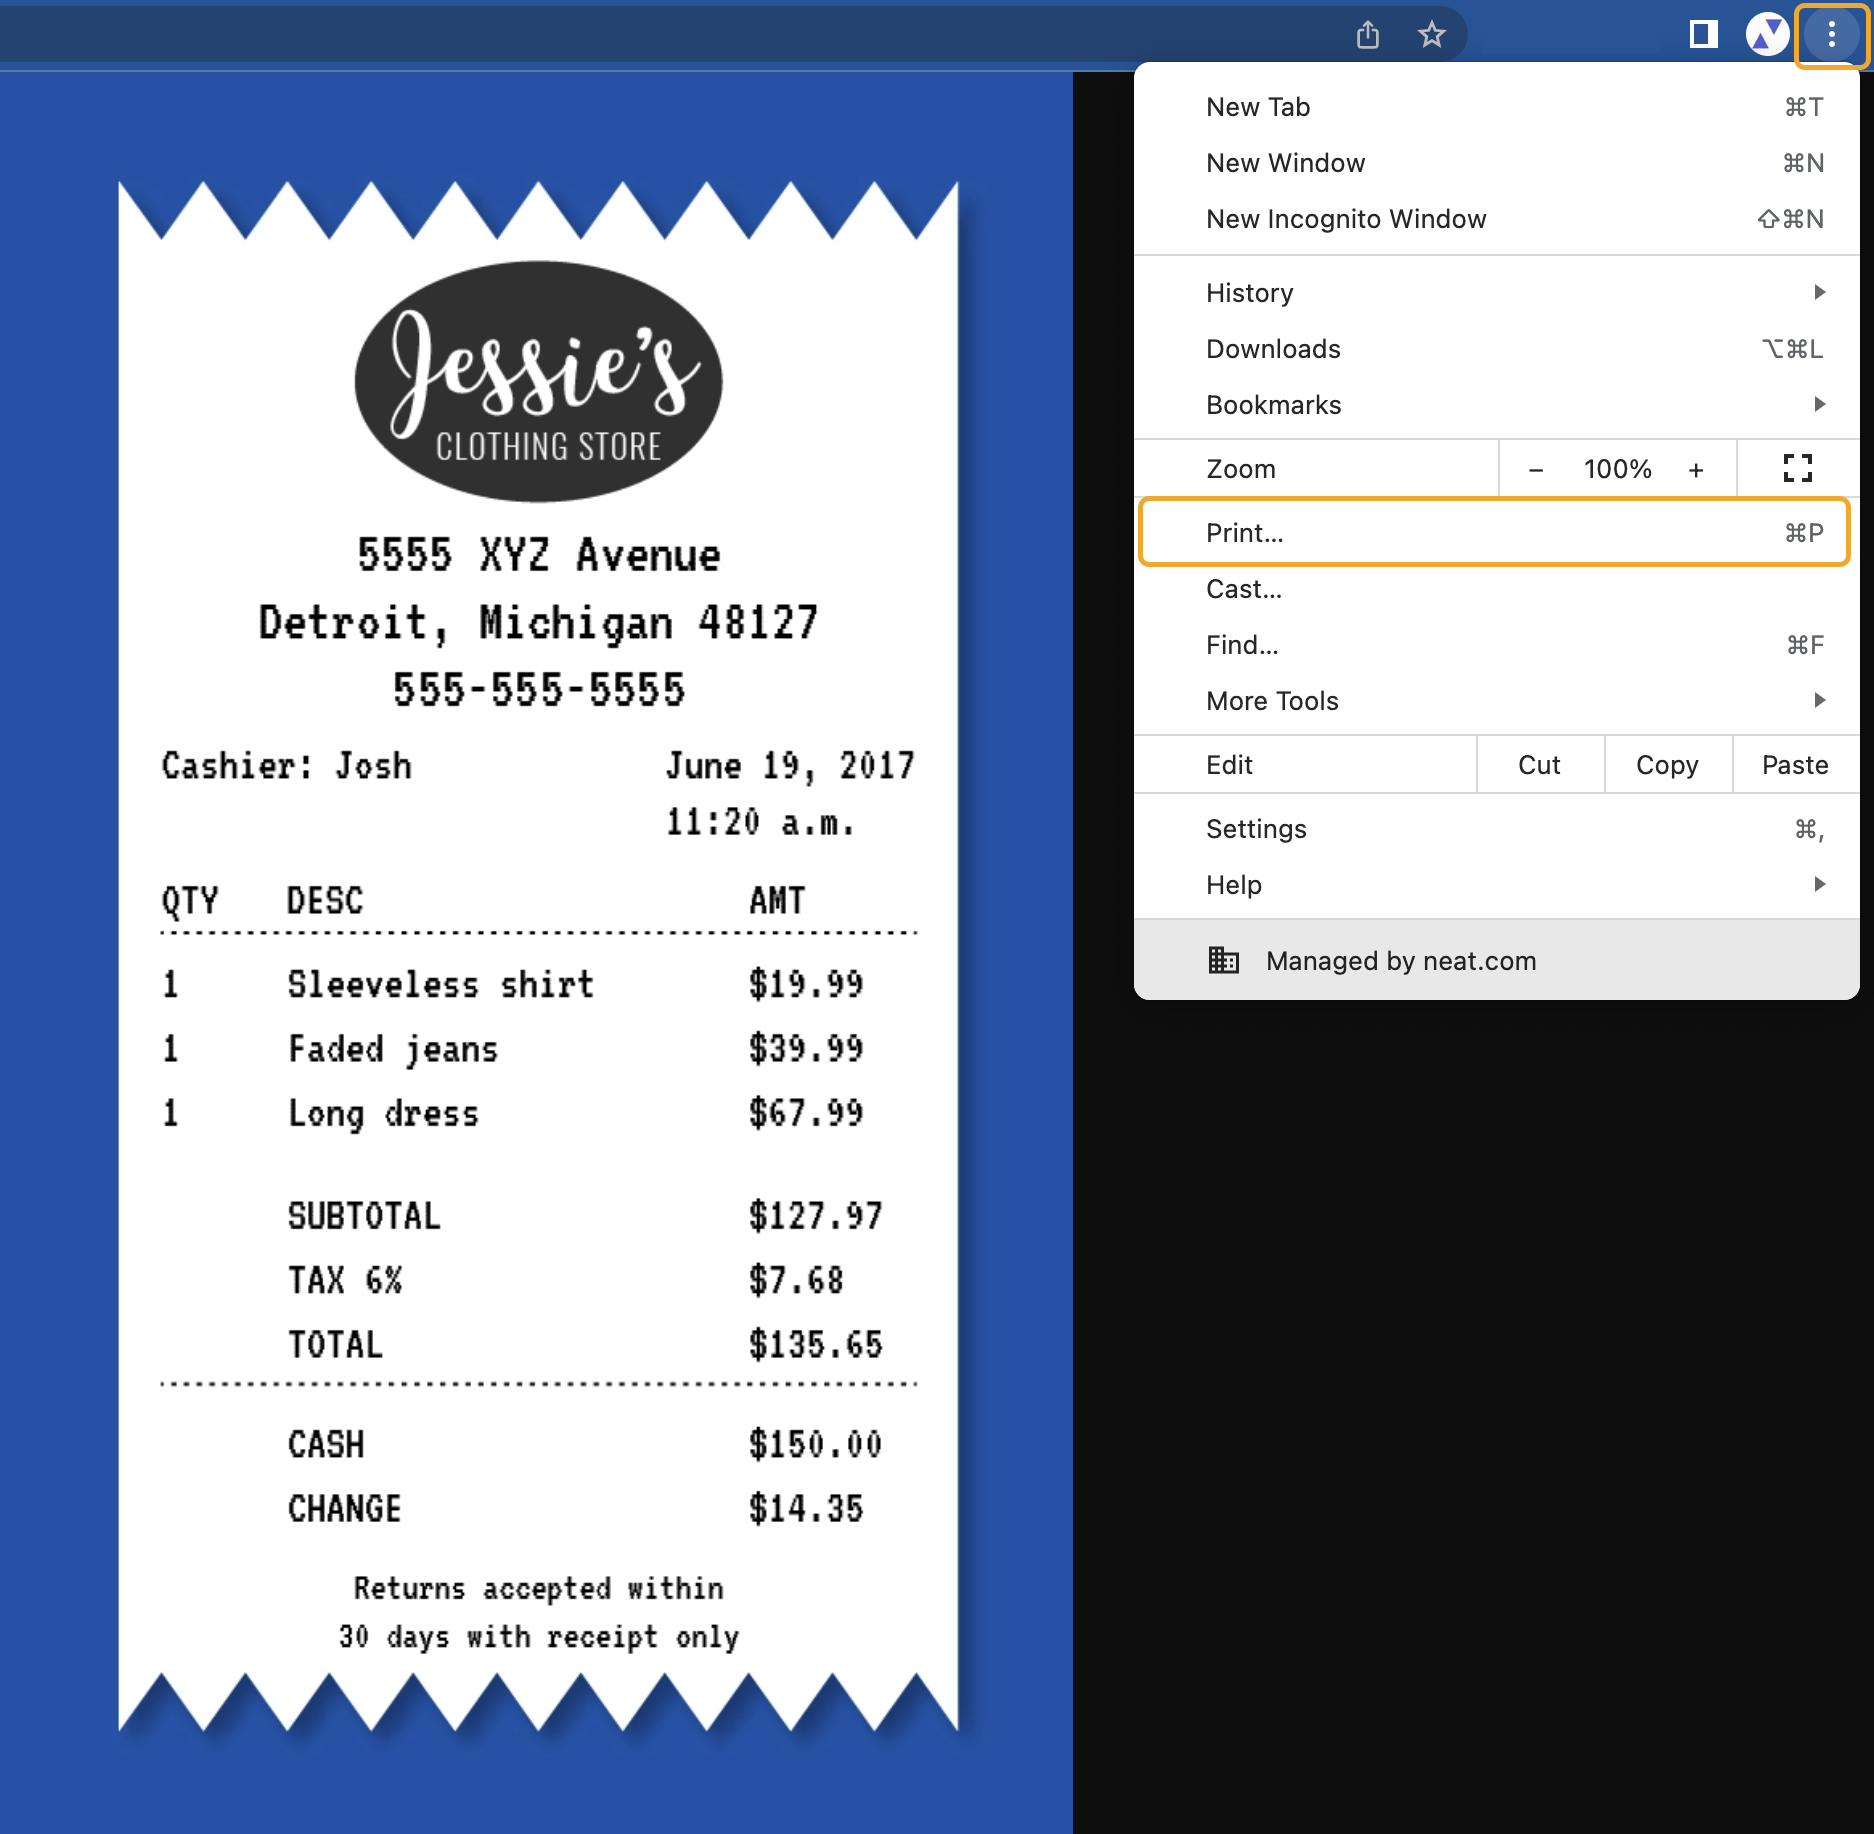
- When you have an item on your Mac that you want to save in your Neat account from a document, file, or your internet browser, right-click on the item or click the three dots at the top right of your web browser to open your action menu (OR click command+P).
- Click Print.
- In the print window, click on the Destination dropdown and select Save to PDF.
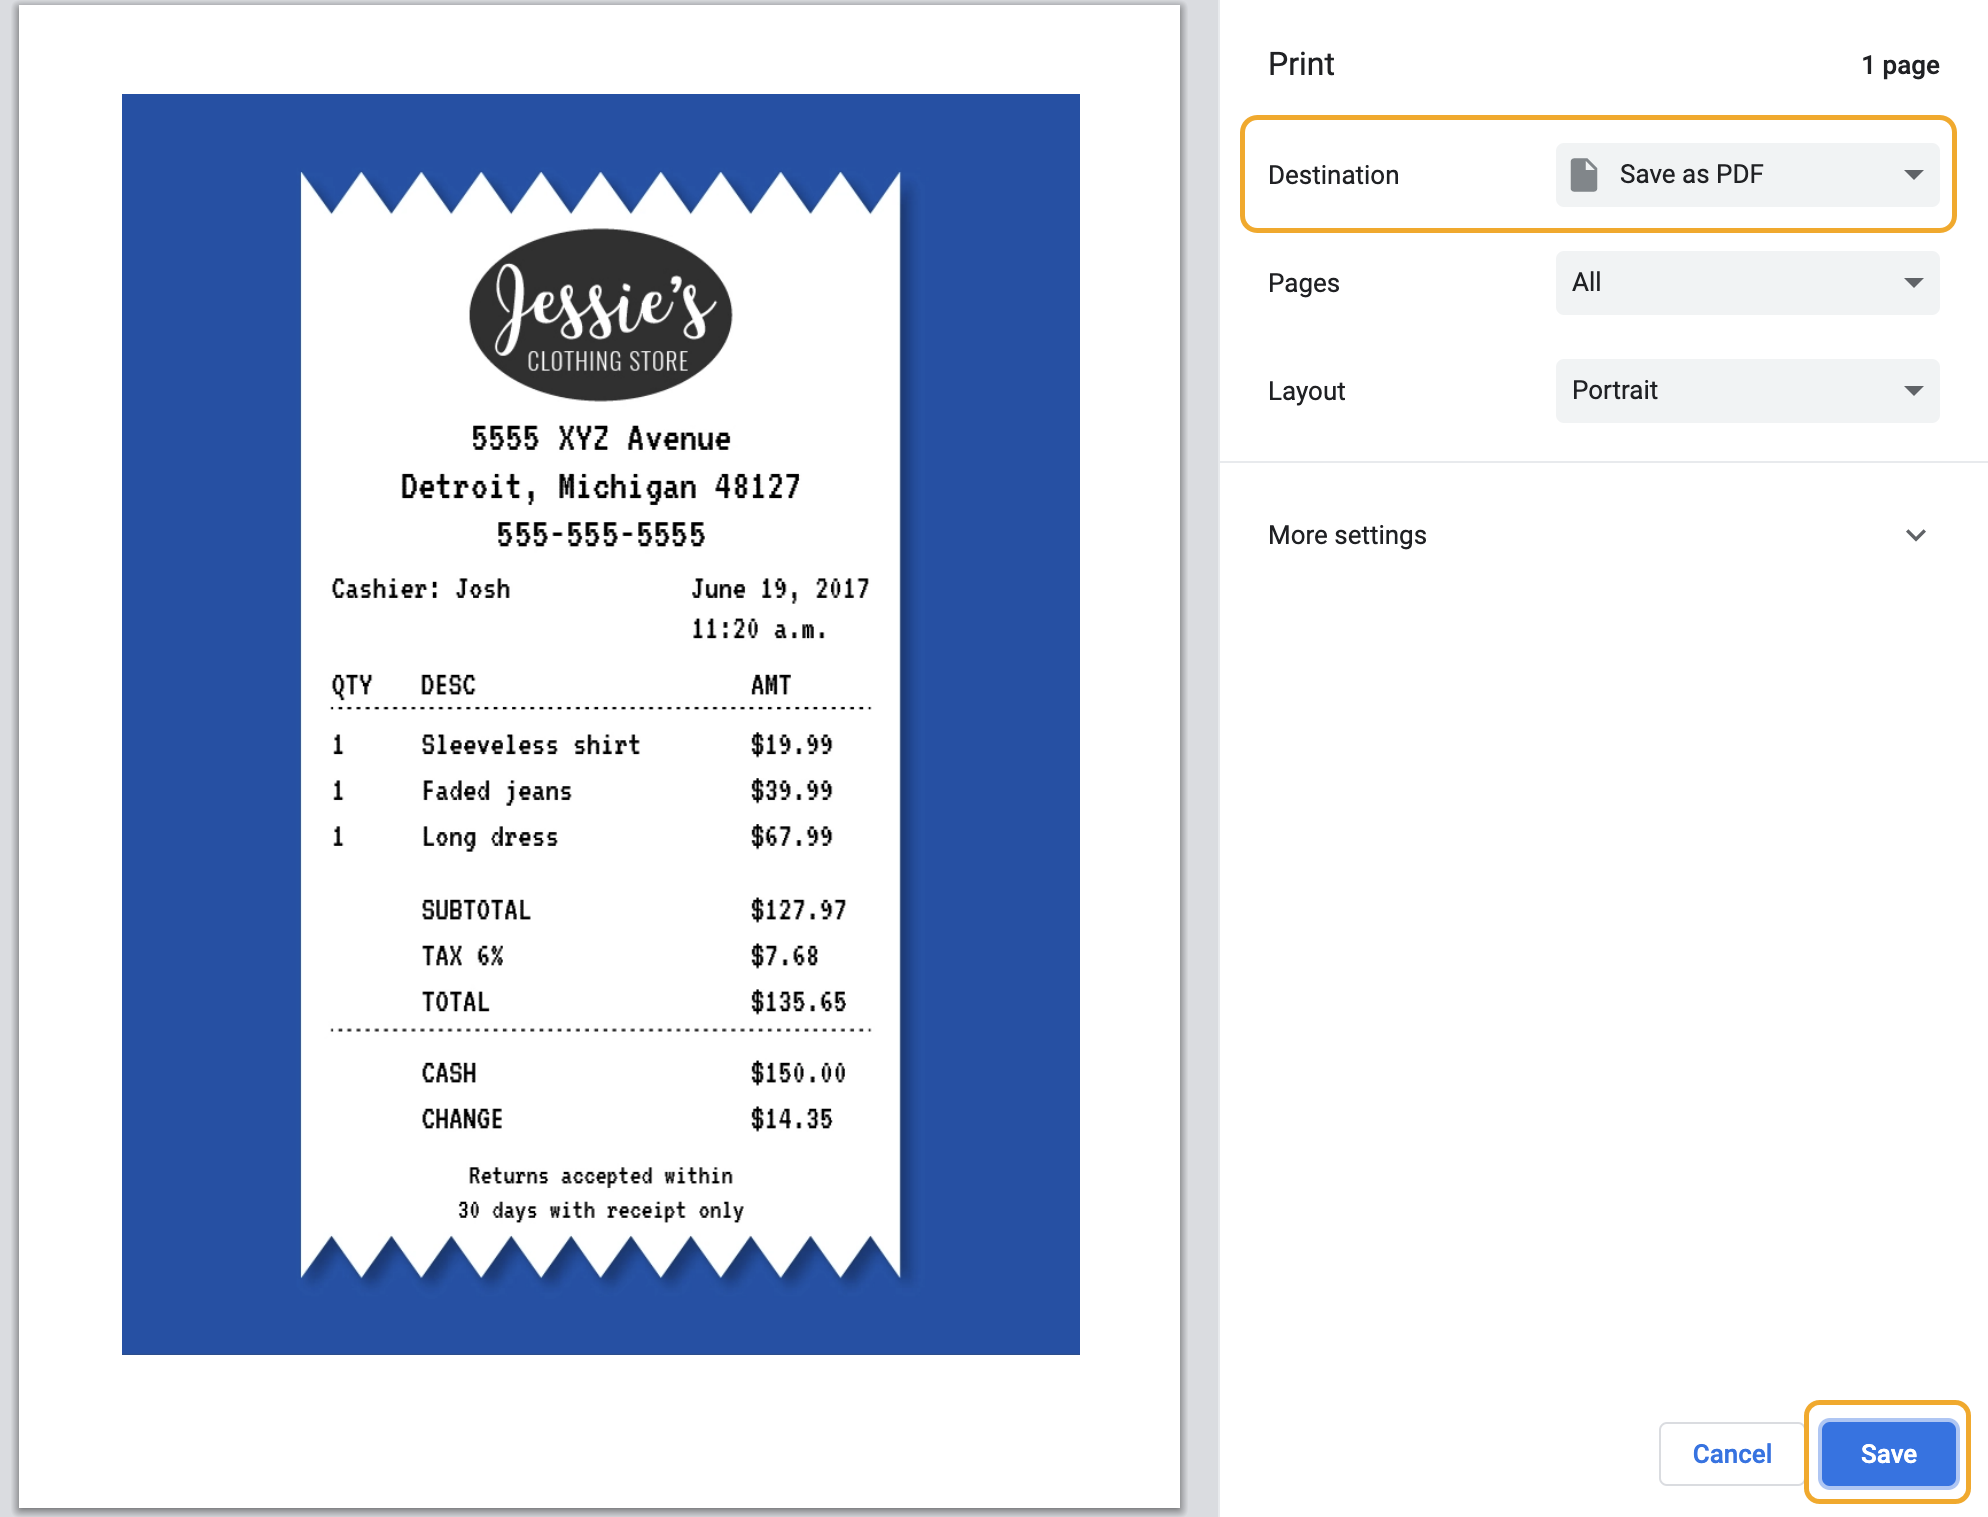
- Click Save. Then, name your item and choose where you would like to save the item.
- Once the item is saved to your computer, you can import the item directly to Neat. Login at app.neat.com
- Click Import. Import is located along the top right of Neat.

- In the Import Your Files box, click Choose Files, then browse to and select the file(s) you want to import OR drag and drop the files you want to import into the import window.
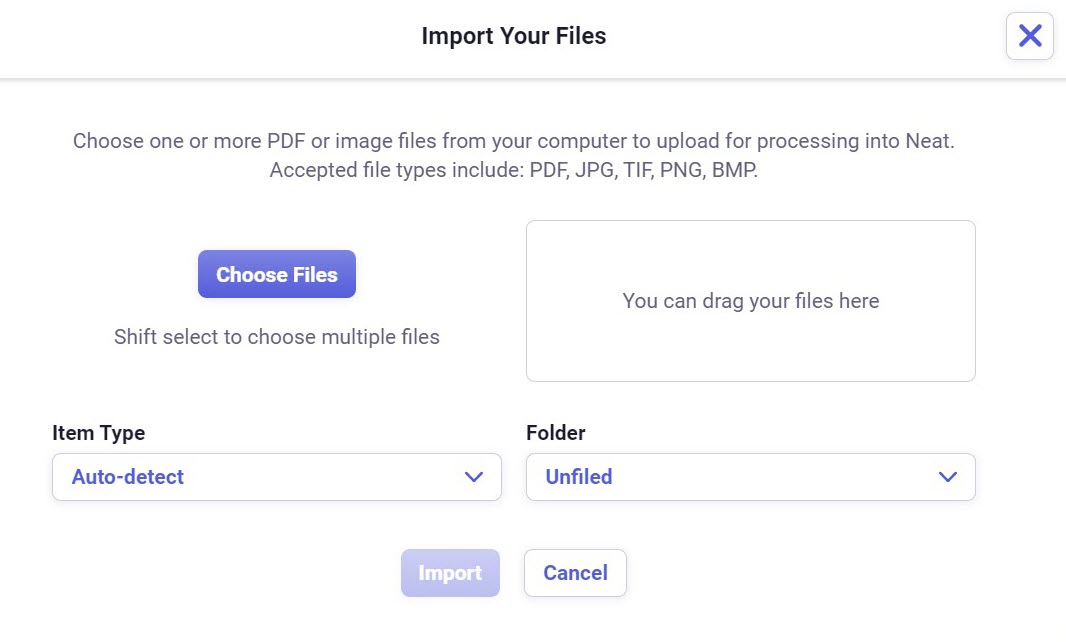
- Once you’ve selected your file(s), then select the Item Type you want your item(s) to be once they are imported.
Please Note: By default, the ‘item type’ is set to Auto-Detect. If you leave Auto-/Detect selected then the Neat Cloud will automatically classify the item type for you, based on the item type it thinks it is.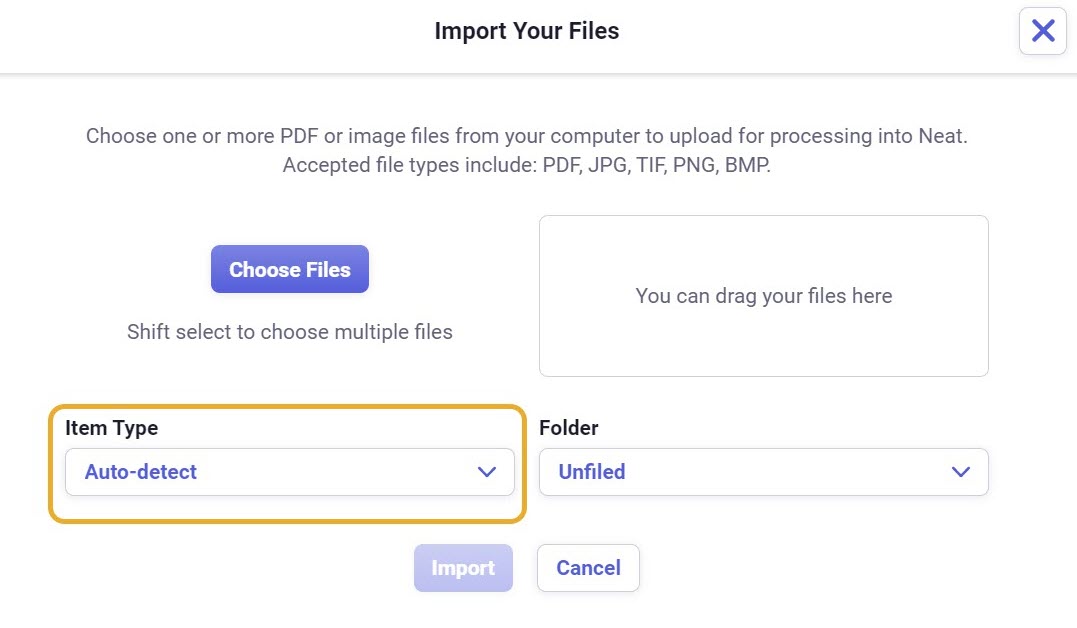
- Then select the folder where you want to save your item(s).
Please Note: By default, the item(s) will be saved under the Unfiled folder in your file cabinet, if you do not select a folder.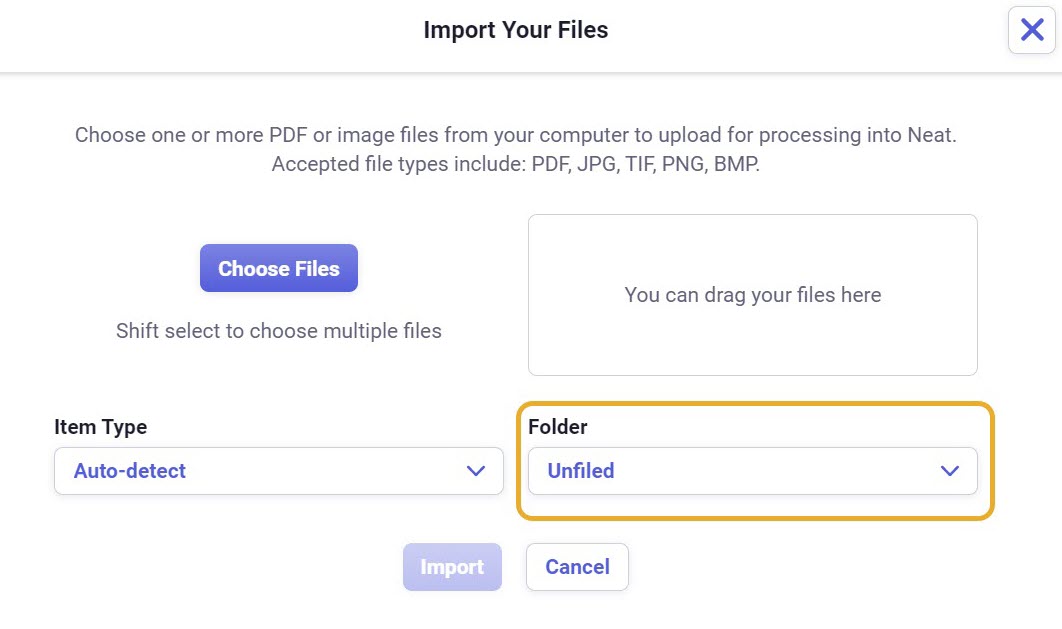
- Once your done making your final changes, click Import.
- Your items will be imported to Neat Cloud to the folder you selected in step 6. Click on the link Take me to the folder in the green import success window that pops up to be taken right to the item.
 Please Note: Your item will also appear in your Needs Review folder.