NeatVerify in Neat
NeatVerify is a human verification service that ensures 99+% parsing accuracy. NeatVerify securely sends your scans to a team of specialists at Neat. The verification process just takes a few minutes on average and once verified, your items will appear in your dashboard. You can apply NeatVerify credits to new scans or to items already in Neat. Each item verified uses one NeatVerify credit.NeatVerify is especially useful for faded receipts or handwritten totals such as a restaurant bill with an added tip. The process is safe and secure, and you’ll know your data is as accurate as possible.
FAQs
- How do I use NeatVerify for items that are already in Neat?
- How do I use NeatVerify when scanning an item?
- How do I use NeatVerify on imported items?
How do I use NeatVerify for items that are already in Neat?
Please Note: For the following you will need to be logged in to the Neat web app.
- Once logged into your Neat account, select the item that you would like to be reviewed for accuracy.
- Once the item is selected, there will be a Reprocess option at the bottom.

- Once reprocess is selected a pop up box will appear.
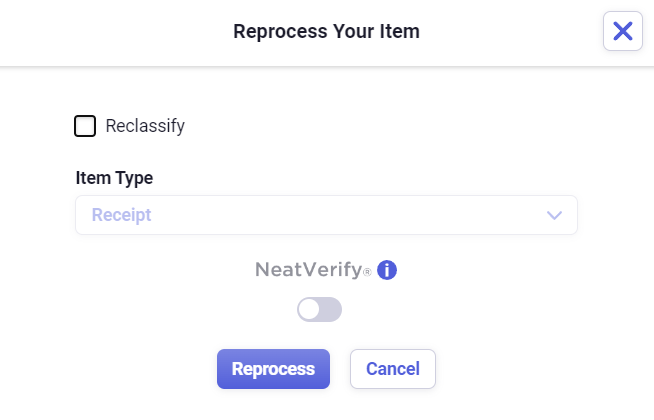
- Toggle NeatVerify on, by clicking the switch so that it is blue.
- Then click Reprocess.
Please Note: The verification process takes a few minutes on average. Once verified, you will be able to locate your item(s) for additional review within your Needs Review Filter
How do I use NeatVerify when scanning an item?
Please Note: These steps are for scanning with the Neat Scan Utility.
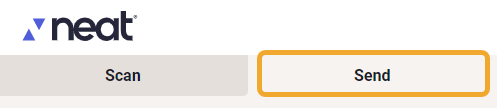
- Once your item is scanned into the Desktop Scan Utility, click Send at the top.
- Make sure the NeatVerify option is selected as On to have your item reviewed for accuracy.
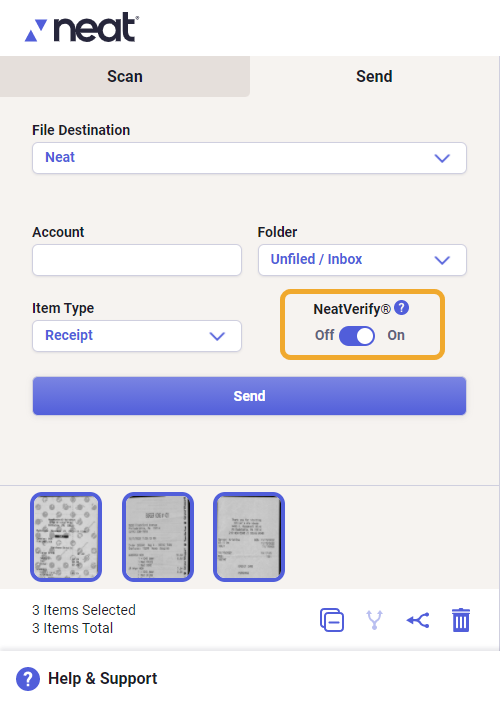
- Click Send at the bottom.
Your item will be sent to Neat and once verified will be available for review in your Needs Review Filter.
How do I use NeatVerify on imported items?
- Click Add Item from the top right hand corner of Neat and select Import.

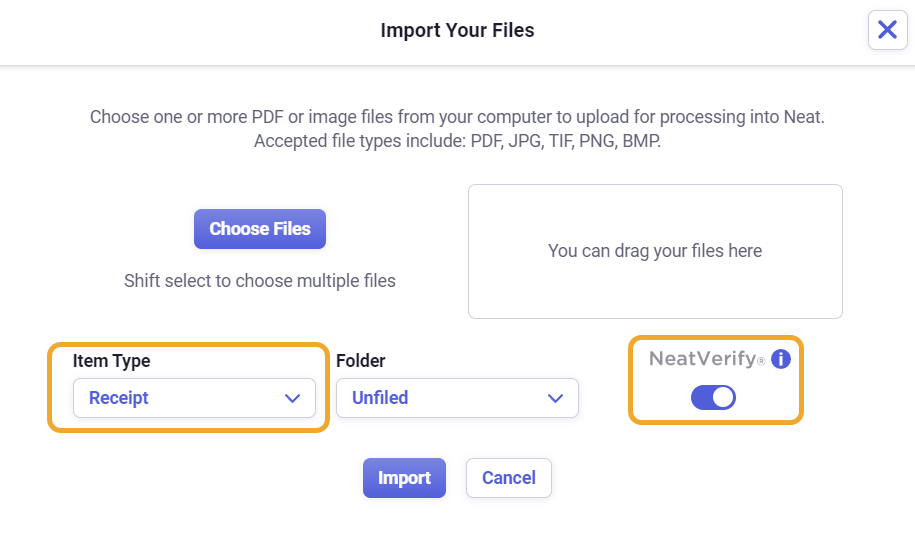
- Set your Item Type to receipt or invoice and then toggle NeatVerify On.
Please Note: NeatVerify can only be used on the following item types:For detailed steps on importing items into Neat, please review this article.- Receipts
- Invoices